Tags
I’ve always wanted to try basket making. Update: 8/29/18 I have tried basket weaving and now I have, oh my, it is a wonderful as I had imagined. They are beautiful and useful- the same as inkle bands. So, I got this crazy idea; why not weave a basket with inkle bands?! 
My inkle basket is created by cutting two inkle bands into strips and weaving them together in a simple over under pattern. For a little contrast, I used two different bands to make the basket , but it would look really nice made out of one pattern too. My band was 1 1/2″ wide and the final basket is 4 1/2″ L x 4 1/2″ W x 4 1/2″ H.
Supplies needed:

1. Inkle band(s) 2. masking tape 3. extra yarn and thread 4. all purpose glue 5. knitting needle (optional) 6. scissors 7. straight pins and embroidery needle 8. something to measure with 9. clothes pins (*not pictured: 1/8″ (3mm) wide coordinating satin ribbon and sewing thread)
Update: 8/29/18 Thanks to a fellow Inkle Weaver in the Inkle facebook group an error was found in my calculations below. I am ever grateful for the discovery! The update is in italics below.
We have to do a bit of math to determine the length of inkle band you will need.
Multiply width of inkle band by 3 = width of basket base
Multiply width of basket base by 3 = length of one *vertical inkle strip
Multiply length of one *vertical inkle strip by 6 = total length of band needed for *vertical strips of the basket
Then:
Multiply width of basket base by 4 = length of one *horizontal inkle strip
Multiply the width of the band by 2. Add to length of one horizontal inkle strip – this will allow for overlap of the woven strips)
Multiply length of one *horizontal inkle strip by 3= total length of band needed for *horizontal strips of the basket
*vertical and horizontal refer to the direction of the strips as they are woven to make the sides of the basket.
example: (for easy math imagine your band is 1 inch wide)
1″ x 3 = 3″ (Width of basket base)
3″ x 3 = 9″ (Length of one vertical strip)
9″ x 6 = 54″ (Total length of band needed for Vertical Strips: excluding fringe)
3″ x 4 = 12″ (Length of one horizontal strip)
2 x 1″ = 2″ (width of inkle band multiplied by 2)
12″ + 2″ = 14″ (Length of one horizontal strip plus width of band x2)
14″ x 3 = 42″ (Total length of band needed for Horizontal Strips of the basket
The example basket would measure 3″L x 3″W x 3″H.
Following the example above, with two bands, as I did, you would need one band at least 54″ for the vertical strips and one at least 42″ for the horizontal strips. If using only one band the two totals need to be added together. Your band would need to be at least 96″. These totals are excluding fringe. The width of the bands will determine the final dimensions of your basket.
So let’s get started!
You will need 6 vertical strips and 3 horizontal strips each cut to the lengths you calculated.
To prevent the ends from raveling, seal the ends. Thread a needle with sewing thread. Put a bit of glue on the end of the thread as wide as the band. I call this glue thread. Yes, I thought long and hard on that name.
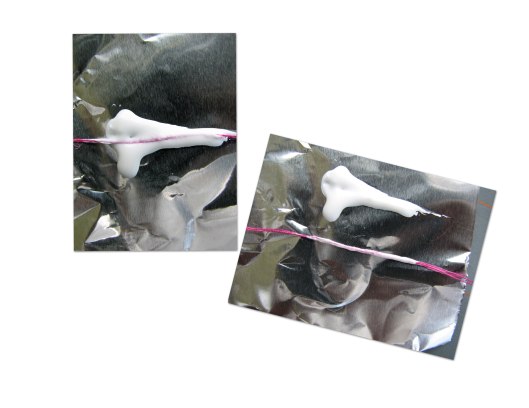
Insert the needle into the “tunnel” between the warp layers, one or two rows from the top edge. Pull the needle and thread all the way through until the glue thread is sandwiched in the band. Press firmly with your fingers to seal.

Trim the strip above the glue thread row. Apply glue along the top of the cut edge. Let the glue dry for at least 15 minutes. Your strips should be good and sealed now.
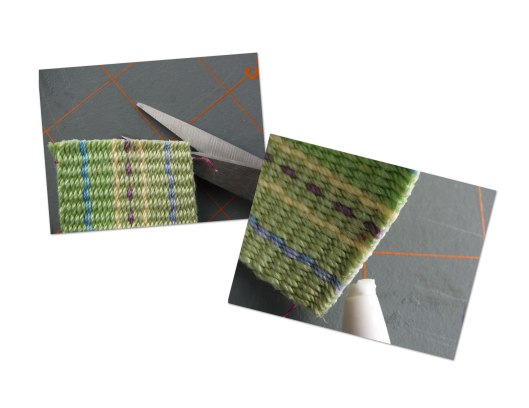
Now we are ready to make a basket!
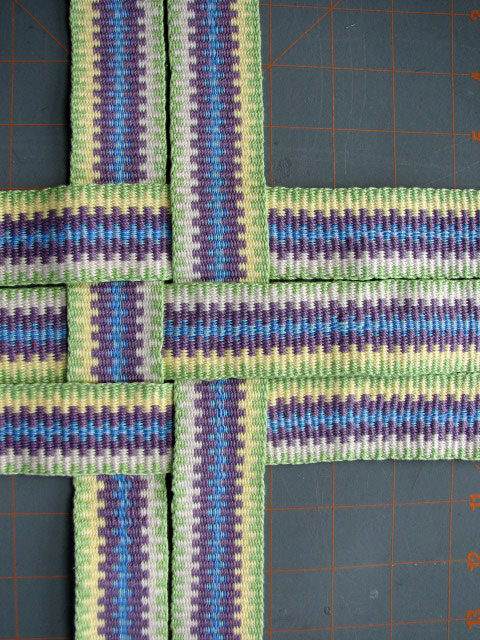
Begin with 4 vertical strips placed like this. 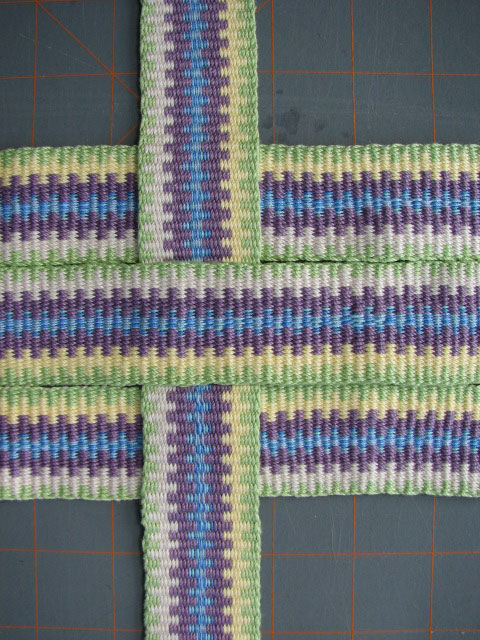
And last strip placed; your base is built. The base square should be centered with the strips edges being evenly lined up on all four sides. Tip: Use a knitting needle to help nudge the strips into place.
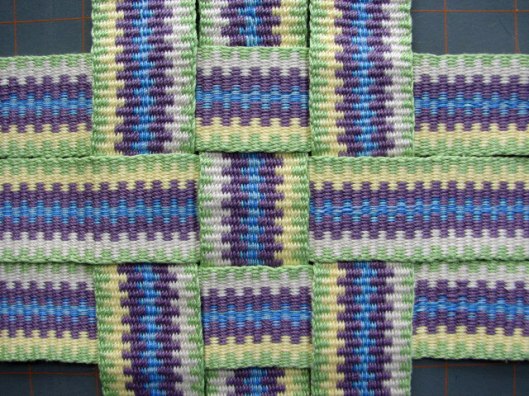
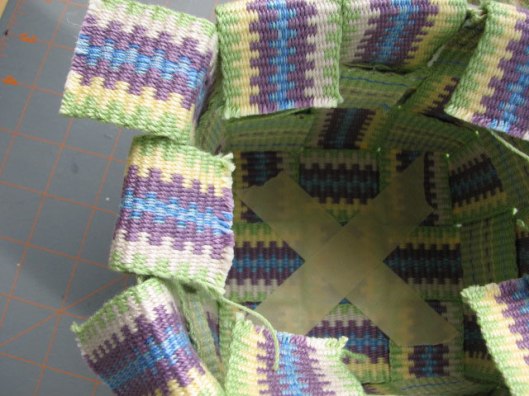
Use the masking tape or straight pins to secure the base so it doesn’t shift while you weave the walls.
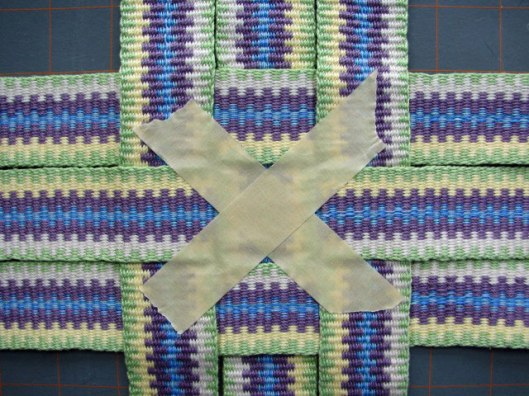
Begin building the walls by weaving a horizontal strip around the base strips.
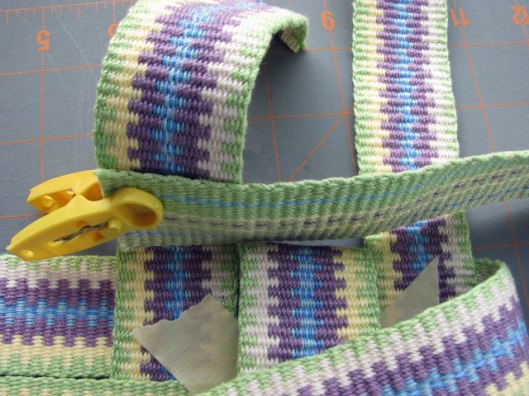
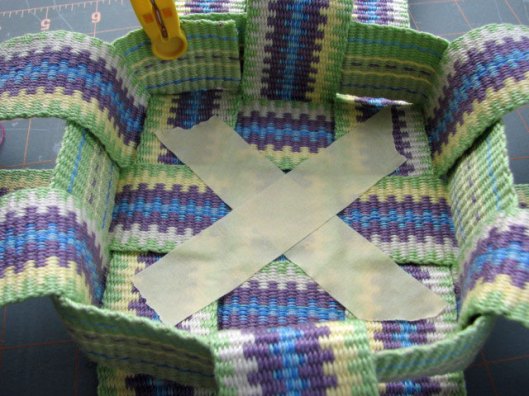
Add glue to the overlap of the horizontal strip inside the basket and weave the overlap behind the next vertical strip to hide it.
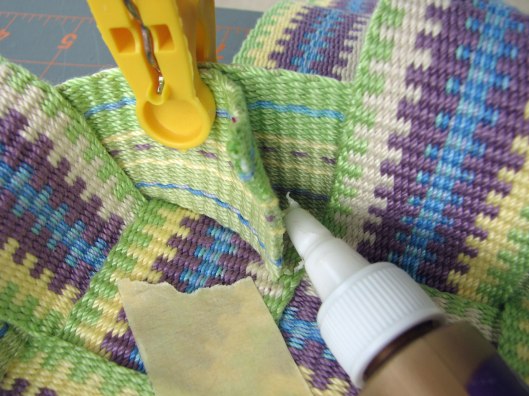
As you continue building the walls of the basket it might be helpful to fold the vertical strips over the horizontal strips to aid in keeping everything in place.
This is what it will look like when all of the sides are built.
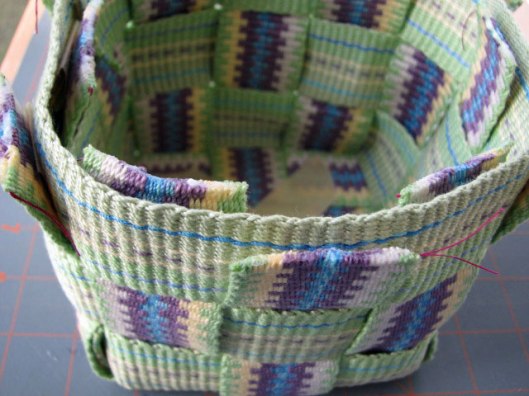
Whipstitch around the top edge with the embroidery needle and ribbon, securing the vertical strips to the horizontal strip. Be sure to insert the needle below the glue thread row.
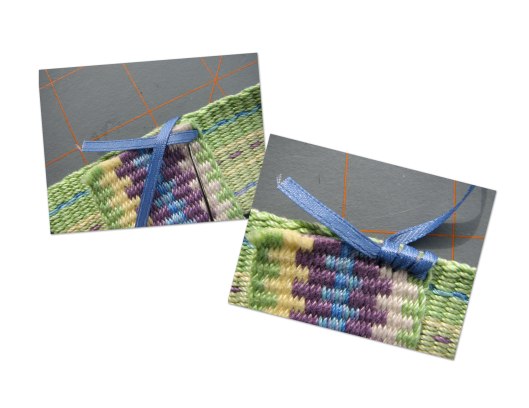
Braid handles out of the fringe you cut off or lengths of yarn. Wrap the ends with yarn and sew to the basket.
And ta-da, you have a woven inkle basket!

My basket is filled with some fibery goodness that just arrived in the mail. Can’t wait to empty it and fill it again. What will you fill your basket with?
warp, weave, be happy! ~ Jennifer

Jennifer, you are amazing. It is a delight to see what you create and appreciate your designs.
Thank you, Lynda. Inkle weaving speaks to me. It’s great to hear from you! Hope all is well in your neck of the woods.
This is so cute!
Glad you like it Andrea. I hope you are inspired to make one. If you do, be sure to share!
Love!
Hi Ms. Dixie! I must say, me too! 🙂
Beautiful!
Thank you Laurie!
That is so cute. You are way more creative than I am.
Thank you, but I must say oh, contraire mon frere! Shall I say, “Theo Moorman dress”.
It’s gorgeous and useful! Nice tutorial.
So glad you like it Veronica. Don’t you just love when things that look nice are functional too.
I love it. Thanks for sharing – this is on my must make list!
Be sure to share what you make, Kara. I’d love to see it!
Absolutely inspiring! I’m so excited I am having to force myself to finish up what I am currently working on before I dig out my inkle loom again to make some coordinating bands.
I am super stoked to be visiting your blog, because I have been having trouble getting in to the site. Thankfully my hubby is a computer tech, and fixed it this morning by changing the dns server that we are using. WIN.
Happy weaving!
🙂 I am super stoked to have your reading my blog! Thank your husband for fixing the problem and thank you for the heads up!
I saw your basket on Laverne Waddington’s website!!! You’re famous now!
I was so honored when Laverne asked to show my basket on her blog Backstrap Weaving. She is uber talented and full of knowledge.
It’s a beautiful basket, and I am going to show it to one of my friends who will be coming over to try weaving. But even more than that, I love your tutorial – it is so clear and all the steps are illustrated so well! Thank you for taking so much care to produce a great teaching tool!
Your kind words mean a lot, thank you. I wish your friend endless hours of enjoyment weaving. Once she trys it we both know she will be hooked!
I LOVE this!!!
Thank you! It was a fun project.
This is such a great idea! I have a book on basket weaving, now I want to give it a try with some inkle bands!
If you do, be sure to share pictures! I’ve always wanted to give basket weaving a try. This is as close as I’ve come so far, though.
Wow – super professional and so beautiful!!
Thank you for the kind words, Mariannedecher. They are very encouraging.
I’m more than happy to uncover this site. I wanted to thank
you for ones time for this particularly wonderful read!!
I definitely liked every bit of it and i also have you bookmarked to check out new
stuff on your blog.
Pingback: Inkle Band Ornaments | inkled pink
That is wonderful ! Thank you !
I love your idea and your inkles look great.
I am new to inkle weaving, but find it quite addictive :). Just a thought re cutting the inkle. I treat it like a steek in knitting (more or less). I machine stitch two or three rows on either side of where I want to cut. I think it is good not too be too neat in the stitching, as you catch more threads in the band and it is less likely to fray. I think the same thing could be done with hand stitching. Having a quarter inch on either side of the cut is likely enough.
Thanks for sharing!
Thank you for your compliment. This is a good tip. In the end the neatness if the raw edges is dependent on the finished product. If the edges won’t be seen this is a great way to go! Thank you for sharing!
Love this, can’t wait to make one , only been weaving plain bands 2″ wide is that too wide ?. Lovely gift 🎁.
Hi Patricia. No, 2″ isn’t too wide. Any band width will work. The wider the band the bigger the basket or the narrower the band the smaller the basket, if you use the same number I did. I’d love to see your finished basket!
Loving this tutorial, but finding it hard to get the measurements of the strips right, my bands are 1 1/2″ wide, can you help .
Thanks for the great idea!
I’m so glad you think so! Be sure to share if you make one.
I would like to try this basket. Could you please advise as to what type and size of yarn to use?
Teri
Hi, Teri. I typically weave with 10/2 or 5/2 perle cotton or crochet cotton, but the material is not too important for this project. Any band you weav should work just fine. Happy inkling!