• About Inkle
  • About Me
  • Contact
  • Daily Band Practice: The Gallery
  • Project Tutorials
  • Teaching
  • Translate inkled pink

inkled pink

~ warp, weave, be happy!

inkled pink

Tag Archives: inkle band

The “Braided” Selvedge

09 Tuesday Aug 2016

Posted by Jennifer Williams a.k.a. inkledpink in Uncategorized

≈ 5 Comments

Tags

braid, inkle band, selvdge


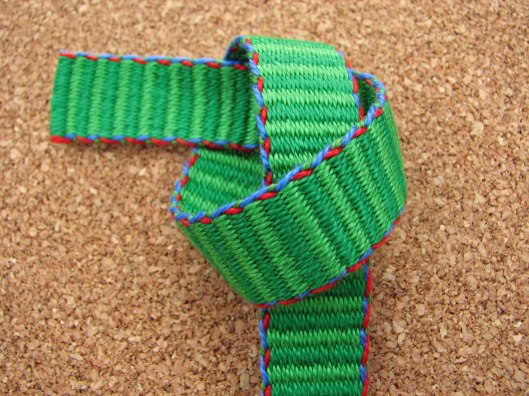
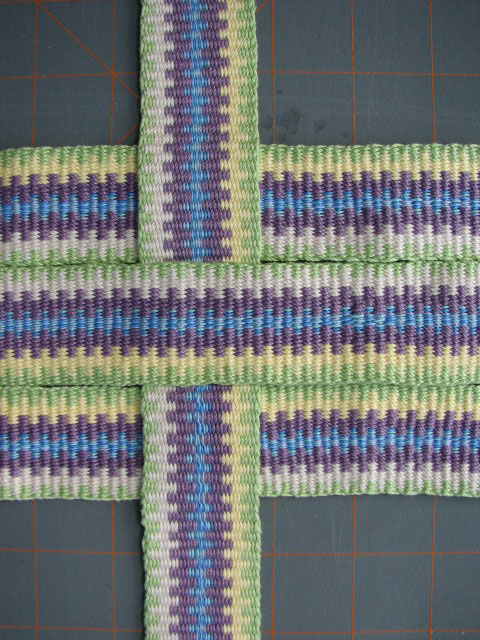
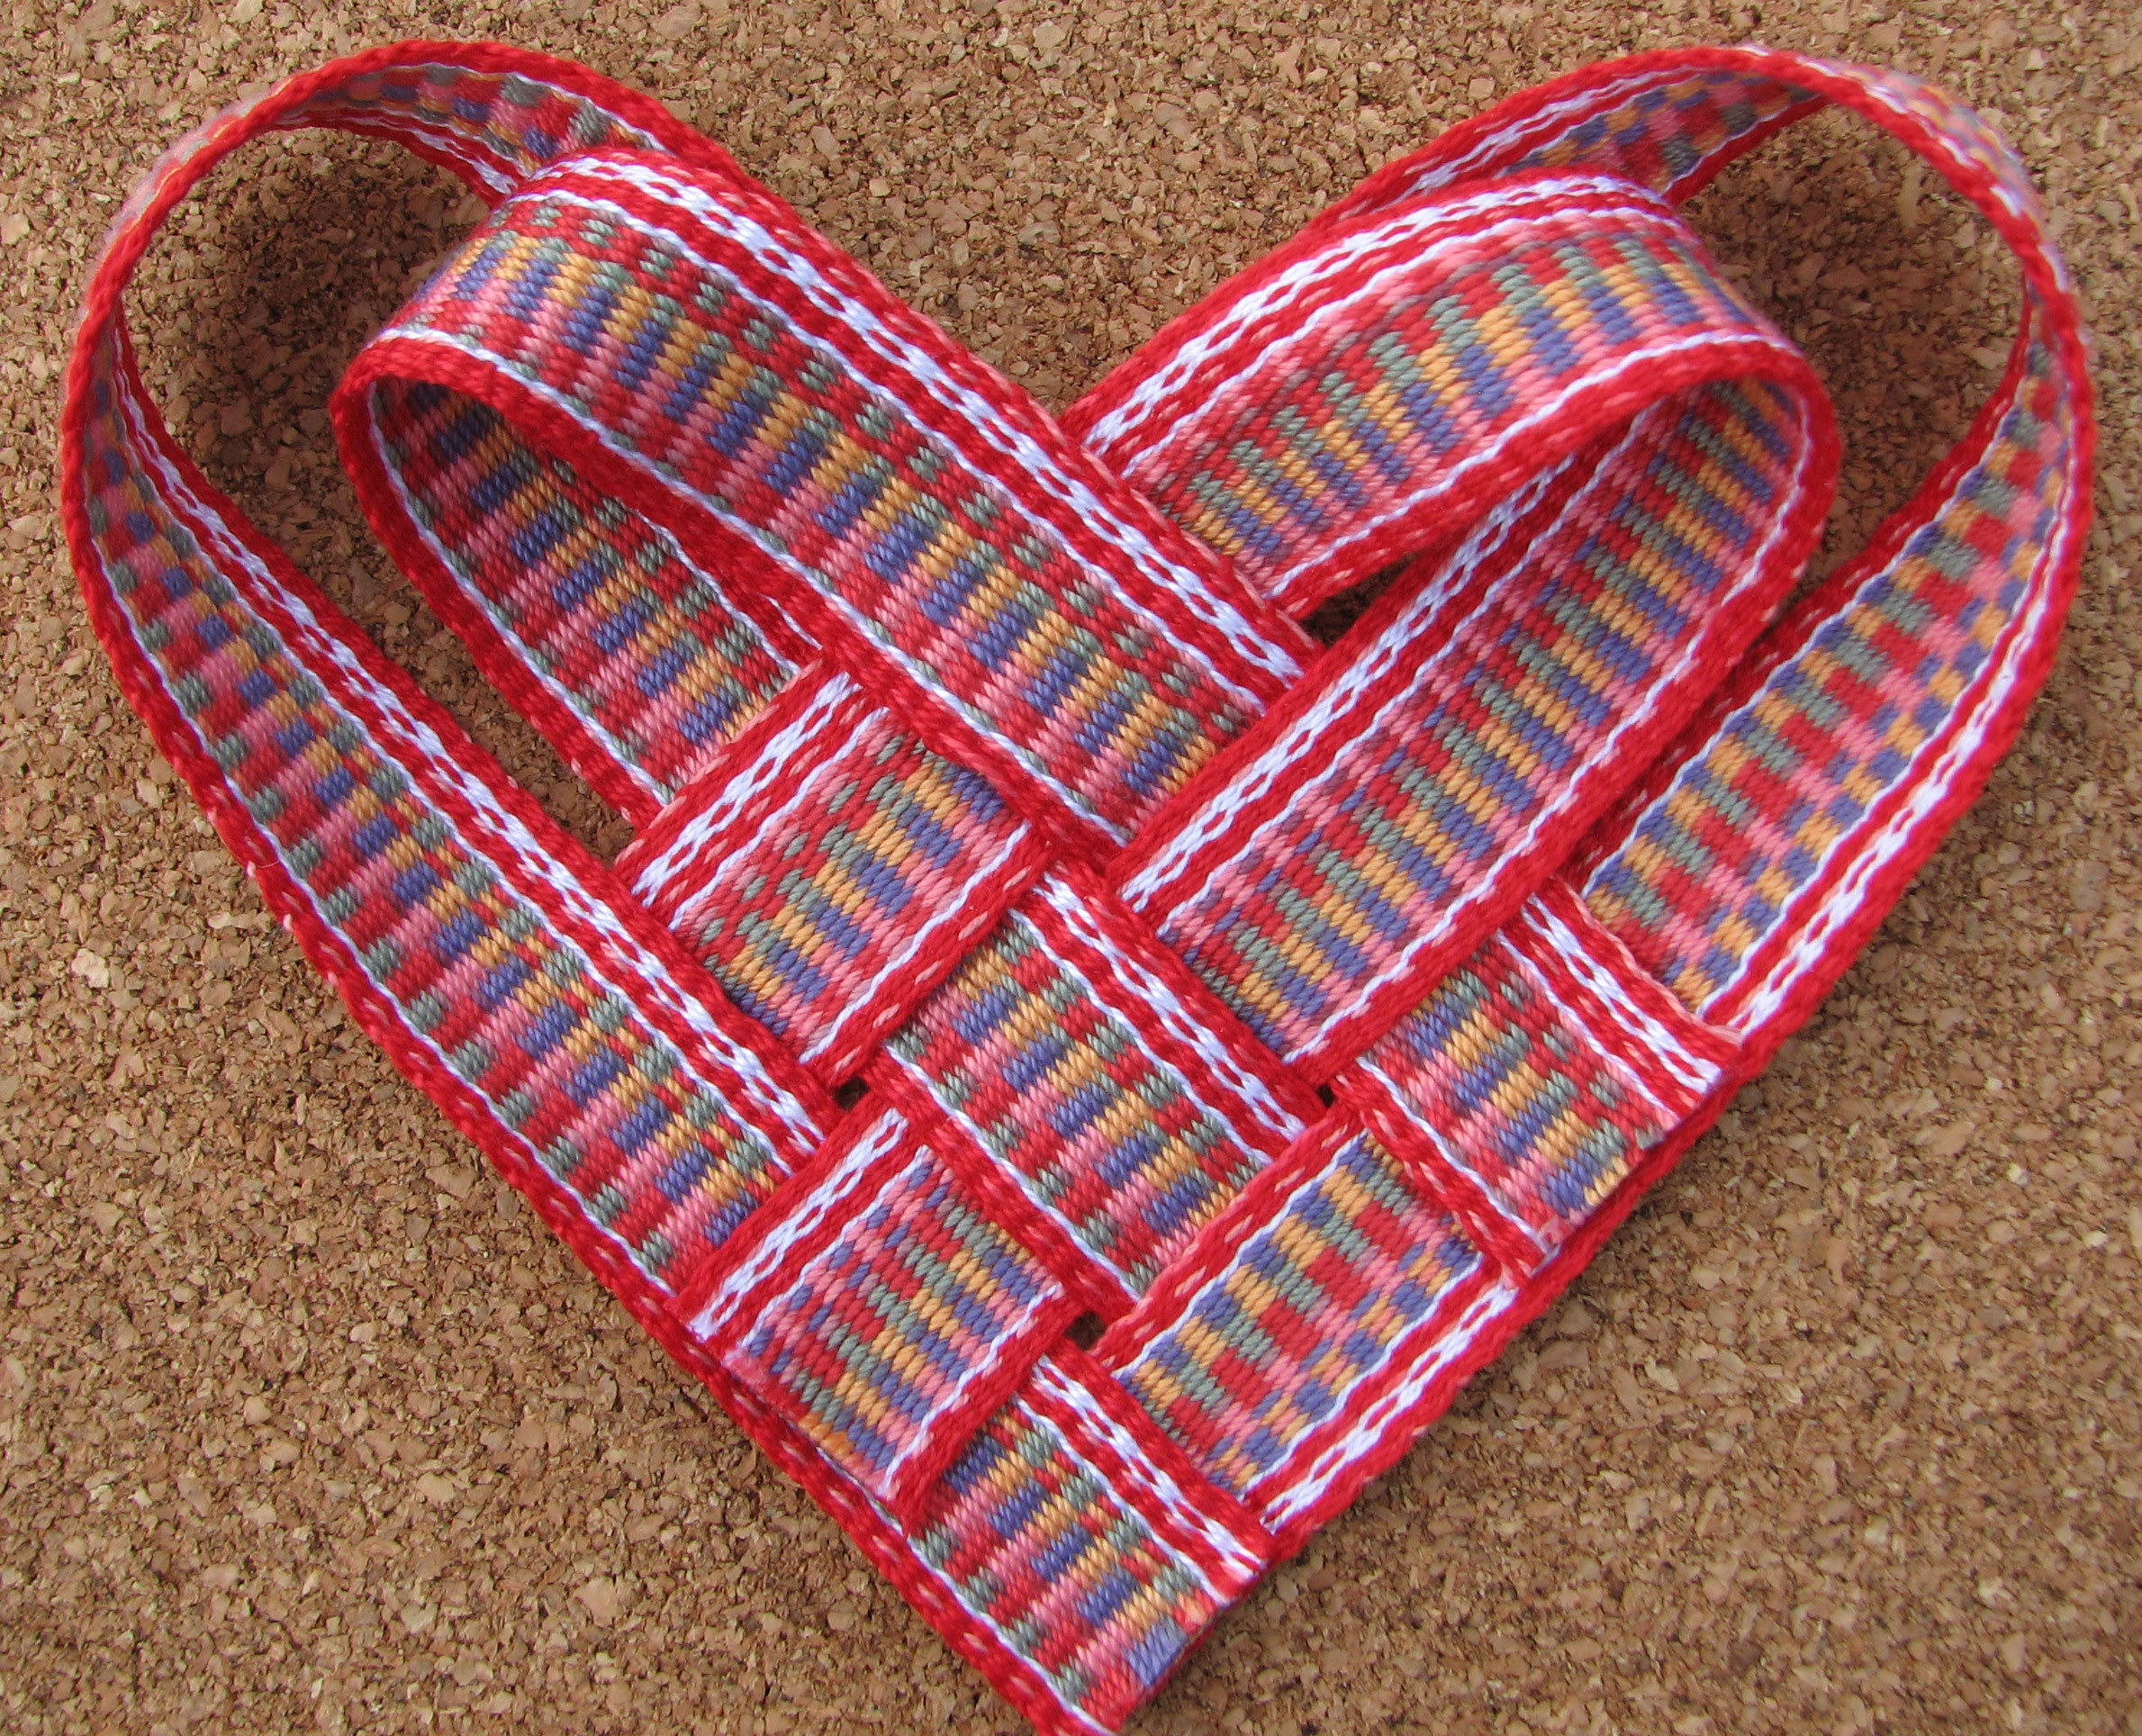
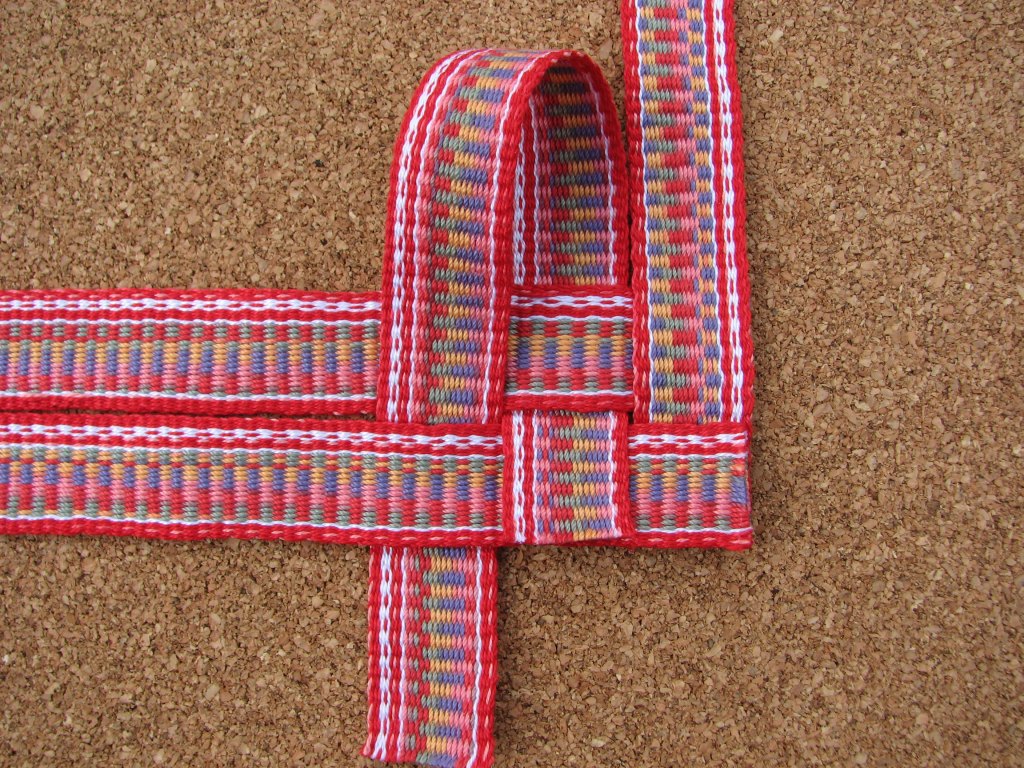
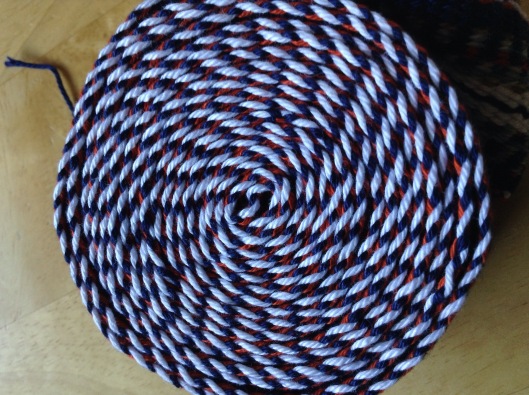
It must match! That is usually my philosophy when it comes to my selvedges and my choice for weft yarn. The little peek-a-boo of color that dots the sides when the weft color does not match the warp color disturbs my sensibilities. But then, one day while looking at all the eye candy on the inkle Facebook page I saw a post by the uber talented inkle weaver Annie MacHale, about a “braided” inkle band edge. Annie has such a wonderful eye for color, it is not a surprise she designed this ingeniously lovely edge. My philosophy quickly became a distant memory. I had to give it a try. The result is now one of my favorite bands! And with Annie’s okay, I share “how to” with you.Inkled Pink Braided edge

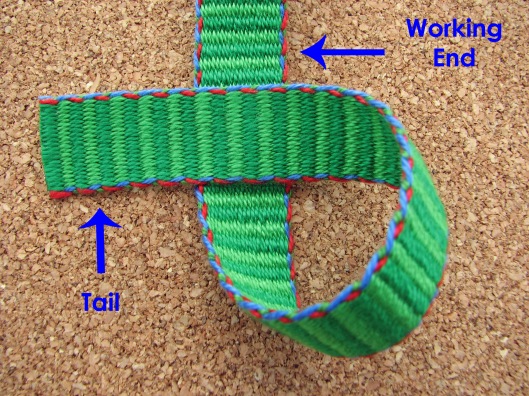
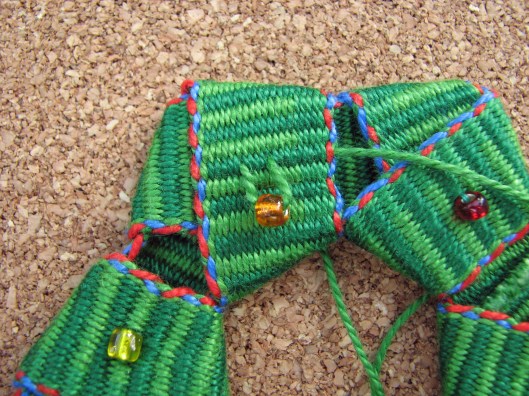
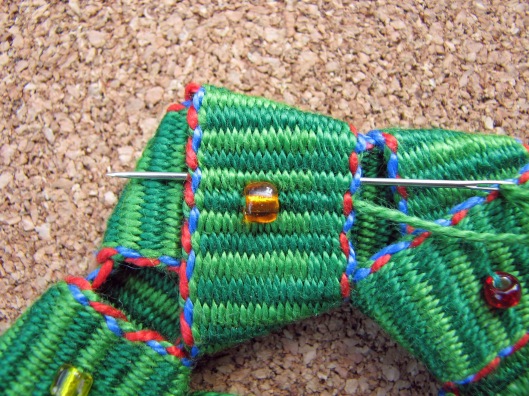
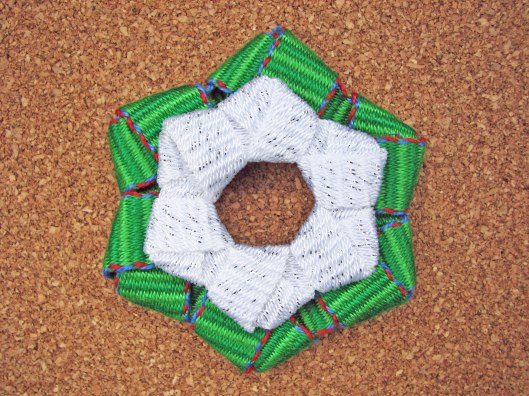
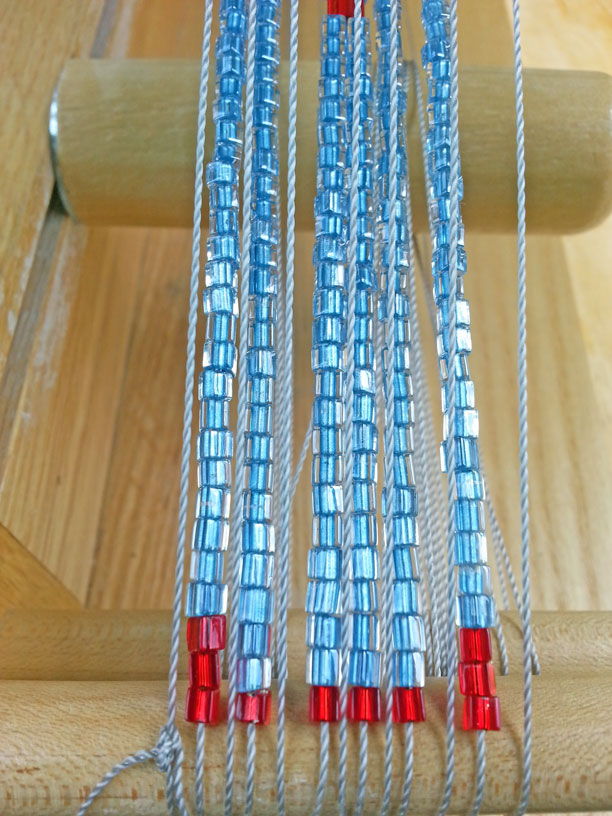
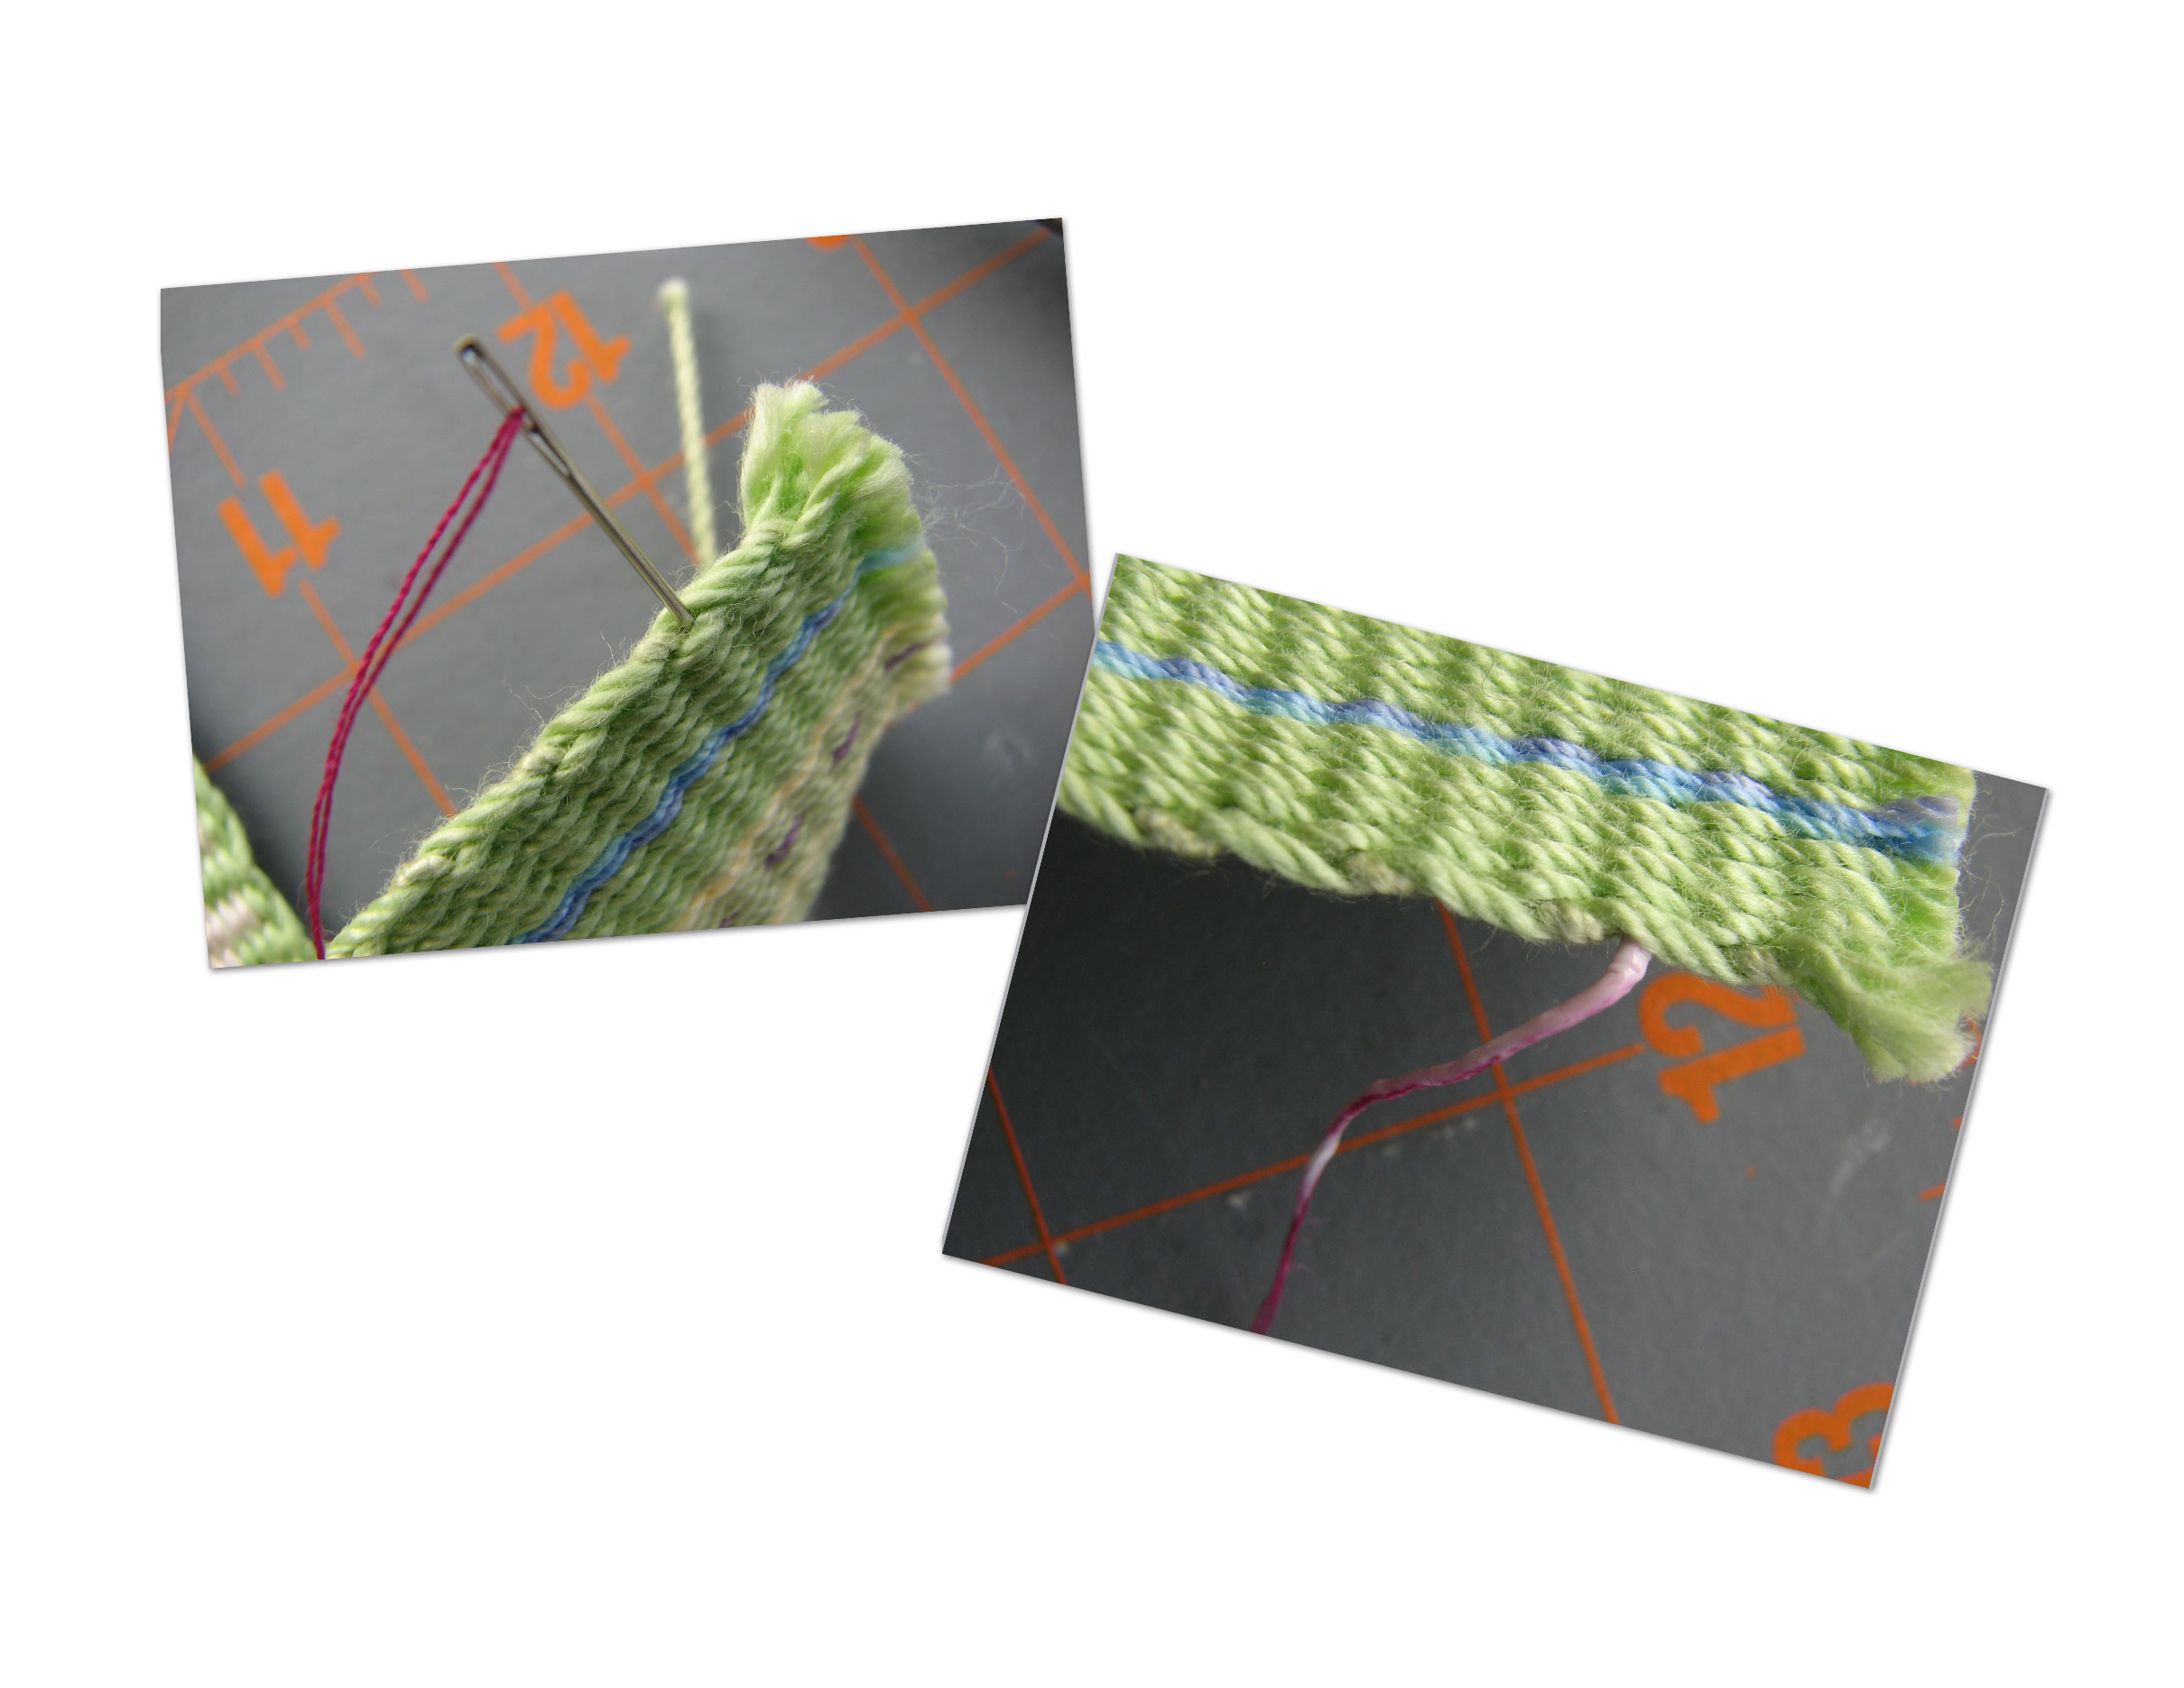
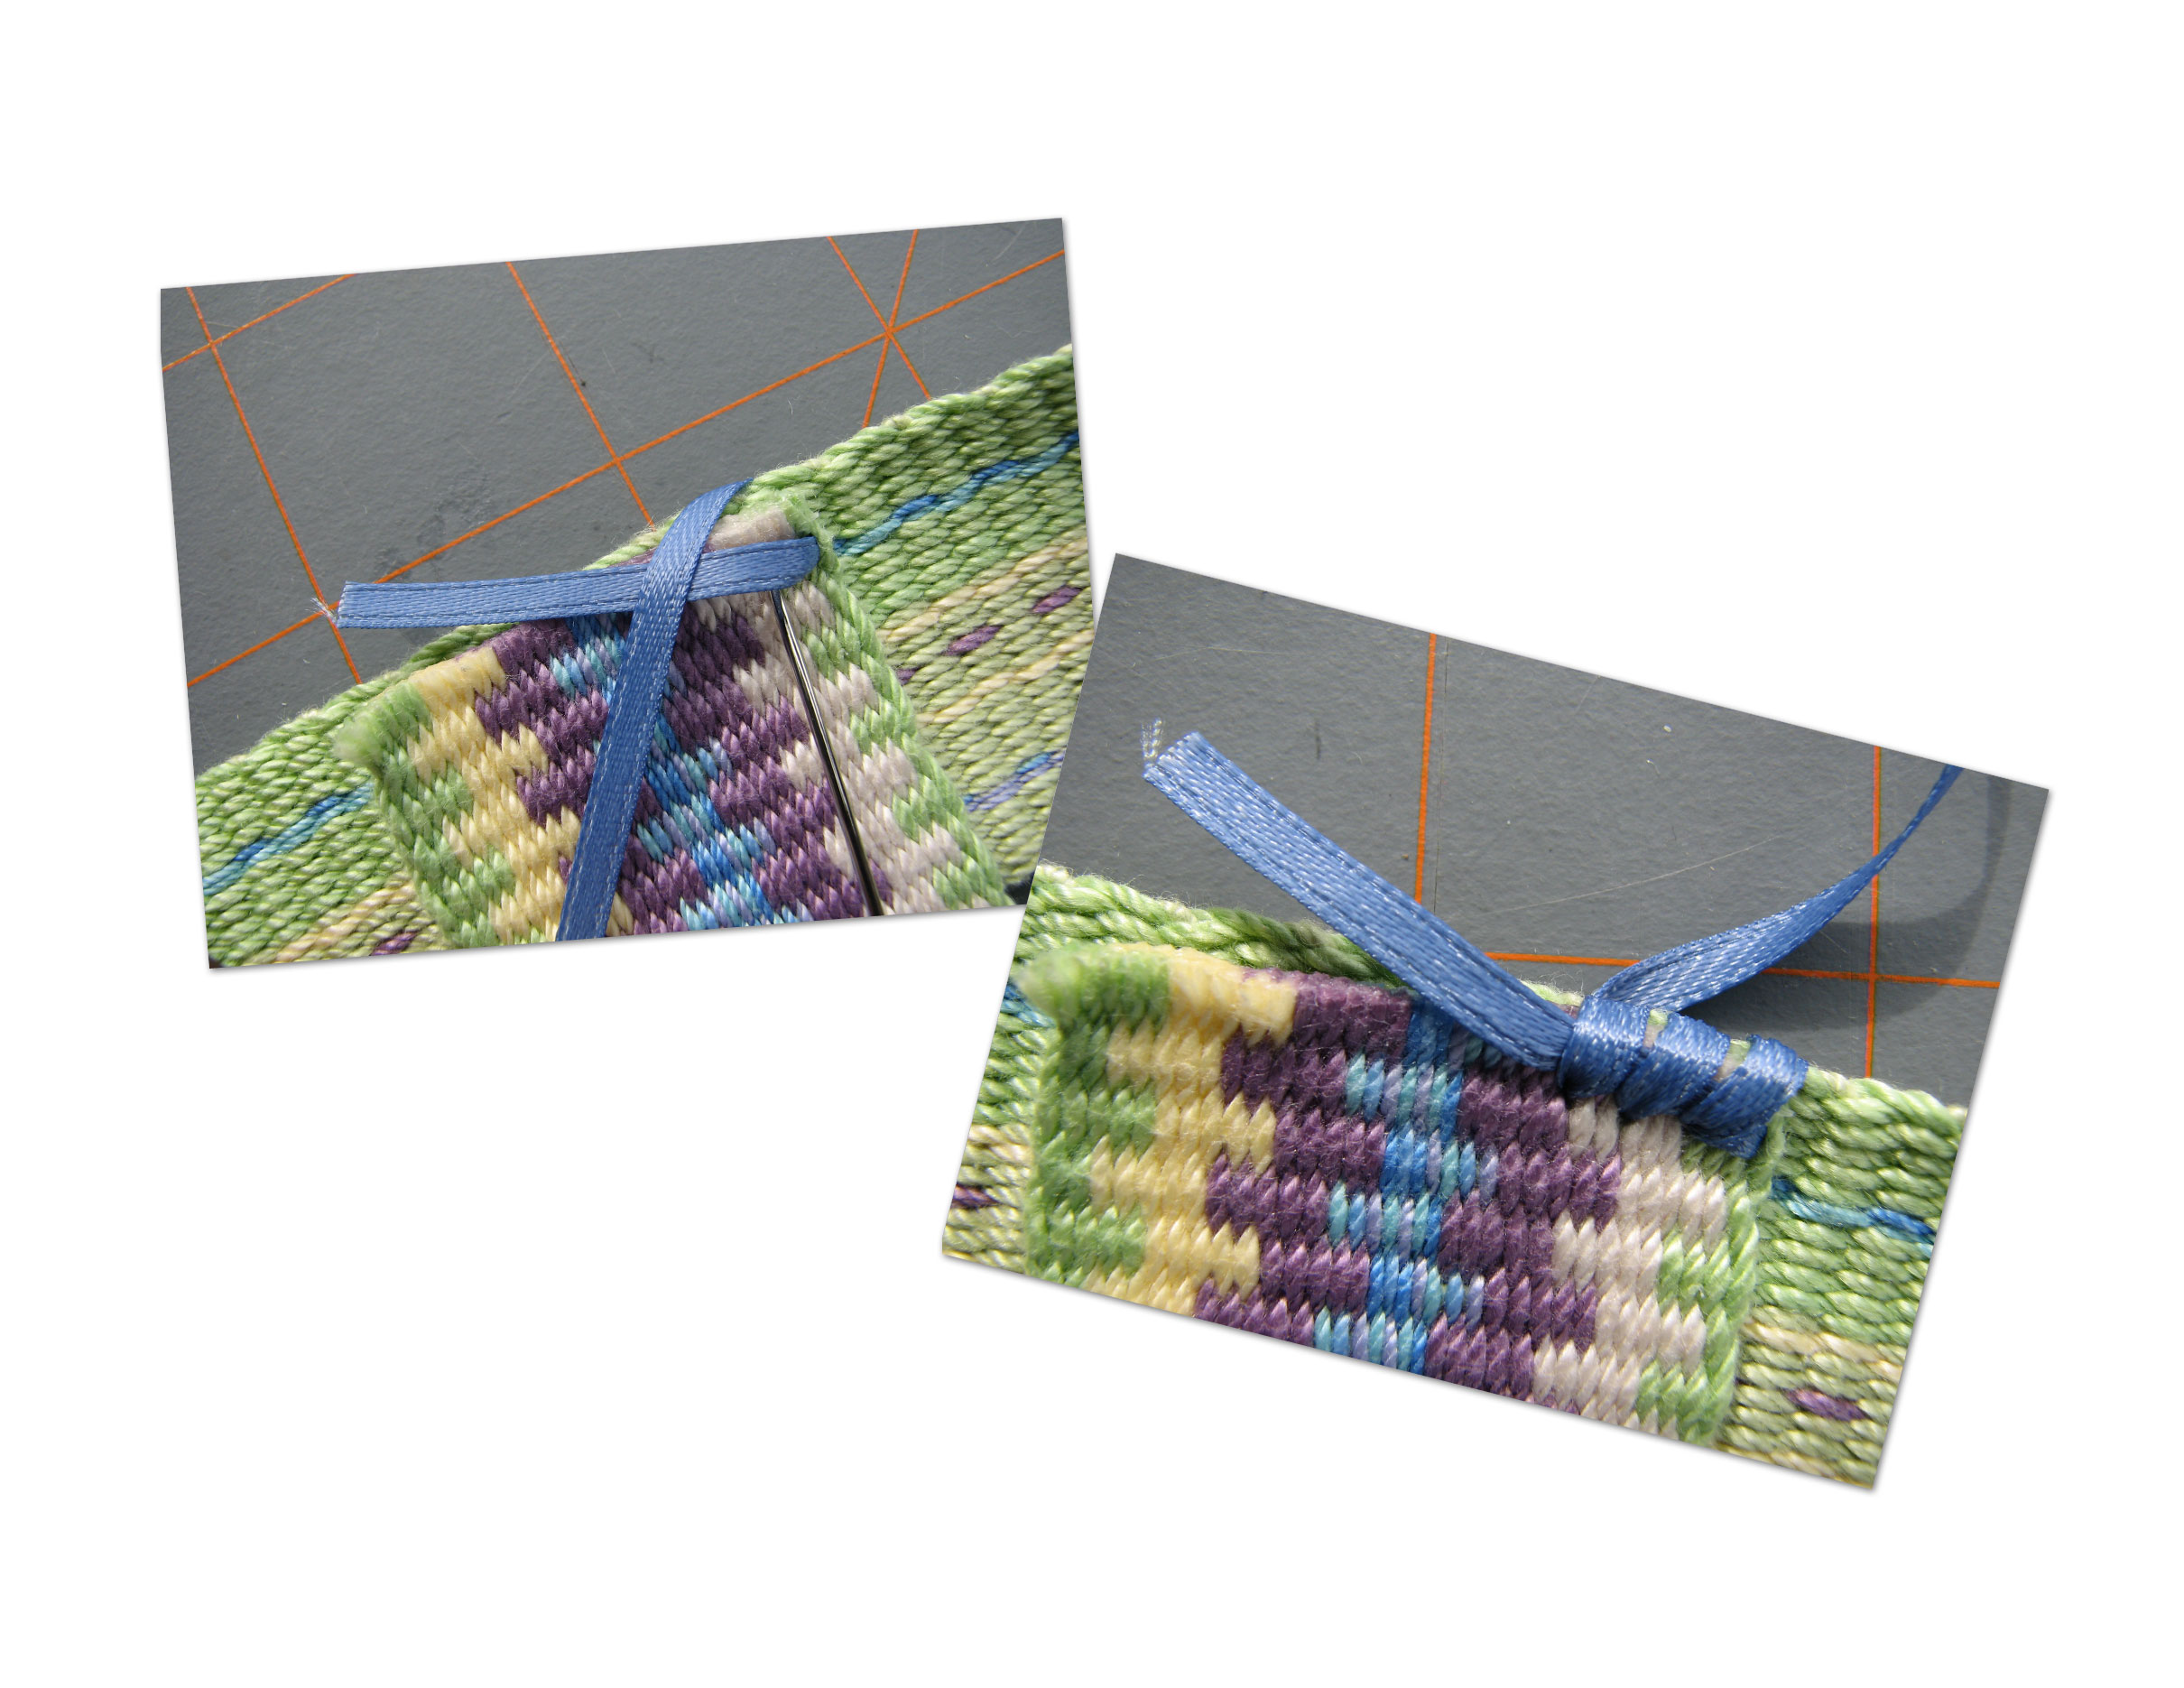
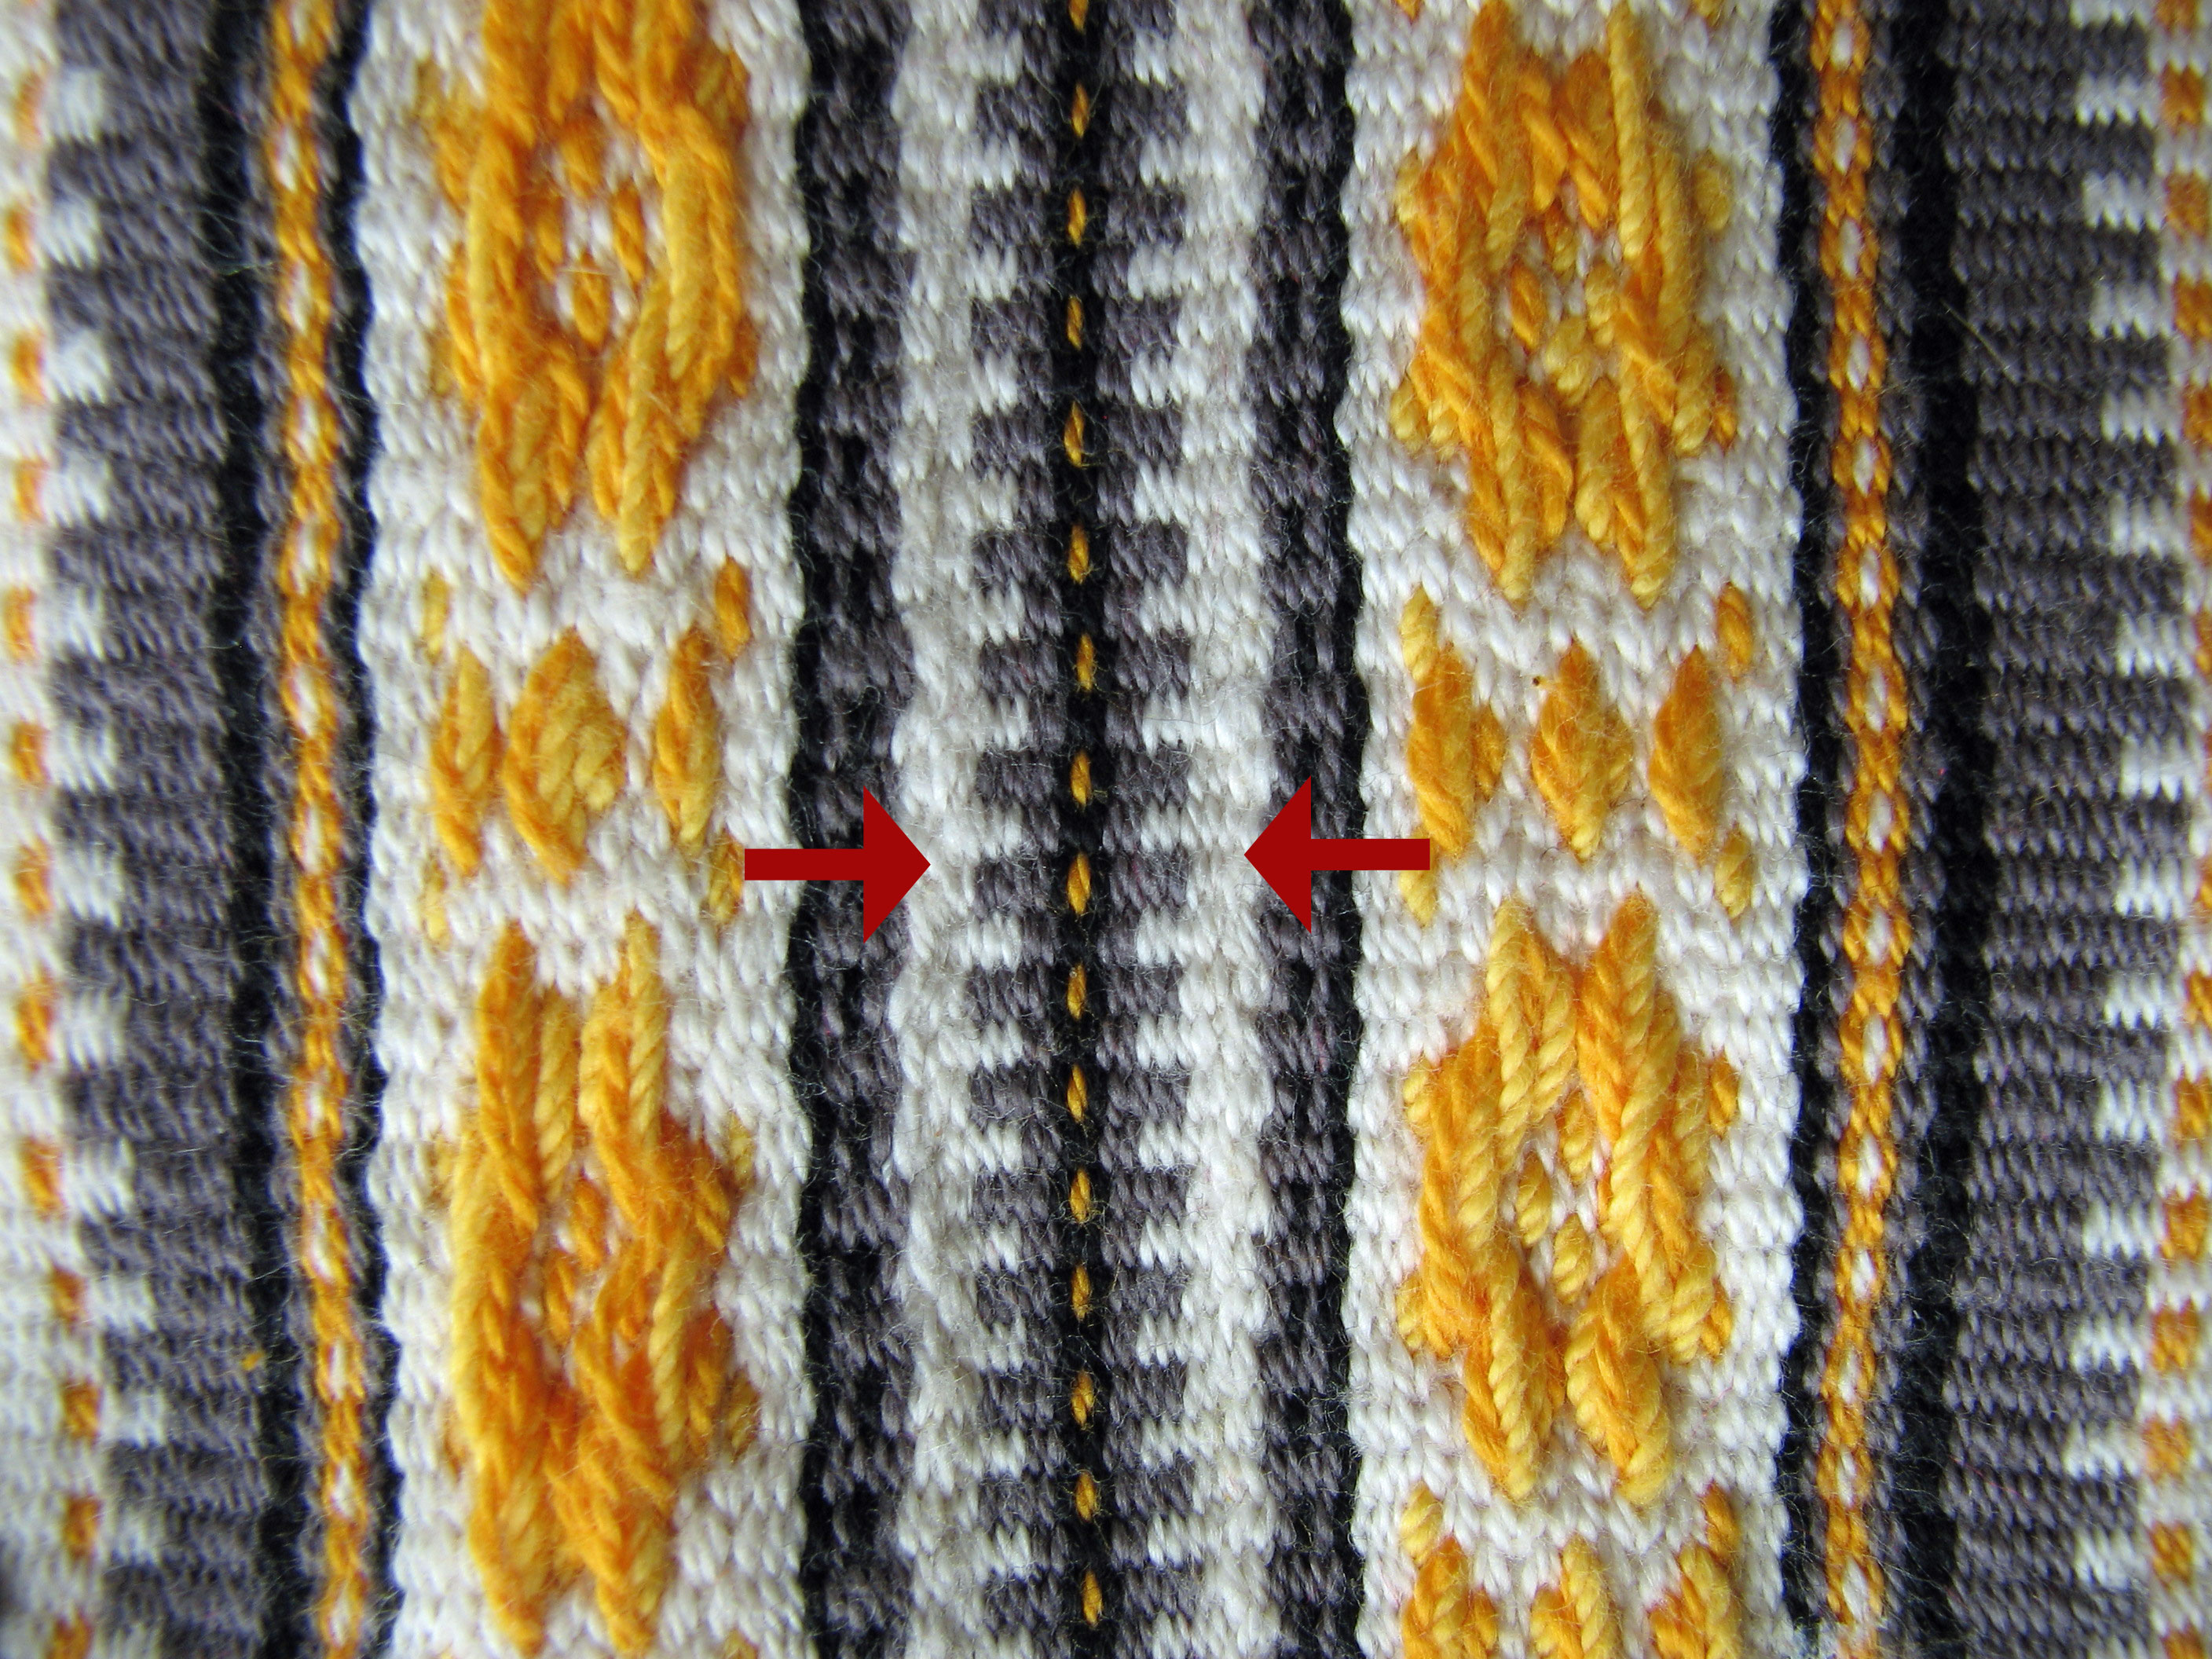
To “braid” your selvedges, you need three colors of yarn, preferably with a noticeable color differnce. Use color one for the first warp thread and color two for the second warp thread. Warp the rest of the band according to your pattern until you come to the last two warp threads. Repeat the same process for your last two warp threads as you did for the first two. Use color three as your weft yarn to create a “braid”.

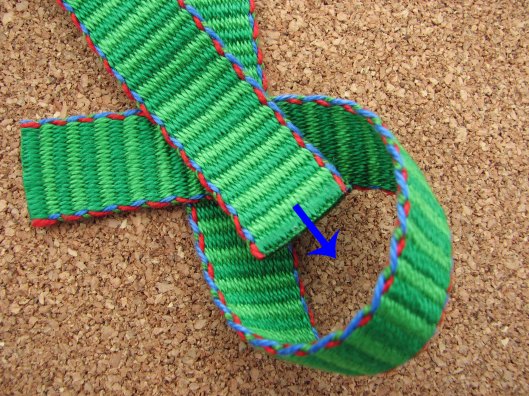
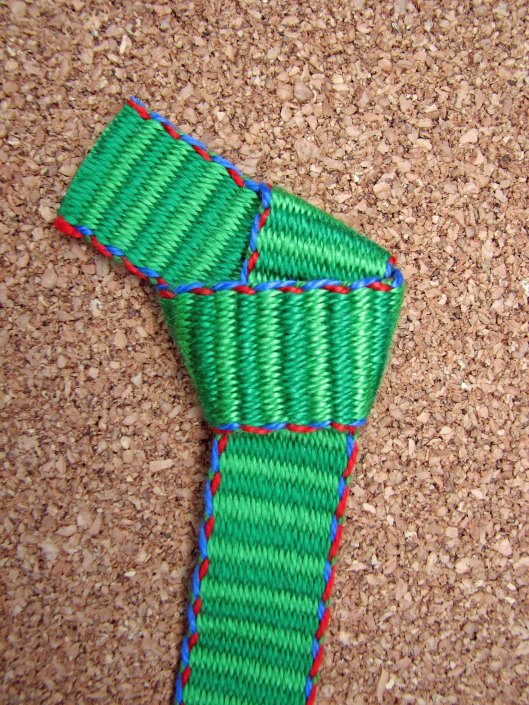
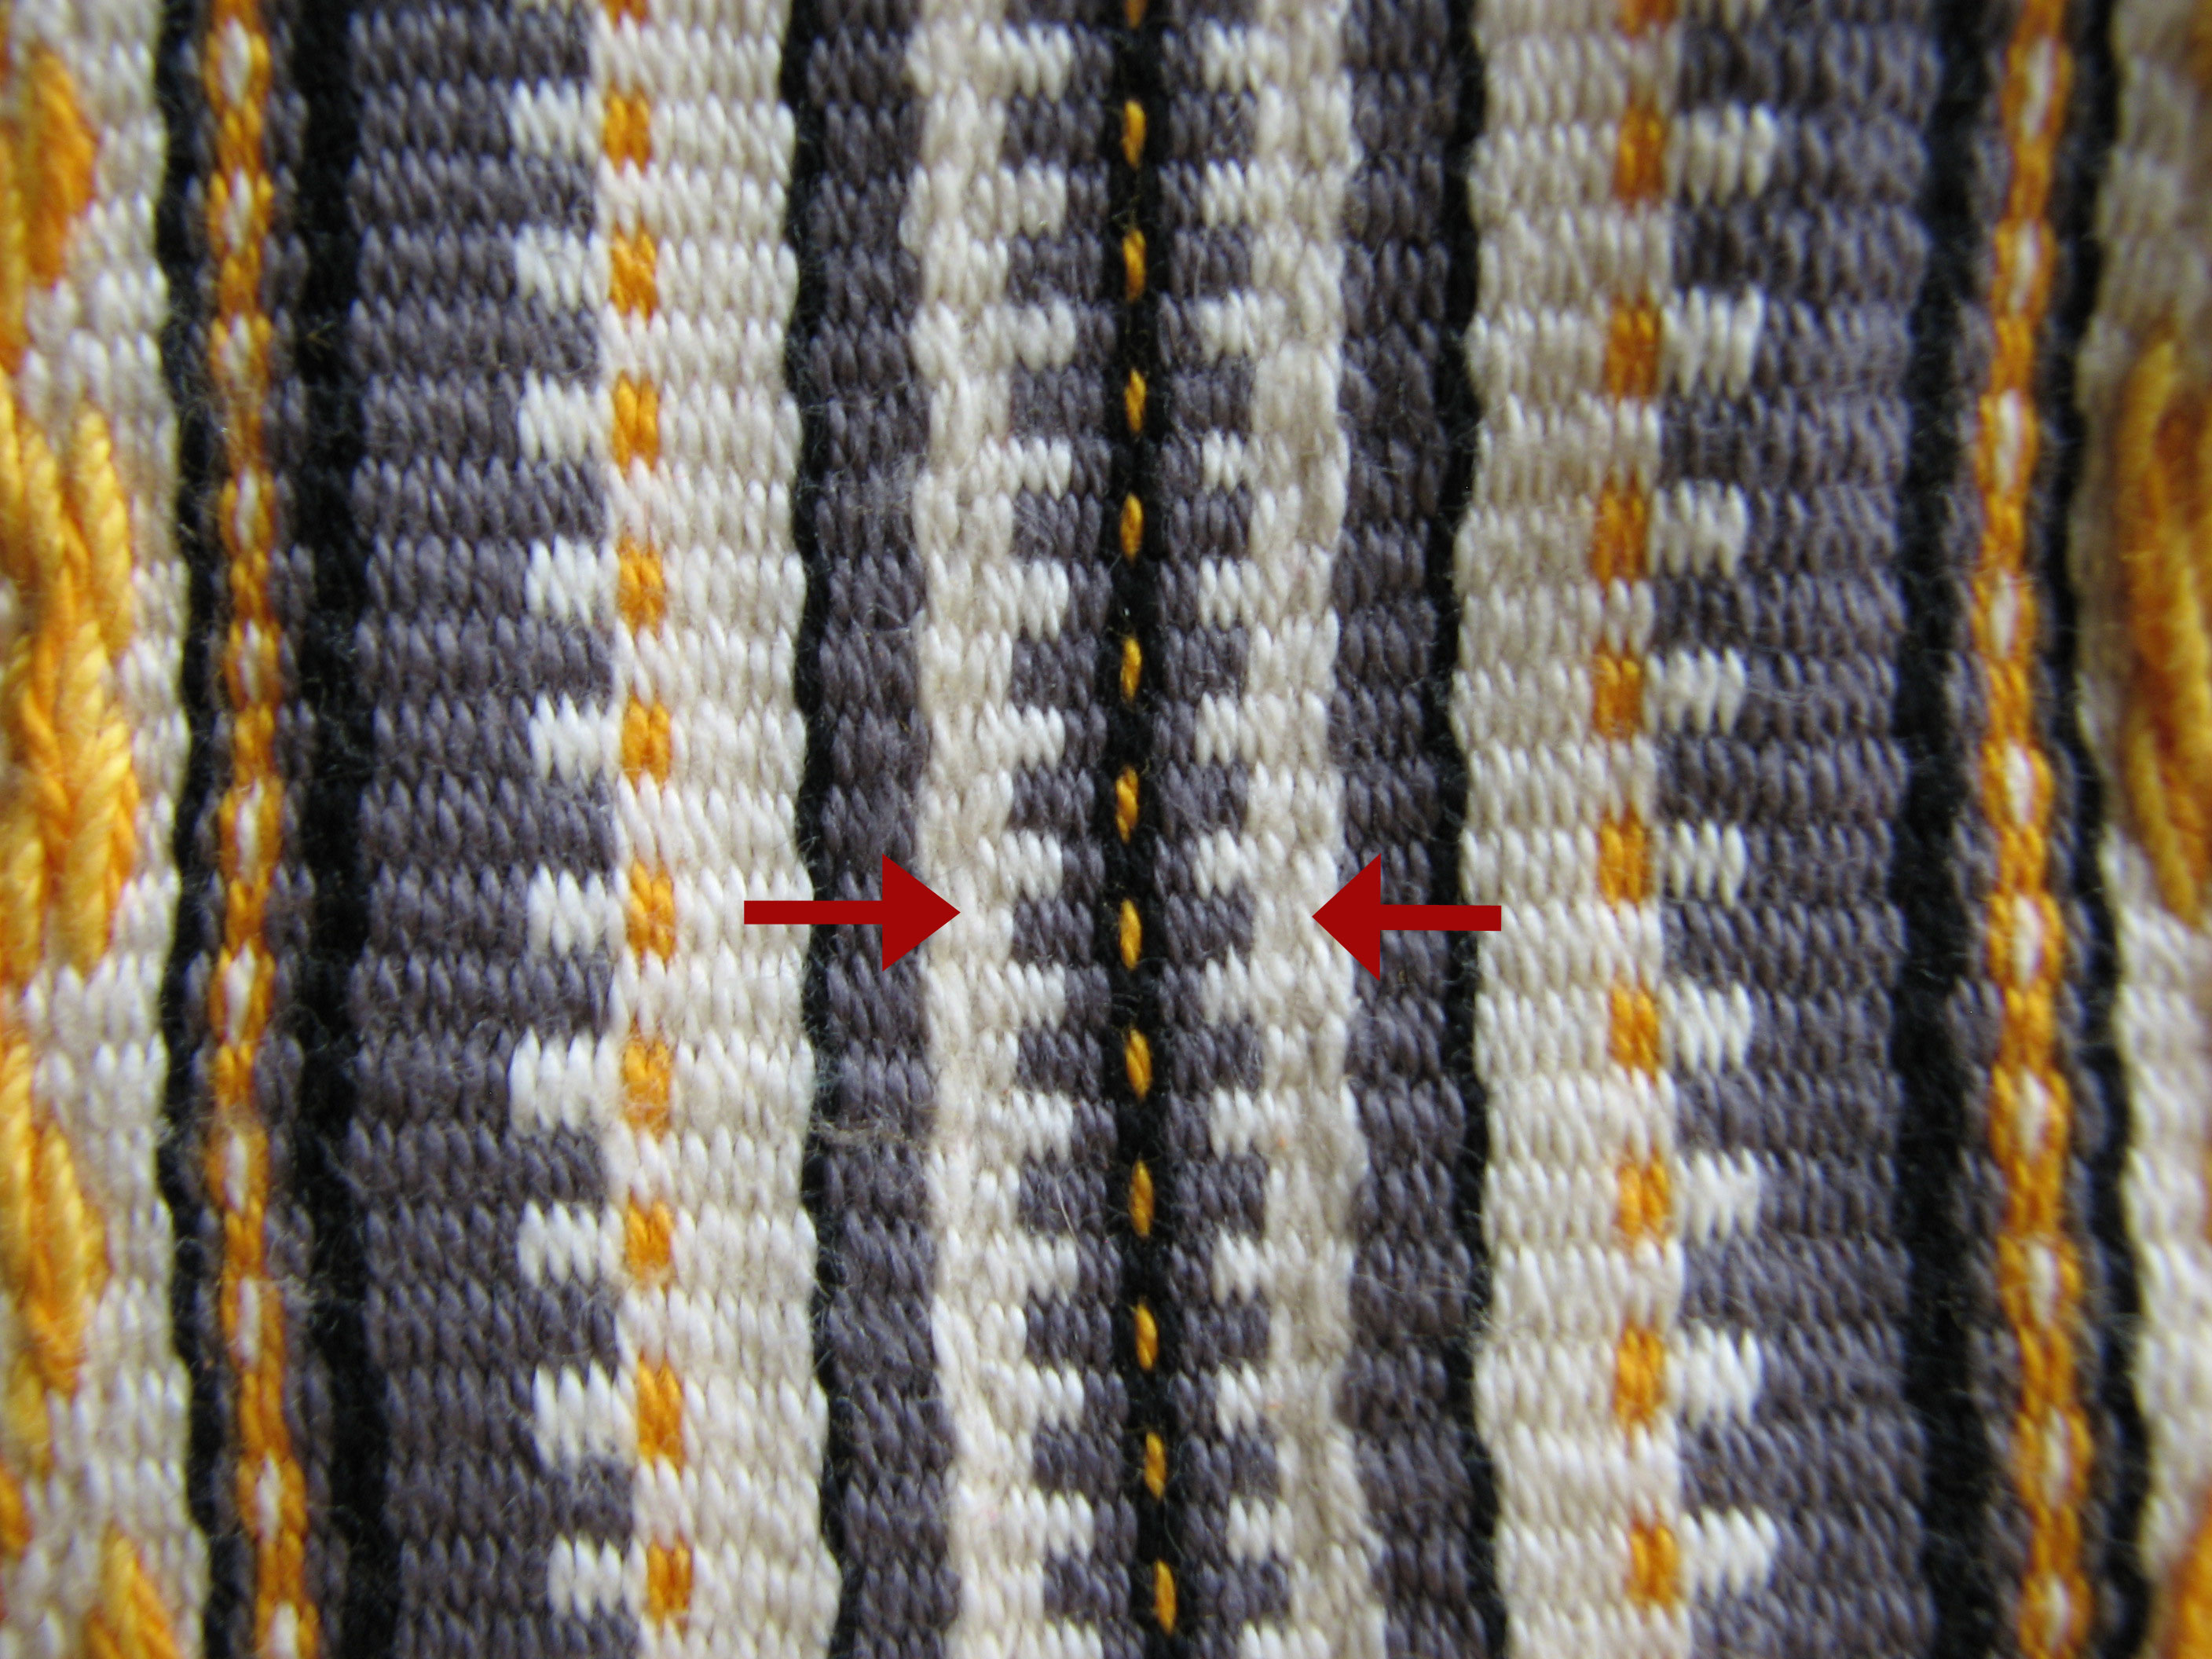
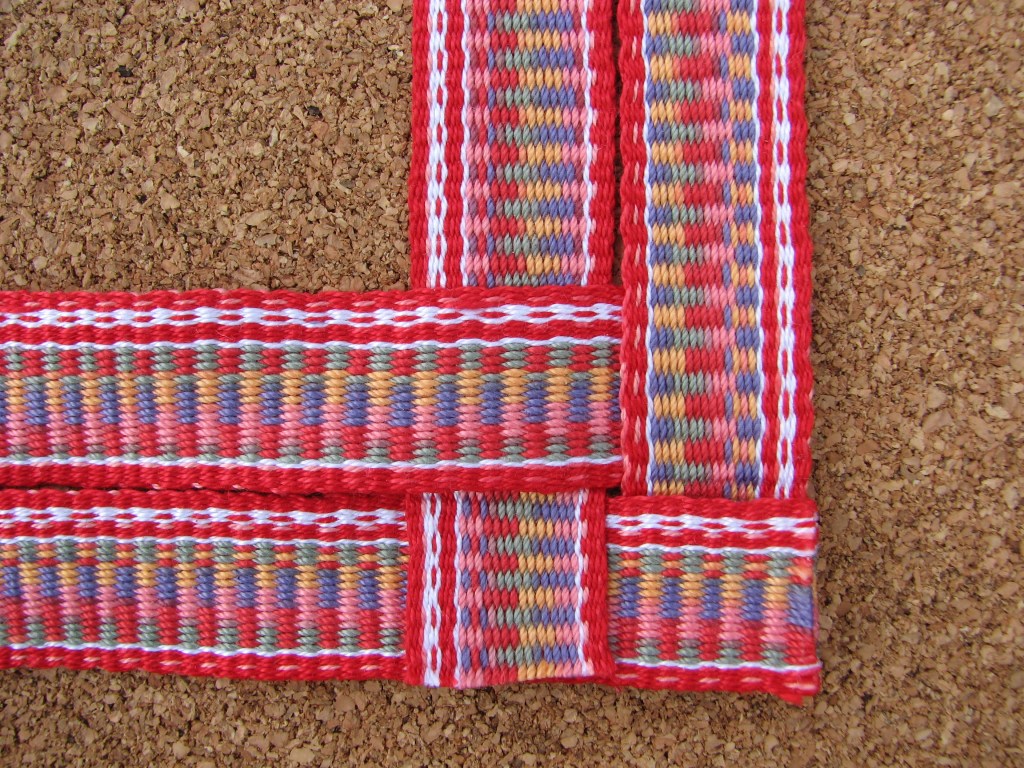
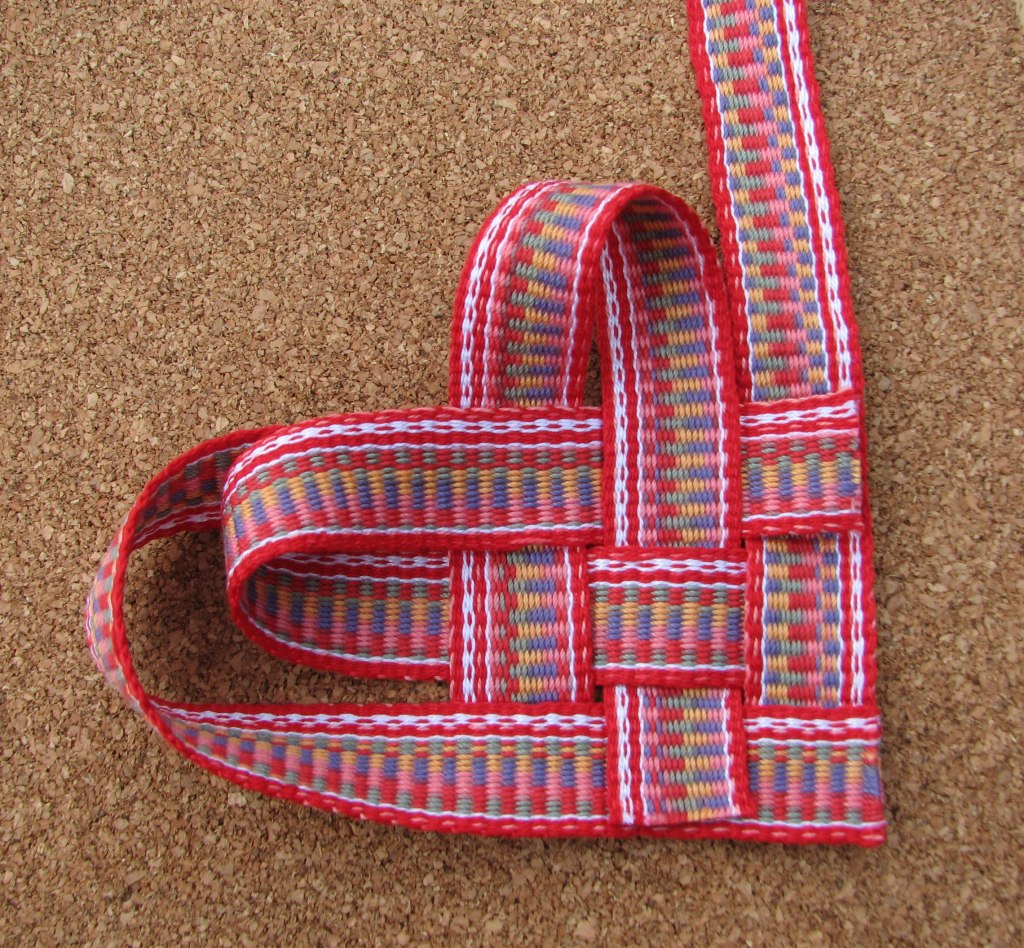
However, beware. . . After I started weaving I realized my selvedges did not match. . .Braided edge

IMG_0393IMG_0388

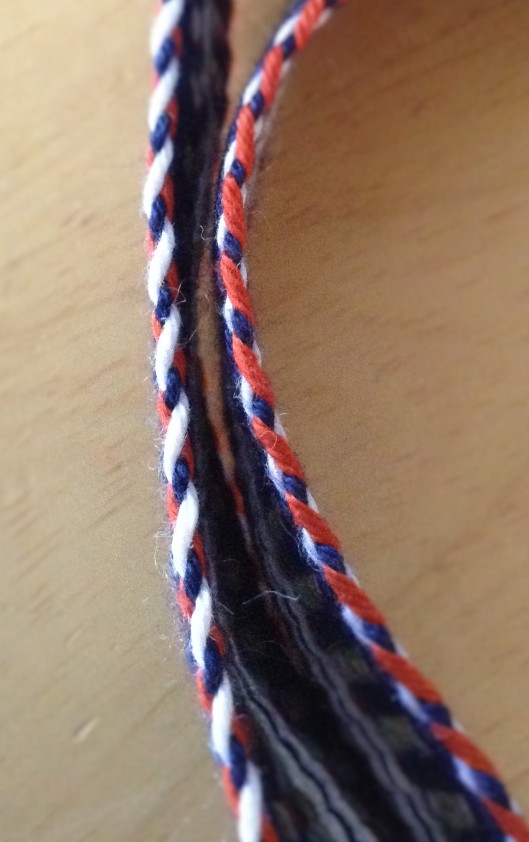
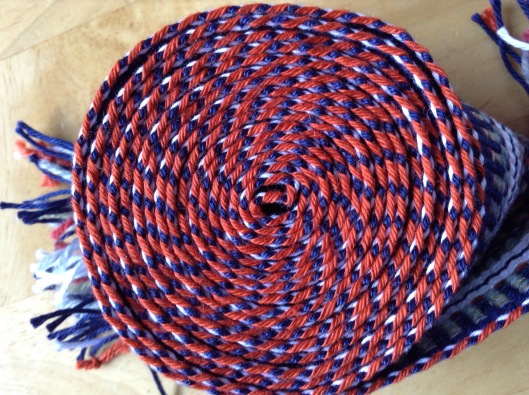
How could this be? Here is a tip: remember to reverse the warping order of the last two colors when you get to the end. The first and last warp threads show as the “dominant” color. So, by warping the first thread with rust and the last thread with white, the edges where different. To make them match I should have warped the first and last threads with the same color. 

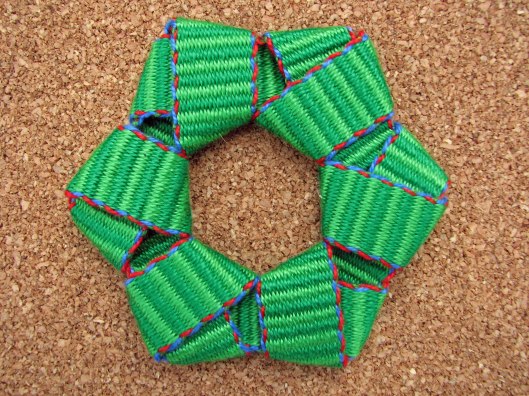
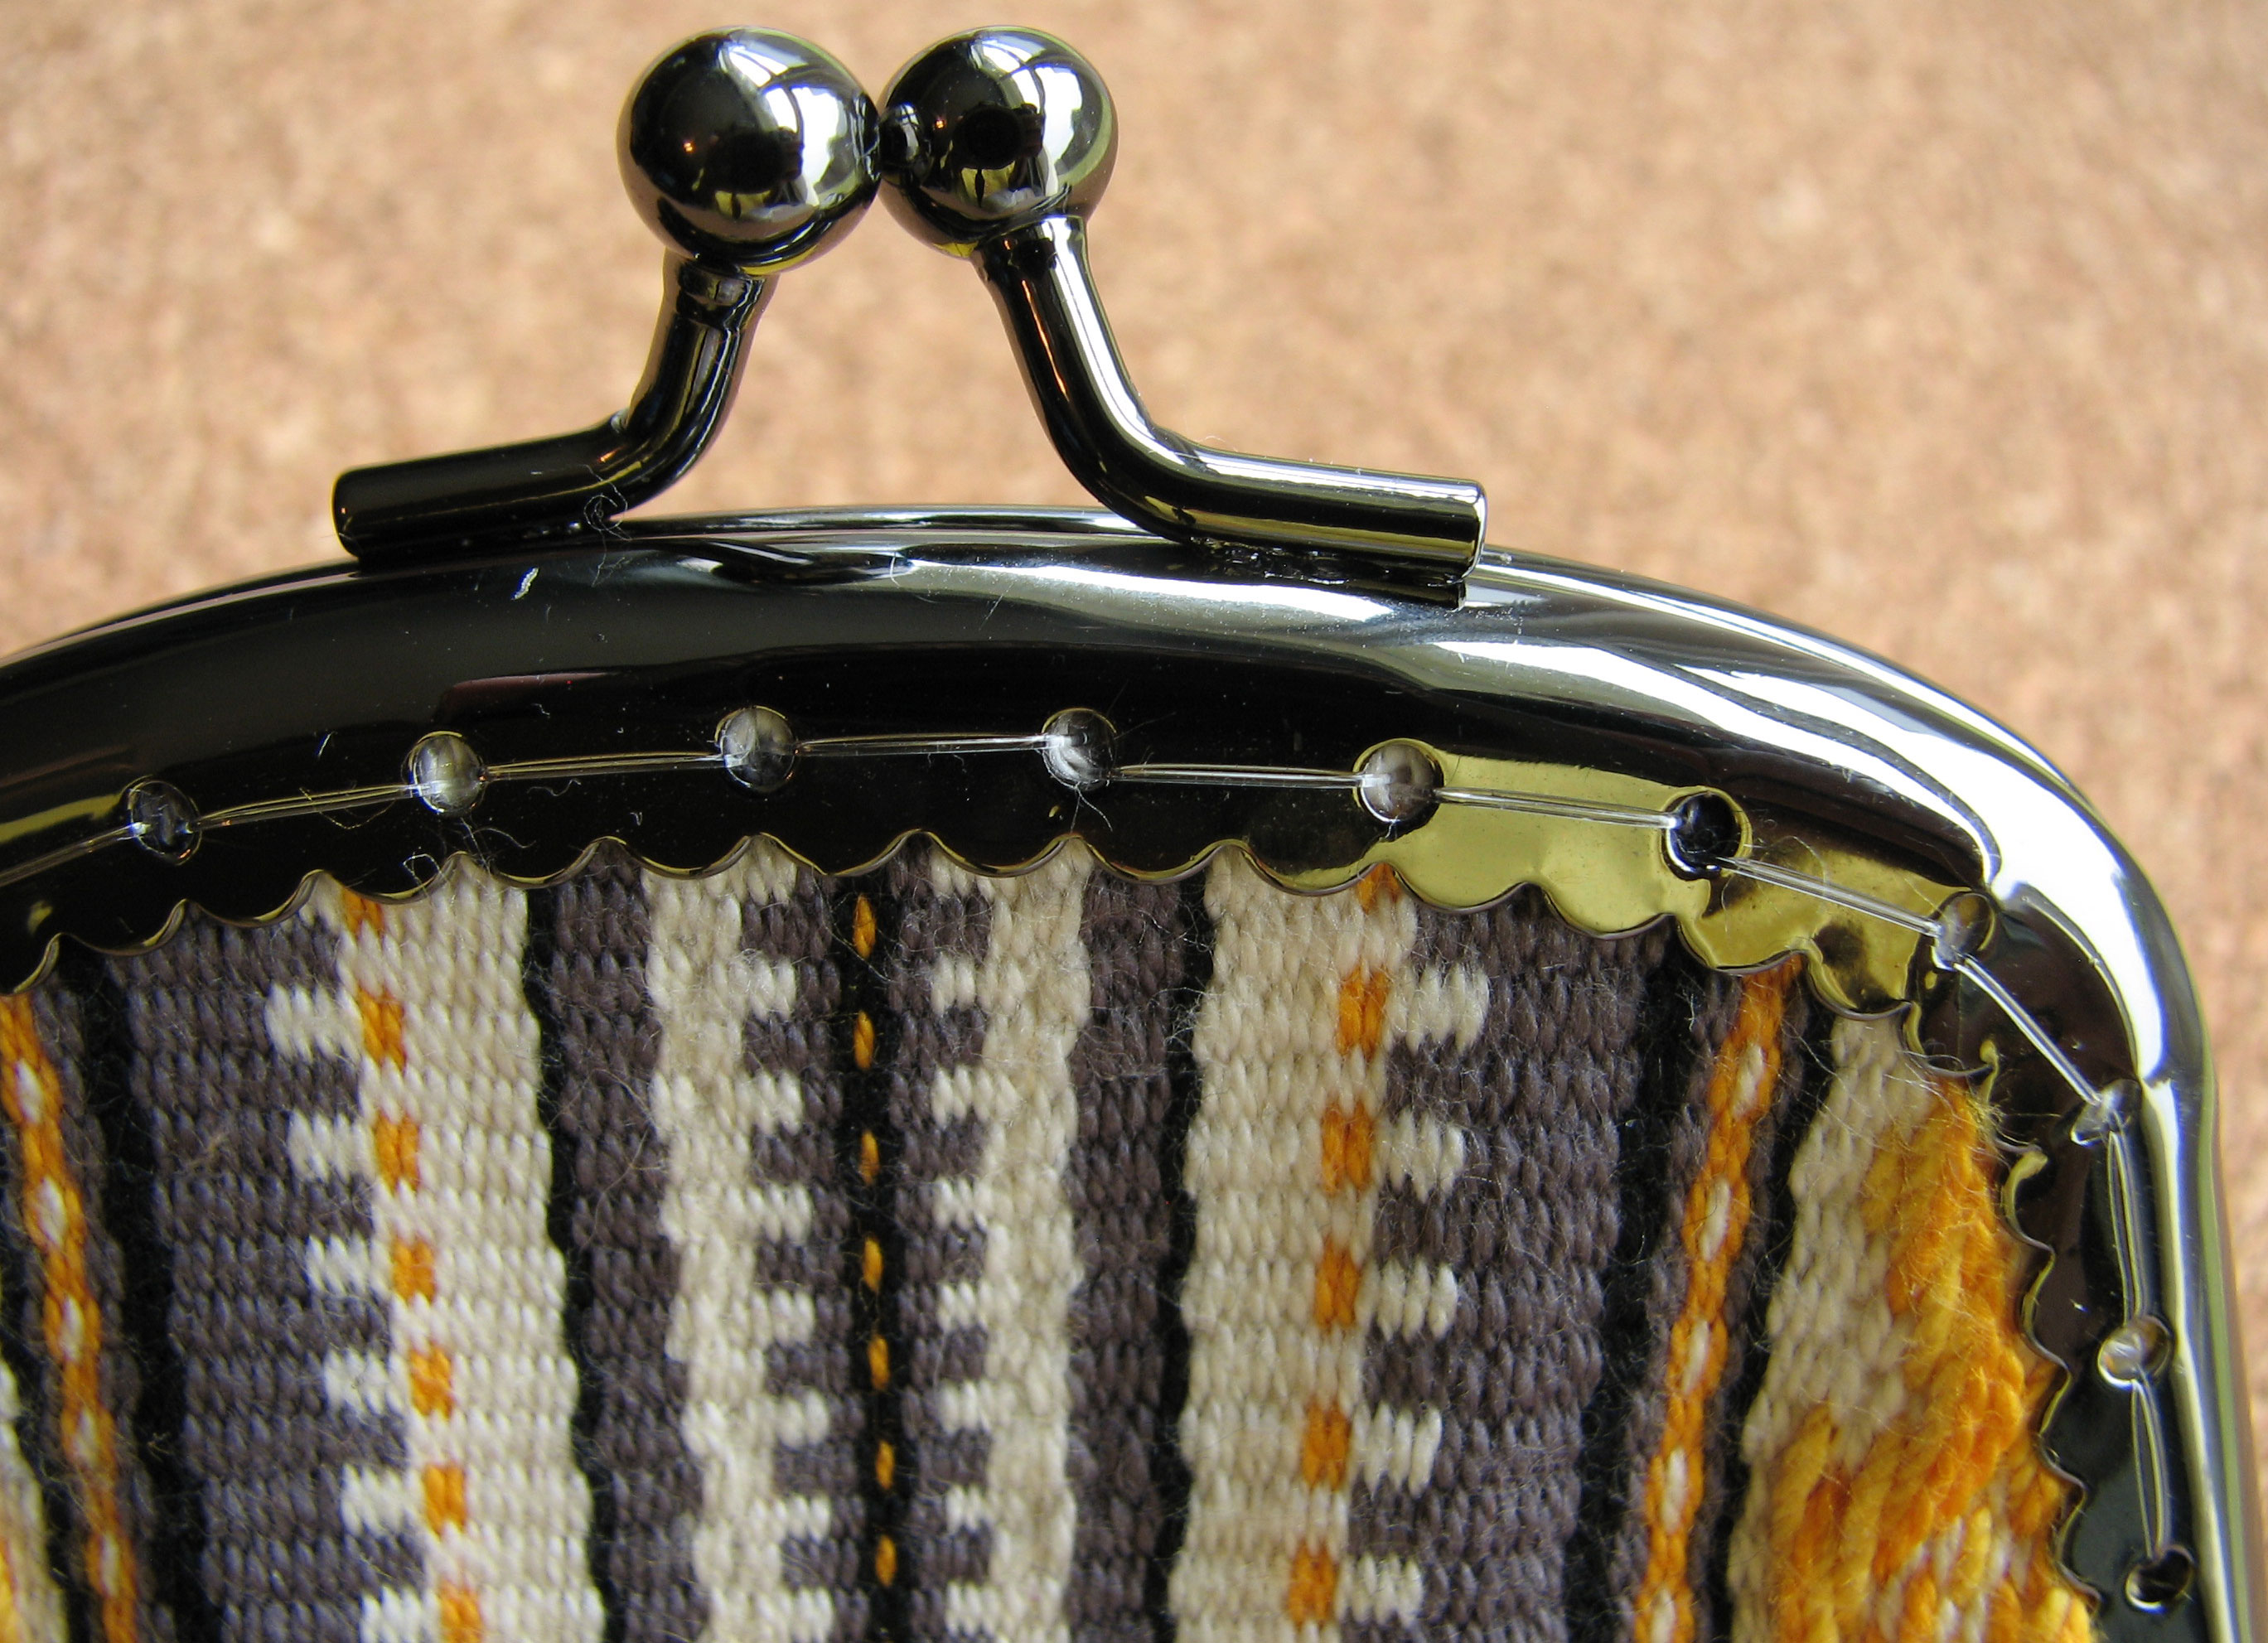
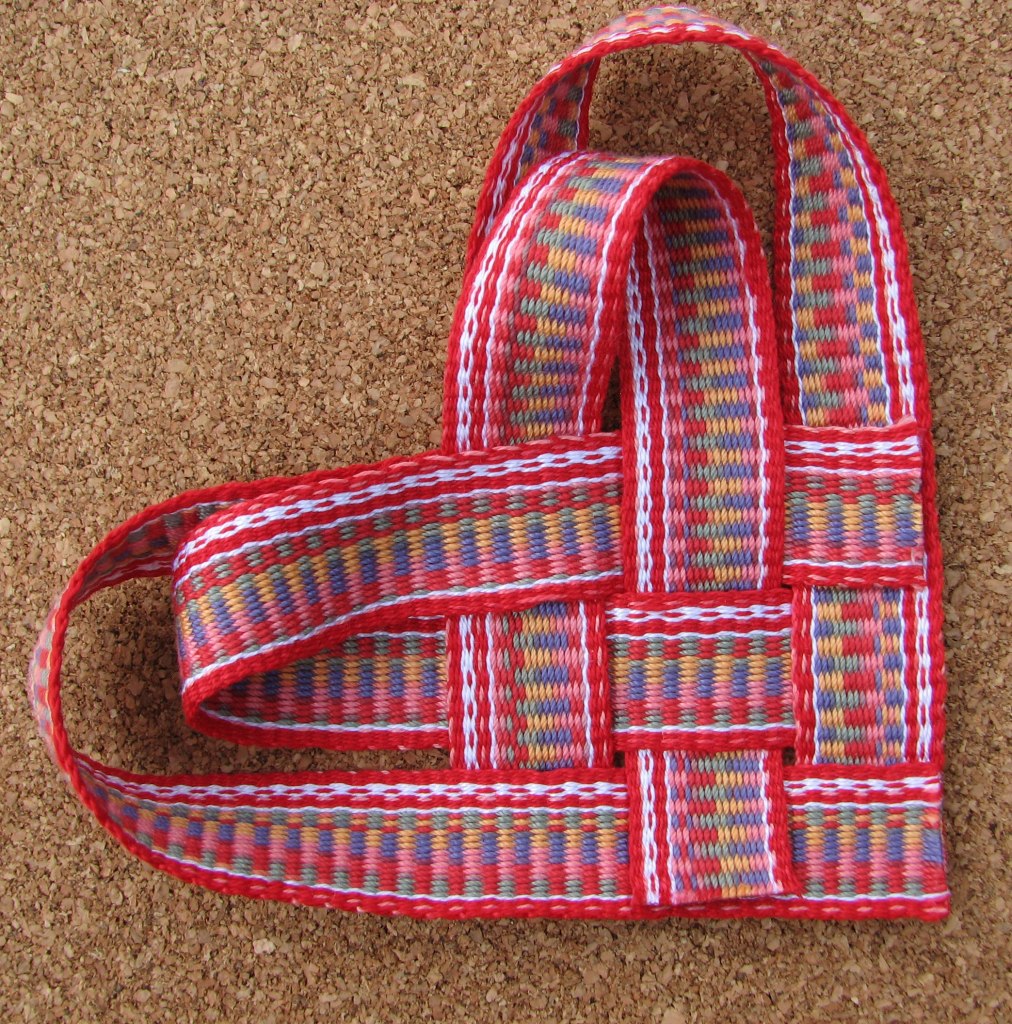
While I did not intend to make my selvedges different colors, I actually like the way it turned out and now, if I choose to, I can recreate the mistake- or shall we say, design element?

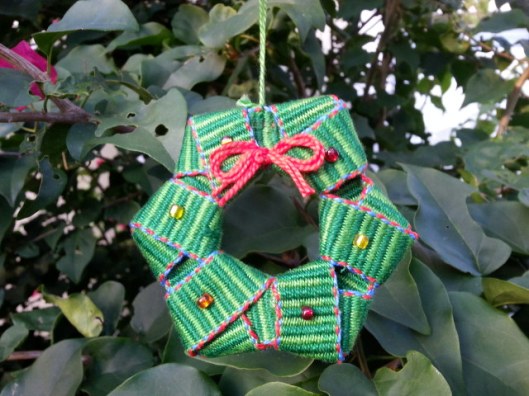
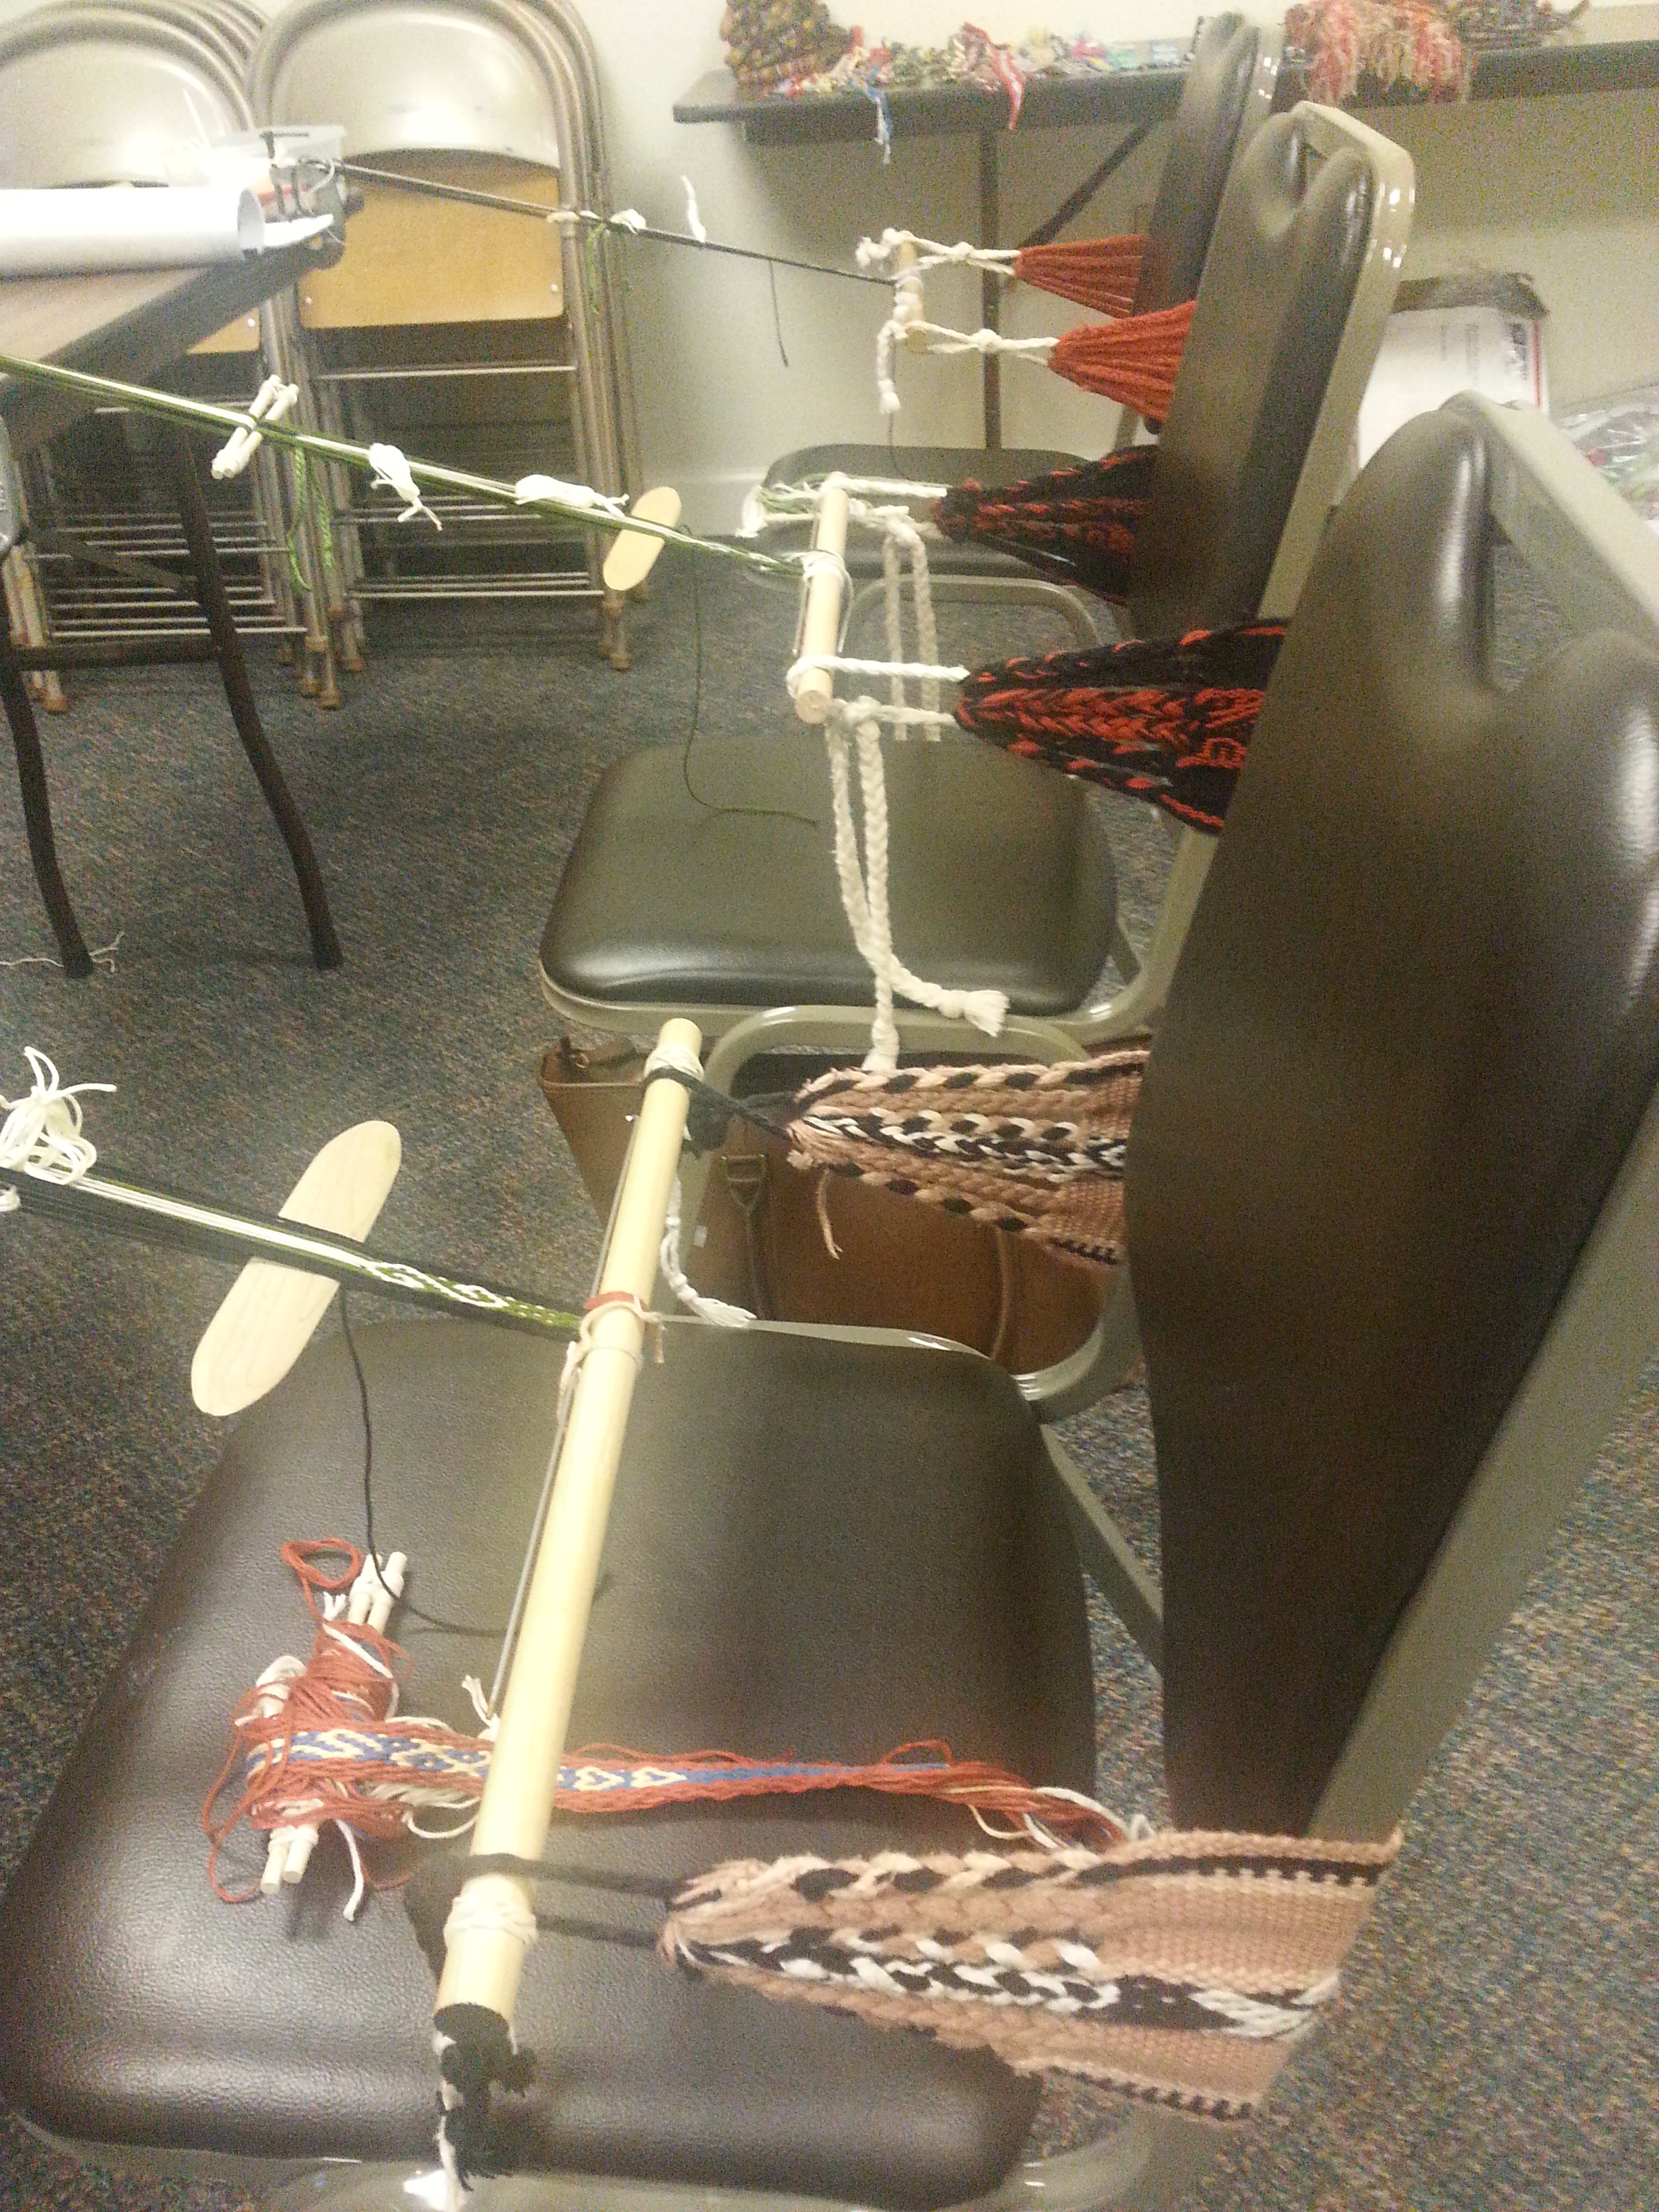
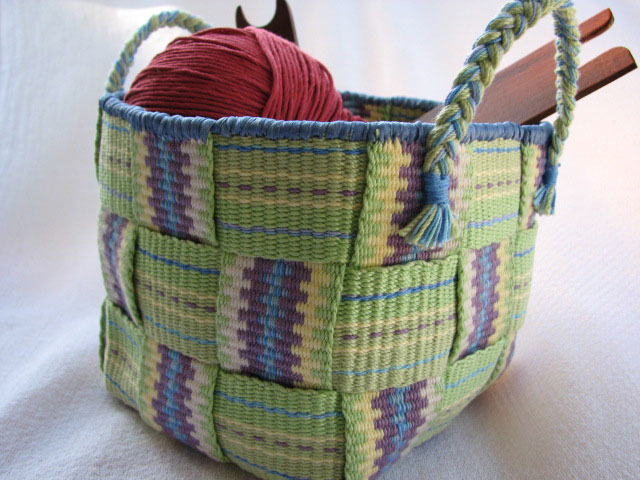
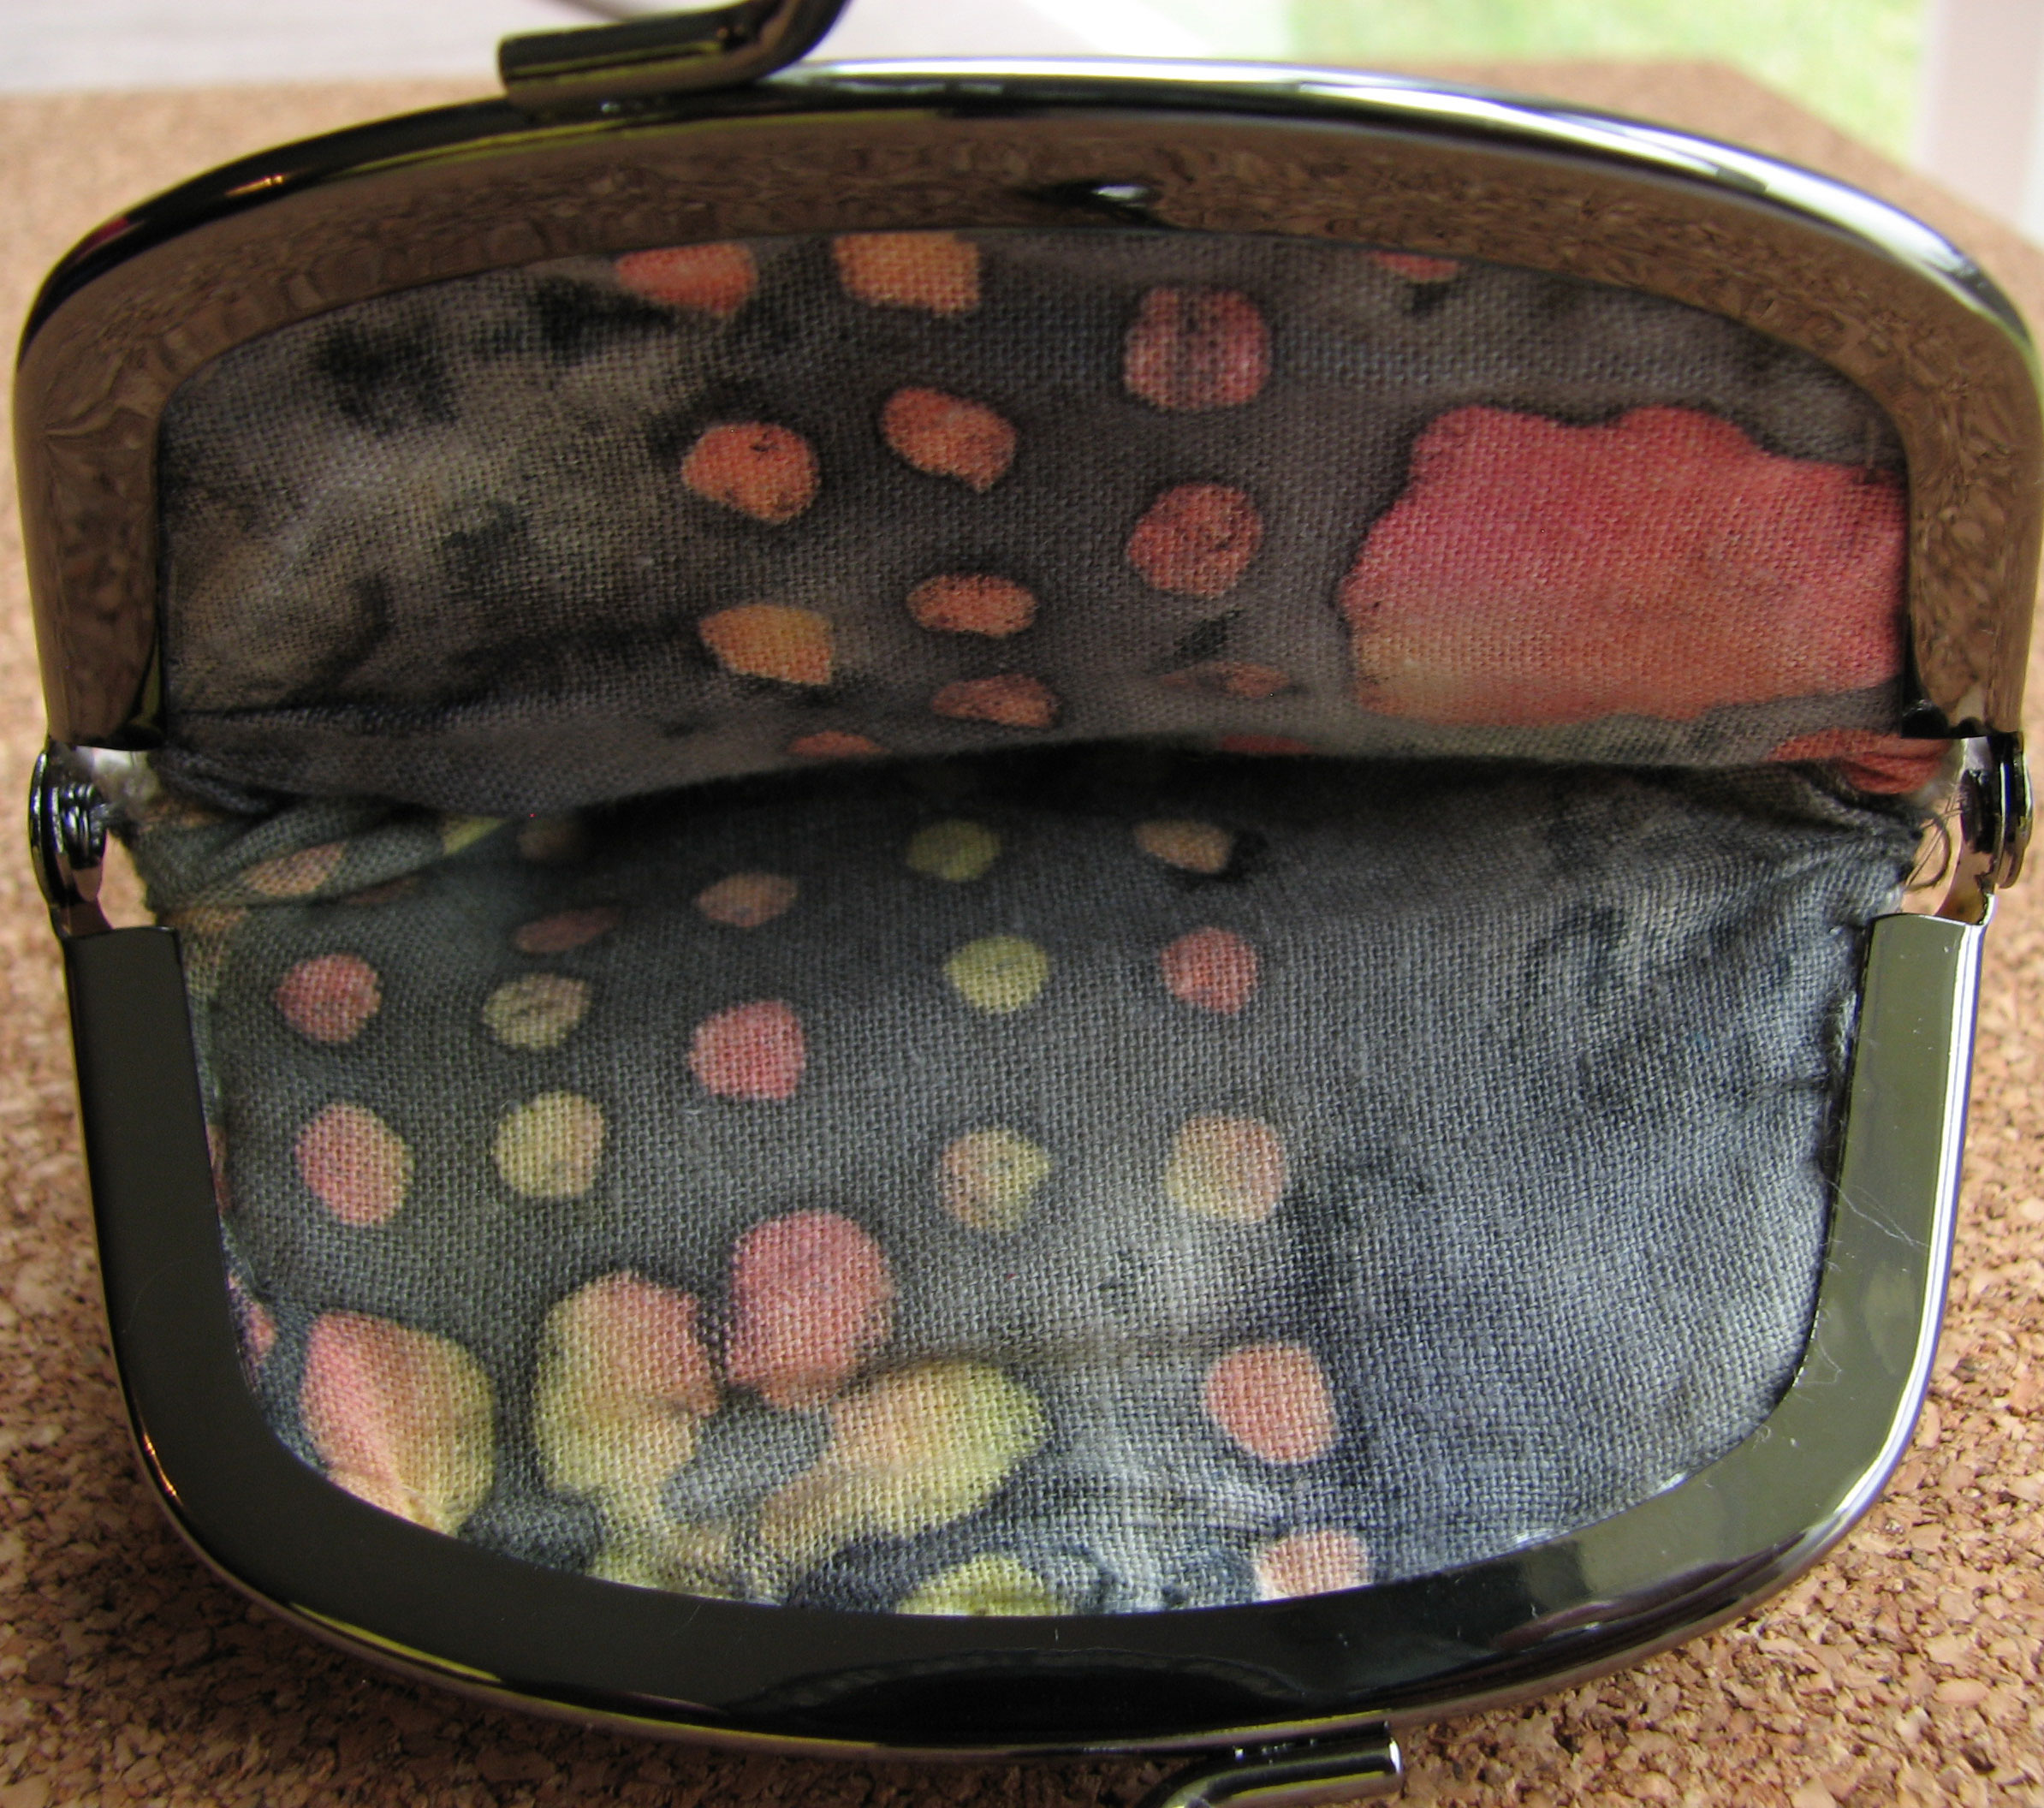
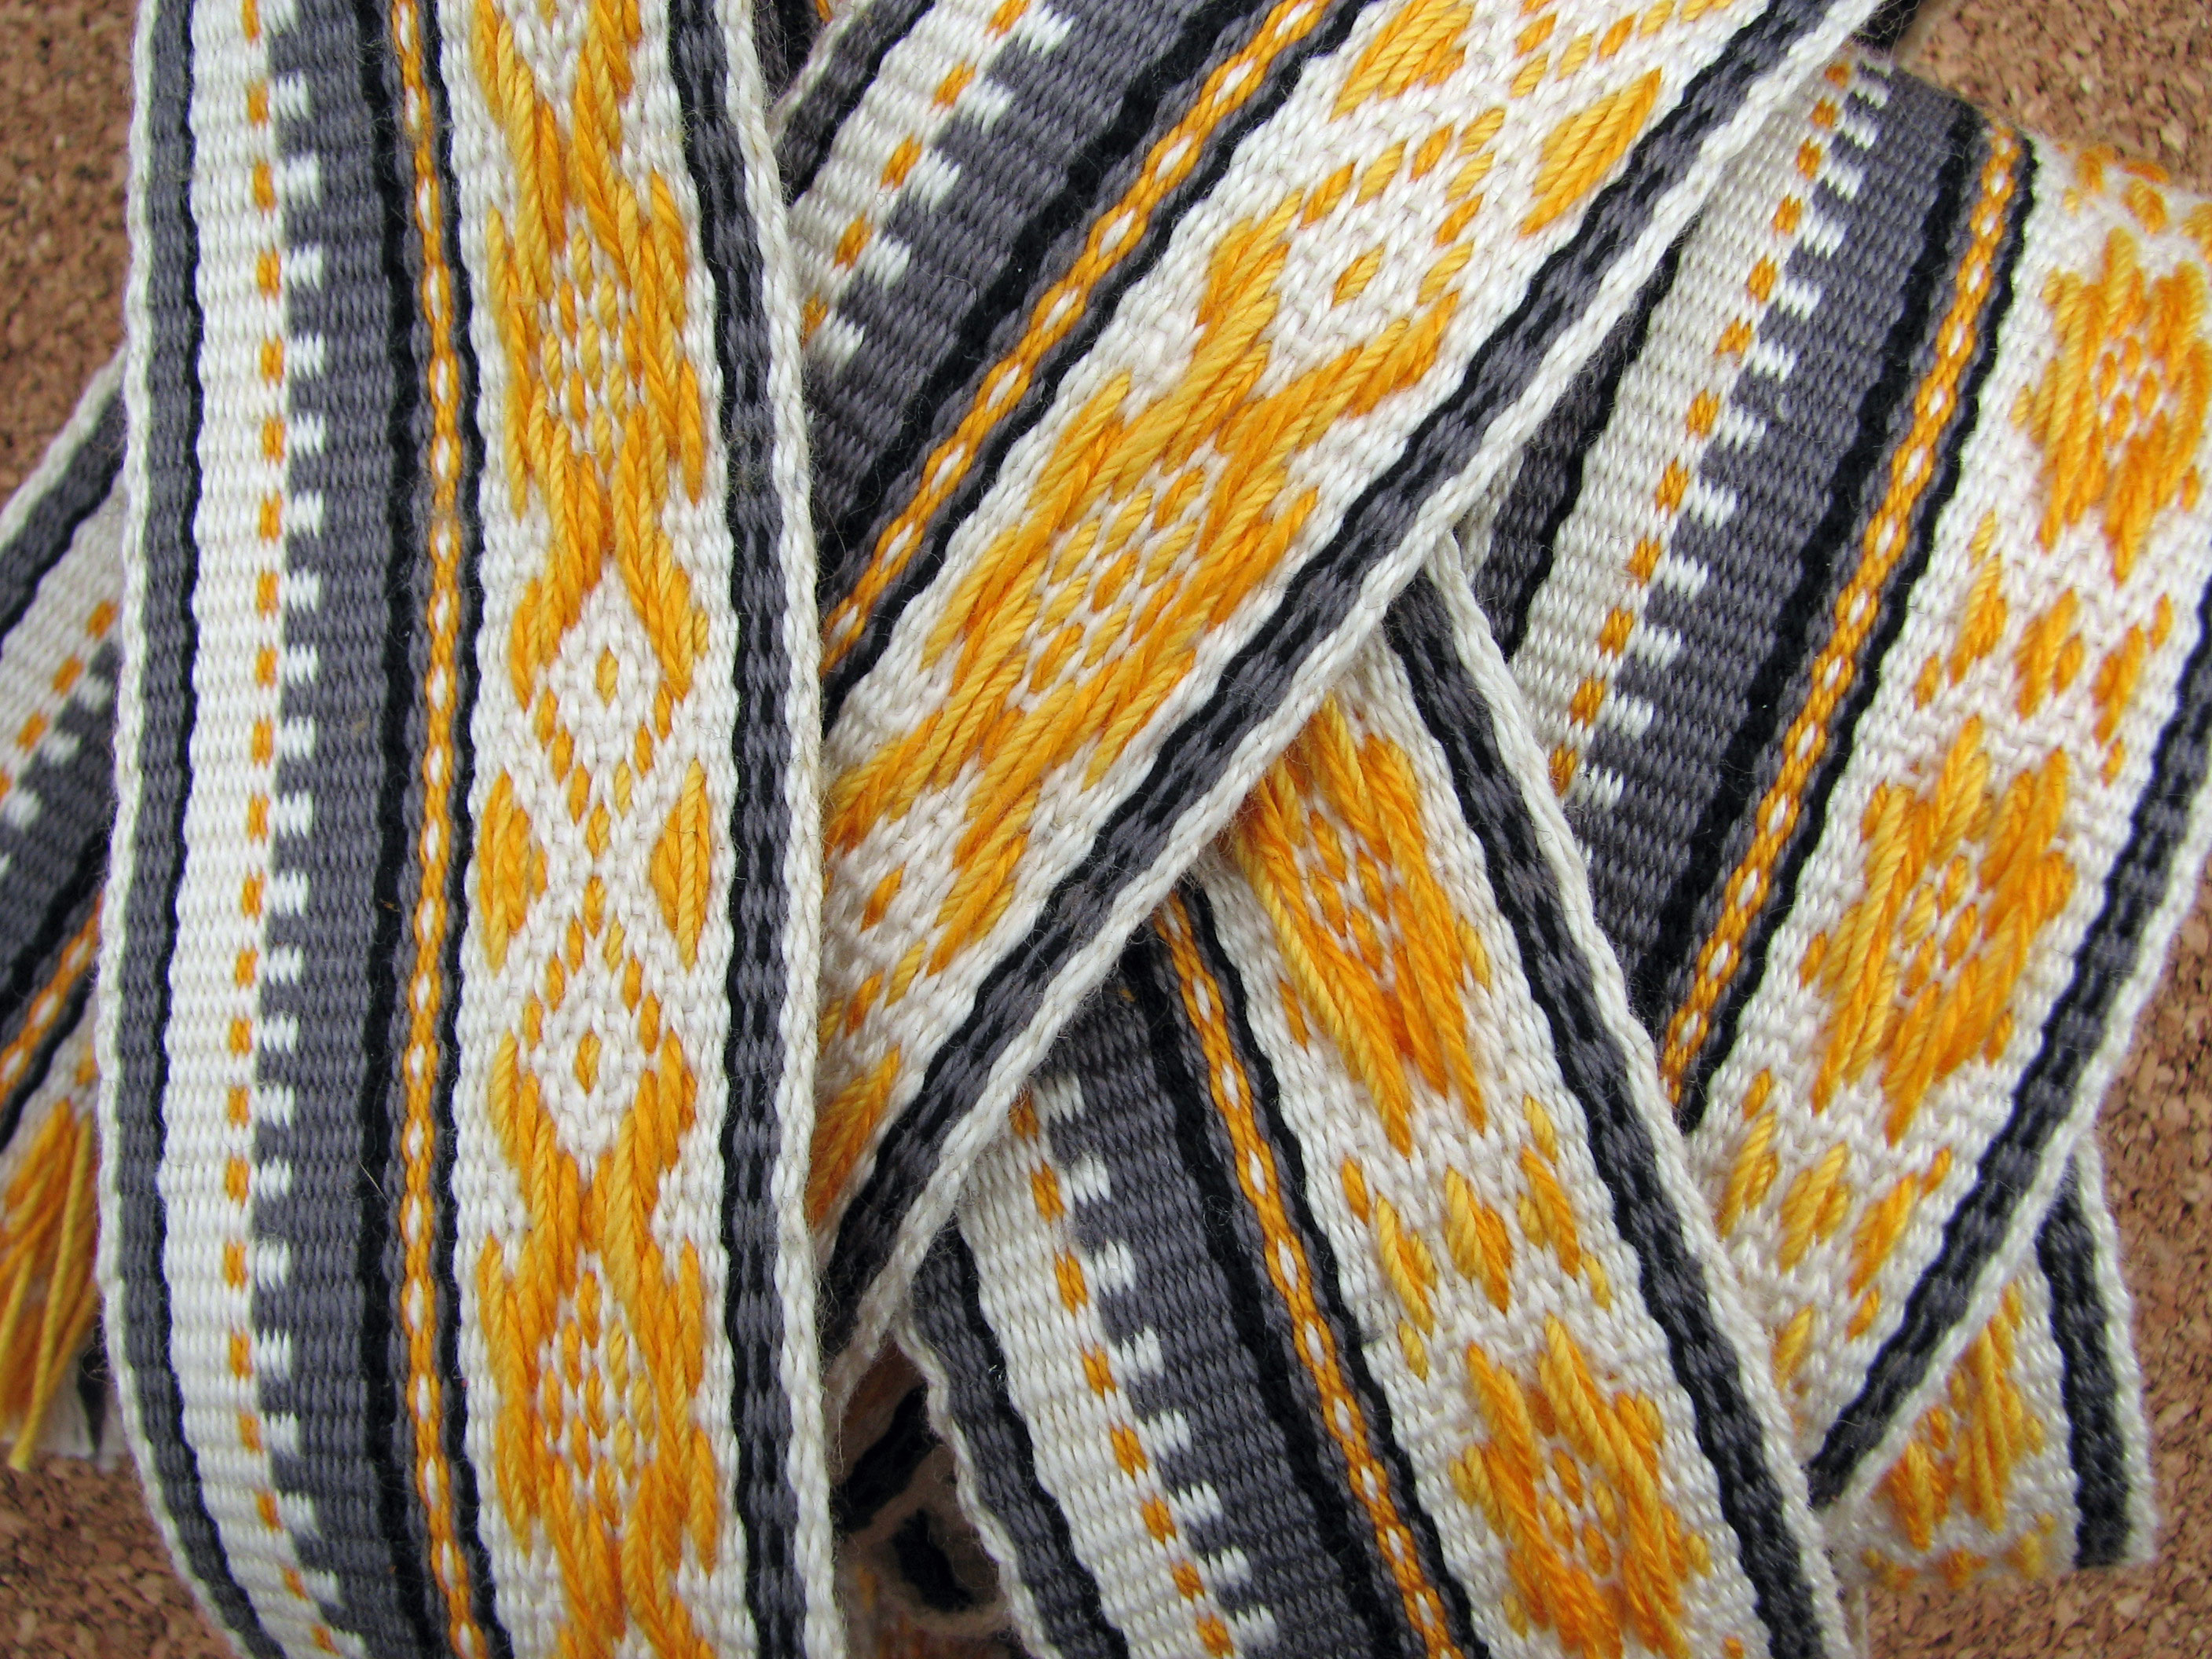
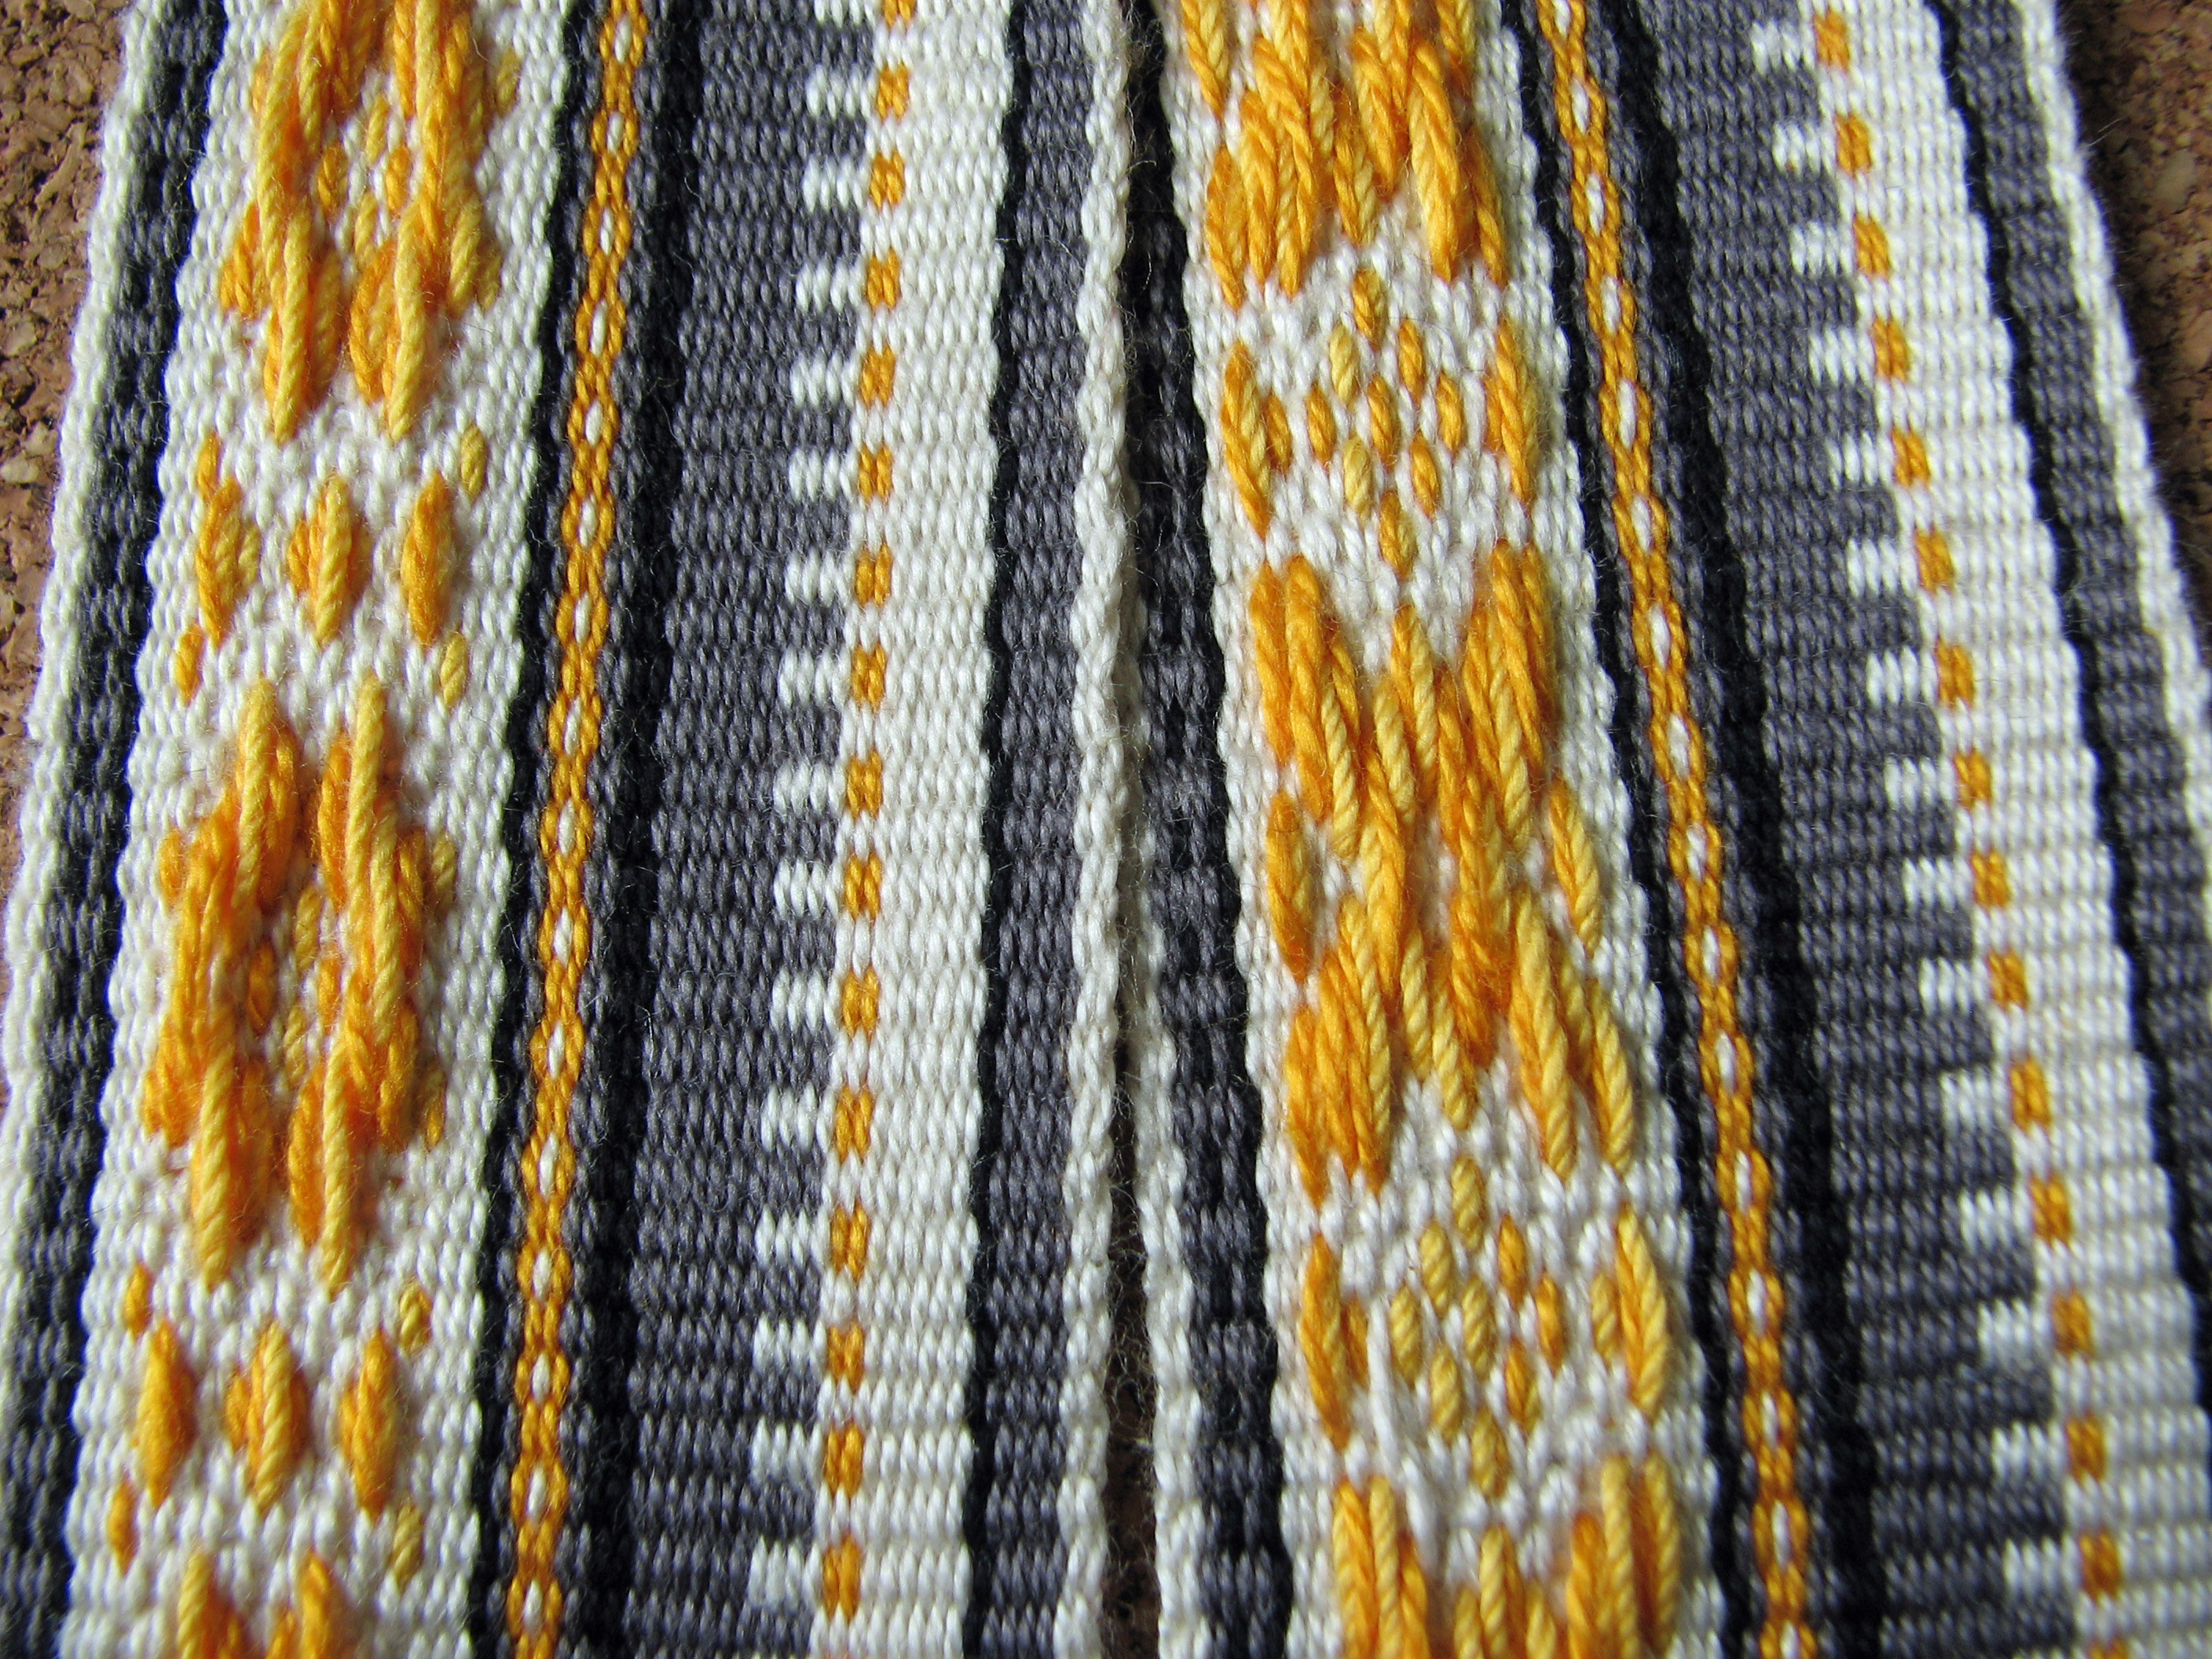
So, why is this my favorite band? It feels fantastic! It has the most pleasant hand of any band I have ever woven. And I love the colorway. I do not usually work with autumnal colors.

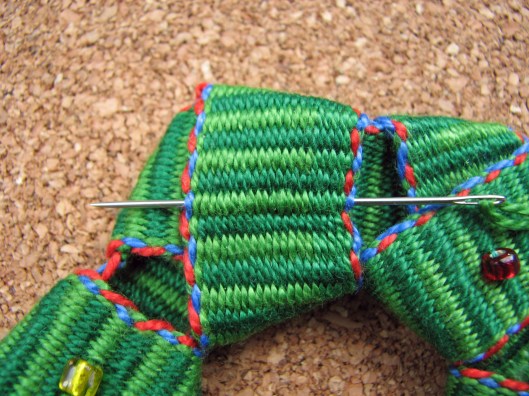
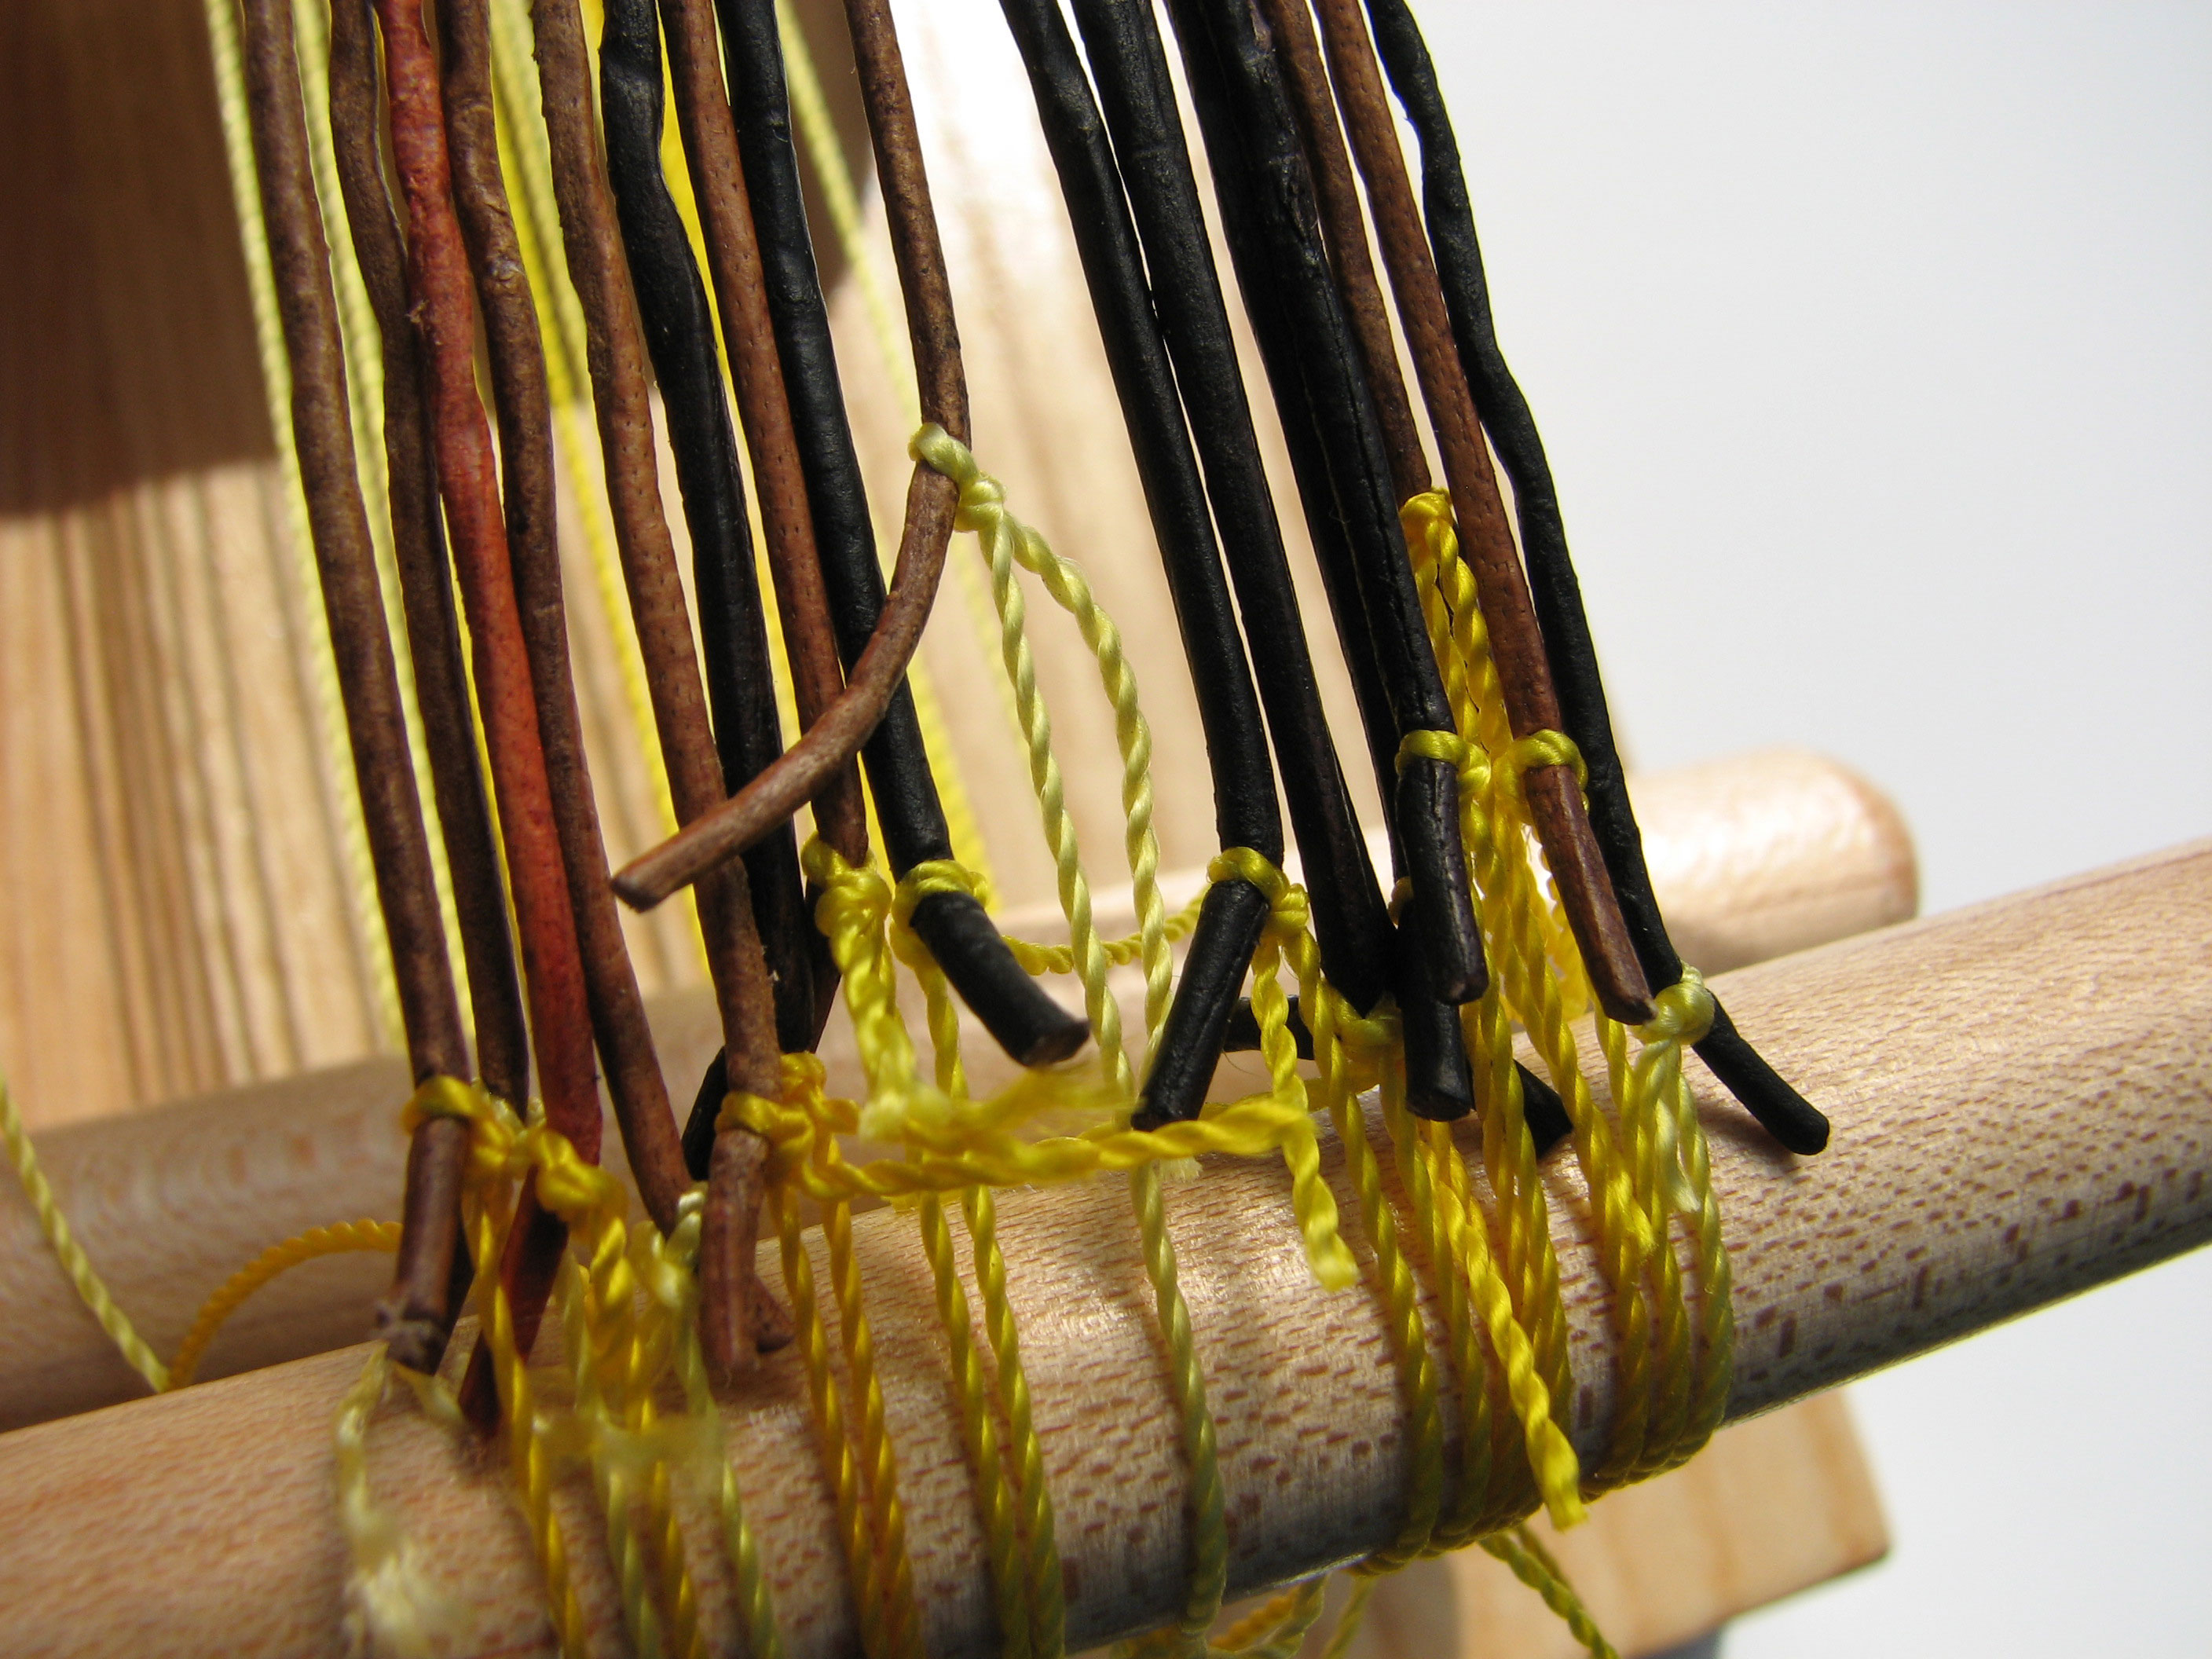
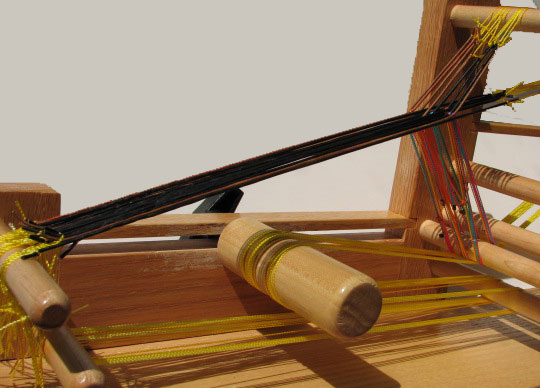
This was my first time working Patons Yarn. The warp is Patons Grace 100% mercerized cotton and Patons Grace Wool and the weft also is the Patons Grace mercerized cotton. I was a bit nervous that the wool would be “sticky” and I would have trouble making a shed. It stuck a very little, but nothing an extra shimmy of the shuttle at the fell line could not fix. I can not wait to warp another band with only the cotton for the warp. I really am a cotton girl at heart. I just love working with the stuff.

Cheers to “braided” selvedges! Hopefully, you will give it a try the next time you warp up your loom. 

 warp, weave, be happy! ~Jennifer

Share this:

  • Click to share on Pinterest (Opens in new window) Pinterest
  • Click to email a link to a friend (Opens in new window) Email
  • Click to share on Facebook (Opens in new window) Facebook
  • Click to share on X (Opens in new window) X
Like Loading...

Inkle Band Ornaments

21 Monday Dec 2015

Posted by Jennifer Williams a.k.a. inkledpink in Design, Projects

≈ 16 Comments

Tags

beads, christmas, holidays, inkle band, inkle ornament, ornaments, patterns, Weaving

inkledpink.com wreath christmas ornament

My favorite thing about this time of year is pulling out all of the decorations and ornaments that we have collected over the years. Many of our ornaments represent memories that we have made on our travels and milestones for our family. Some are handmade treasures, like the ones lovingly hand stitched every year by my mother-in-law for each of her grandchildren.

The boys love pulling out ornaments and saying, “Mommy made this.” or “This is my ornament that Grandma made for me.” Of course, I needed to design inkle band ornaments to add to our collection! I came up with two; a wreath and a snowflake.

inkledpink.com tutorial snowflake ornament

What you will need for the wreath:

an inkle band 3/4” wide at least 30” long.
scissors
craft glue
thread
12″ of weft yarn
embroidery needle
beads (I used large glass seed beads from a big box craft store)

Step 1: Seal the edges of the inkle band with glue thread (see here).

Step 2: Fold a flat knot into the inkle band, leaving ½ an inch of a tail at the beginning.

inkledpink.com tutorial wreath ornament step1.1

inkledpink.com tutorial wreath ornament step2

inkledpink.com tutorial wreath ornament step3

inkledpink.com tutorial wreath ornament step4

Step 3: Repeat these steps 5 more times. Be sure to always fold in the same direction. You will have something like this:

inkledpink.com tutorial wreath ornament step8.2

Step 4: Make sure both tails are no wider than the width of the knots. Cut and secure to prevent from fraying.

inkledpink.com tutorial wreath ornament step6
inkledpink.com tutorial wreath ornament step5

Step 5: Insert the tails into the back of the first and last knot. Add glue to secure.

inkledpink.com tutorial wreath ornament step7

Step 6: Stitch or glue beads as ornaments. (I stitched them using weft yarn).

inkledpink.com tutorial wreath ornament step8.1

Insert needle between the layers of a row and pull yarn through. Stop before the yarn pulls out.

inkledpink.com tutorial wreath ornament step9

Insert the needle halfway into the next row. Add a bead.

inkledpink.com tutorial wreath ornament step10

Skip a few warp threads, insert the needle back into the row and exit the other side. Pull the yarn snuggly so it does not show.

inkledpink.com tutorial wreath ornament step11

Insert the needle into the last row and pull the yarn through. Pull snuggly to secure. Trim.

Step 7: Add a yarn bow and tie a piece of yarn or string to the ornament and you are finished!

inkledpink.com snowflake ornament tutorial step2

Now for the Inkle Snowflake Ornament.

inkledpink.com tutorial snowflake ornament

For the Inkle Snowflake Ornament you will need:

1/2″ wide inkle band at least 24″ long
3 pipe cleaners
-cut 6 pieces to 2 1/4″
-cut 12 pieces to 1 1/4″
1/4″ bell

Follow steps 1 through 3 for the Inkle Wreath Ornament.

Step 4: Make the branches. Fold 2 small pieces over each of the longer pipe cleaner pieces. Repeat 6 times.

inkledpink.com tutorial snowflake ornament step1
inkledpink.com tutorial snowflake ornament step2
inkledpink.com tutorial snowflake ornament step3
Add a second branch.

Step 5: Add a small drop of glue to the bottom end of each branch. Insert a branch into each knot.

inkledpink.com tutorial snowflake ornament step5

Step 6: Tie a bell to the center of each snowflake and add a string to hang.

inkledpink.com tutorial snowflake ornament2

It may not be cold outside (at least not here in the Sunshine State) but, I think I see snow!

I used very simple warping patterns for both projects, but can only imagine how fantastic they would look with fancier patterns! The wreath is woven with 10/2 perle cotton in both the warp and the weft using the following draft:

wreath draft

For the snowflake, I used size 2, Omega brand nylon crochet thread (both warp and weft) in white (w) and white with silver thread (s) with this pattern:

inkledpink.com snowflake draft.

The crochet nylon is available from online yarn store Creative Yarn Source and some big box craft stores sell it too. It comes in a large array of colors.

Ornaments can be made as large or small as you want by increasing or decreasing the width of the band.

inkledpink.com tutorial wreath-size

No matter the width of the band, it will always take six knots to complete the shape. There must be some mathematical explanation for this, right? If you know, please share!

Happy holidays to you and your family! And as always –

warp, weave, and be happy! ~Jennifer

Share this:

  • Click to share on Pinterest (Opens in new window) Pinterest
  • Click to email a link to a friend (Opens in new window) Email
  • Click to share on Facebook (Opens in new window) Facebook
  • Click to share on X (Opens in new window) X
Like Loading...

Beaded Inkle Band Necklace

24 Friday Apr 2015

Posted by Jennifer Williams a.k.a. inkledpink in Design, Inspiration, Weaving material

≈ 13 Comments

Tags

beads, belt buckle necklace, FTWG, Fulco di Verdura, inkle band, necklace, nylon crochet cotton

Have you ever seen something that sparked an idea for a project? I hinted at an idea that hit me last December. It happened while I was watching the television show CBS Sunday Morning. The story I saw was about the amazing jewelry designer Fulco di Verdura and a belt buckle necklace he created. What I saw inspired me to recreate his work as an inkle band. The result is this beaded inkle band belt buckle necklace.

inkledpink-beaded-inkle-band-necklace

Here is his beautiful original necklace that appeared upon my television that fateful day. Isn’t it a vision of inkle band inspiring loveliness?

Fulco-di-Verdura-buckle-necklace-screen-shot

Yes, this is an actual picture of the screen of my television.

His necklace just screamed inkle band to me. According to this article, it is made of platinum and set with 566 aquamarines and 39 rubies.

I needed to figure out how to weave a whole inkle band with beads. Both Anne Dixon’s book The Weaver’s Inkle Pattern Directory: 400 Warp-Faced Patterns and Helene Bress’ book Inkle Weaving talk about inkle weaving with beads, but in both books they are only adding a few beads here and there.  In recreating Mr. Verdura’s necklace, I wanted to make a band as close to his design as possible, so in the end I used the method Helene Bress used of adding beads to the warp yarn before winding it onto the loom, just with many more beads!

It took 897 3mm cube Delica seed beads! One bead at a time…

You might remember my post about sampling. Well, so I didn’t run out and buy too many beads, or worse, too few, I wove a few samples first. By doing so, I figured out that 7 rows of weaving with the beads equaled 1 inch (1.27cm) of band. Having that information helped me determine how many tubes of beads I needed in order to reach the length I wanted. (I bought extra. Beads have a tendency to spill when you have 3 cats and 2 little boys.) I put the beaded warp yarn on the loom, remembering to only slide the beads onto the unheddled threads.

beaded-inkle-band-warp

Having my little guys around when I have steal some time to weave causes funny mishaps in the middle of winding on a warp…

Oops!

Oops!

Sampling also showed me it is best to start and end with a non-beaded heddle thread. When I didn’t do so, the selvedges were wobbly and would curl under the beads. The warp for this band is only 13 ends wide, but I think I would do the same process for a beaded inkle band of any width.

beaded-inkle-band-selvedge.

Phew, no more wobbly selvedge.

For both the warp and weft I used Omega brand nylon crochet thread, which was slippery enough to allow the beads to slide easily into place. (Sometimes too easily!) To weave the beads into the band, I opened the shed, passed the shuttle, slid the beads into place, changed the shed, beat, then passed the shuttle and slid beads into place again. This process securely locked the beads.

weaving-beaded-inkle-band

Weaving with the beads essentially causes the band to be a balanced plain weave instead of warp-faced, but the color of the yarn recedes so it still looks warp-faced.

beadedinklebandbalanced weave

One of the challenges of creating projects with inkle bands is that there is always a fringe to contend with and I wanted a clean, fringeless edge. What to do? My answer was to only weave one pass of the shuttle before adding a row of beads. The beauty of having the beads on the warp is that I was able to weave the fringe back into the beads for a finished, secure edge, that did not ravel. The bead holes are big enough to allow for three strands of fringe to be passed back through without too much effort.

beaded-inkle-band-fringeless-edge

The necklace is actually two pieces. Since it was not made out of fabric, I couldn’t just cut it in half. Instead, while the band was on the loom, I wove a predetermined length, ended it with one shot, advanced the warp, leaving about 12 inches (30.48cm) of unwoven warp and began weaving again, with a clean edge start. But, for the second piece I ended it with about a ½ inch (1.27cm) of plain weave with 3/2 cotton as the weft. This end was then sewn to the back of the band to connect the necklace and make it look like one continuous band.

beadedinklebandheader

One of my favorite things about the necklace is the clasp I found in the Etsy shop Golden Twin Clasps.

beaded-inkle-band-clasp

The lighting (ahem, not the photographer) makes this look like a necklace made with lighter beads.

And, that is how I wove with beads to create my beaded inkle band buckle necklace. Thank you, Mr. Fulco di Verdura for the inspiration. Want to see the story that started it all? You can watch it here.

I admit, I love the way my necklace turned out! It has a beautiful drape because of the nylon crochet thread and a pleasant weight since it is woven with beads. My necklace may not be set in platinum with aquamarines and rubies, but it sparkles and feels great on. Yup, it meets all the criteria I have for jewelry! How about you?

Oh, and I did finish the necklace in time to have it for the fashion show and fiber exhibit at the FTWG Conference back in March. It was close, but I did it!

warp, weave, be happy! ~ Jennifer

Share this:

  • Click to share on Pinterest (Opens in new window) Pinterest
  • Click to email a link to a friend (Opens in new window) Email
  • Click to share on Facebook (Opens in new window) Facebook
  • Click to share on X (Opens in new window) X
Like Loading...

Give Backstrap Weaving a Chance

30 Monday Mar 2015

Posted by Jennifer Williams a.k.a. inkledpink in Backstrap Weaving

≈ 6 Comments

Tags

Andean Pebble Weave, backstrap, backstrap loom, Florida Tropical Weavers Guild, inkle band, inkle weaver, Lake Yale, Laverne Waddington, loom, Weaving

Weekend before last, I learned how to make these on a backstrap loom,

backstrap first attempt ip

in a workshop taught by the guru of backstrap weaving, Laverne Waddington,

wpid-20150321_085312.jpg

So nice to meet Laverne in person!

with this view of Lake Yale in Leesburg, FL.

wpid-20150322_074647.jpg

Sunrise on beautiful Lake Yale.

How lucky am I?! My first backstrap weaving workshop was taught by the delightful Laverne Waddington! What a true treat and pleasure. She stopped by the Florida Tropical Weavers Guild Annual Conference to teach a 2 ½ day Andean Pebble Weave class.

Meeting Laverne, after knowing her only from the online inkle group on Ravelry, was great! She is so incredibly nice and a skilled and VERY patient teacher! We started with provided, pre-warped backstrap looms, so after a quick demo and introduction we were able to begin weaving! Have you ever taken a workshop from someone who has a lot of knowledge for the subject, but did not convey the “how to” well? None of that here. Laverne is a natural born teacher! The passion she has for backstrap weaving shows and she is a teacher at heart. Each lesson seamlessly built on the previous lesson. We learned how to wind a warp, make heddles, read and design patterns, and “read the fabric”. The class was well paced, keeping the interest of faster weavers, yet artfully paced as to not lose the slower weavers (uh, yup meaning me!). 

The backstrap I got to use during class.

The backstrap I got to use during class.

Having never done any backstrap weaving before, but being an inkle band weaver, I admit that I anticipated I would take to it easily. WRONG! At least I can say, I liked my selvedges and I was familiar with the rhythm of pick-up. Beyond that, am I ever glad that Laverne is such a wonderfully patient teacher, because I think I gave her patience a test!

4 warps started

4 warps started

Backstrap weaving for me was like driving in England. Driving a car is something I do every day, but put the car and the steering wheel on the opposite side and I’m a mess! Let’s just say, I touched the curb more than a few times while in the UK – no damages or injuries. Similarly, I spent as much time unweaving as I did weaving during the class. Fortunately, unlike driving in England, backstrap weaving is something I enjoyed enough to try again!

Backstrap weaving workshop with Laverne Waddington

Classroom set for open house night.

It was such a creatively fulfilling weekend. Laverne’s workshop taught me so much. If you ever have a chance to take a workshop from this lovely lady, do it! 

I’m working on an inkle band backstrap so I can finish the bands from class. Spending that much time around so many fiber loving people was so enriching. I’m inspired to do nothing but weave. I’ll be sharing the results soon.

Andean Pebble Weave backstrap

One of Laverne’s beautiful Andean Pebble Weave backstrap looms.

Oh, what a beautiful setting for all the creativity of the weekend!

Another gorgeous sunrise.

Another gorgeous sunrise.

IMG_0846

Any place that has a Hammock Village has the right idea.

Warp, weave, be happy!

~Jennifer

Share this:

  • Click to share on Pinterest (Opens in new window) Pinterest
  • Click to email a link to a friend (Opens in new window) Email
  • Click to share on Facebook (Opens in new window) Facebook
  • Click to share on X (Opens in new window) X
Like Loading...

A Tisket, A Tasket, Weave an Inkle Basket

03 Wednesday Apr 2013

Posted by Jennifer Williams a.k.a. inkledpink in Projects, Tutorials

≈ 39 Comments

Tags

basket, inkle band, sew, thrumbs, Weaving

I’ve always wanted to try basket making. Update: 8/29/18 I have tried basket weaving and now I have, oh my, it is a wonderful as I had imagined. They are beautiful and useful- the same as inkle bands. So, I got this crazy idea; why not weave a basket with inkle bands?! Inkle band basket tutorial final

My inkle basket is created by cutting two inkle bands into strips and weaving them together in a simple over under pattern. For a little contrast, I used two different bands to make the basket , but it would look really nice made out of one pattern too. My band was 1 1/2″ wide and the final basket is 4 1/2″ L x 4 1/2″ W x 4 1/2″ H.

Supplies needed:

1. Inkle band(s) 2. masking tape 3. extra yarn, floss, or thread 4. all purpose glue 5. knitting needle (optional) 6. scissors 7. straight pins and embroidery needle 8. something to measure with 9. clothes pins

1. Inkle band(s) 2. masking tape 3. extra yarn and thread 4. all purpose glue 5. knitting needle (optional) 6. scissors 7. straight pins and embroidery needle 8. something to measure with 9. clothes pins (*not pictured: 1/8″ (3mm) wide coordinating satin ribbon and sewing thread)

Update: 8/29/18 Thanks to a fellow Inkle Weaver in the Inkle facebook group an error was found in my calculations below. I am ever grateful for the discovery! The update is in italics below.

We have to do a bit of math to determine the length of inkle band you will need.

Multiply width of inkle band by 3 = width of basket base
Multiply width of basket base by 3 = length of one *vertical inkle strip
Multiply length of one *vertical inkle strip by 6 = total length of band needed for *vertical strips of the basket

Then:

Multiply width of basket base by 4 = length of one *horizontal inkle strip
Multiply the width of the band by 2. Add to length of one horizontal inkle strip – this will allow for overlap of the woven strips)
Multiply length of one *horizontal inkle strip by 3= total length of band needed for *horizontal strips of the basket

*vertical and horizontal refer to the direction of the strips as they are woven to make the sides of the basket.

example: (for easy math imagine your band is 1 inch wide)
1″ x 3 = 3″ (Width of basket base)
3″ x 3 = 9″ (Length of one vertical strip)
9″ x 6 = 54″ (Total length of band needed for Vertical Strips: excluding fringe)
3″ x 4 = 12″ (Length of one horizontal strip)
2 x 1″ = 2″ (width of inkle band multiplied by 2)
12″ + 2″ = 14″ (Length of one horizontal strip plus width of band x2)
14″ x 3 = 42″ (Total length of band needed for Horizontal Strips of the basket

The example basket would measure 3″L x 3″W x 3″H.

Following the example above, with two bands, as I did, you would need one band at least 54″ for the vertical strips and one at least 42″ for the horizontal strips. If using only one band the two totals need to be added together. Your band would need to be at least 96″. These totals are excluding fringe. The width of the bands will determine the final dimensions of your basket.

So let’s get started!

You will need 6 vertical strips and 3 horizontal strips each cut to the lengths you calculated.

To prevent the ends from raveling, seal the ends. Thread a needle with sewing thread. Put a bit of glue on the end of the thread as wide as the band. I call this glue thread. Yes, I thought long and hard on that name.
inkle band basket tutorial step 9.5.

Insert the needle into the “tunnel” between the warp layers, one or two rows from the top edge. Pull the needle and thread all the way through until the glue thread is sandwiched in the band. Press firmly with your fingers to seal.
inkle band basket tutorial step 9

Trim the strip above the glue thread row. Apply glue along the top of the cut edge. Let the glue dry for at least 15 minutes. Your strips should be good and sealed now.
Inkle band basket tutorial step 9.2

Now we are ready to make a basket!

Begin with 4 vertical strips placed like this. Inkle band basket tutorial step 1

Then:
Inkle band basket tutorial step 2

And last strip placed; your base is built. The base square should be centered with the strips edges being evenly lined up on all four sides. Tip: Use a knitting needle to help nudge the strips into place.
Inkle band basket tutorial step 3

Use the masking tape or straight pins to secure the base so it doesn’t shift while you weave the walls.
Inkle band basket tutorial step 4

Begin building the walls by weaving a horizontal strip around the base strips.
Inkle band basket tutorial step 5 Inkle band basket project step 6

Add glue to the overlap of the horizontal strip inside the basket and weave the overlap behind the next vertical strip to hide it.
Inkle band basket project step 7

inkle band basket project step 8

Oops, the strips in this picture are not sealed…

As you continue building the walls of the basket it might be helpful to fold the vertical strips over the horizontal strips to aid in keeping everything in place.

This is what it will look like when all of the sides are built.
Inkle band basket project step 10

Whipstitch around the top edge with the embroidery needle and ribbon, securing the vertical strips to the horizontal strip. Be sure to insert the needle below the glue thread row.
Inkle band basket tutorial step 11.

Braid handles out of the fringe you cut off or lengths of yarn. Wrap the ends with yarn and sew to the basket.Inkle band basket embroidery edge

And ta-da, you have a woven inkle basket!
Inkle band basket tutorial final

My basket is filled with some fibery goodness that just arrived in the mail. Can’t wait to empty it and fill it again. What will you fill your basket with?

warp, weave, be happy! ~ Jennifer

Share this:

  • Click to share on Pinterest (Opens in new window) Pinterest
  • Click to email a link to a friend (Opens in new window) Email
  • Click to share on Facebook (Opens in new window) Facebook
  • Click to share on X (Opens in new window) X
Like Loading...

Sample, Sample, Sample

26 Tuesday Mar 2013

Posted by Jennifer Williams a.k.a. inkledpink in Tips

≈ 8 Comments

Tags

inkle band, inkle loom, leather lacing, nylon yarn, samples, warp

My weaving study group teacher is always saying SAMPLE, SAMPLE, SAMPLE. It makes complete sense to sample. Mistakes and discoveries about yarn type, color, etc. can be made before delving into the final project and save a lot of time and money.

How do you sample inkle weaving. Heck, compared to a floor loom warp inkle loom warps are sample size. Even though I’m planning a narrow band, only 19 warp ends, warped at the shortest length it still uses 19 yards of my limited quantity and expensive warp material. I’m sampling leather. $$$ You get the picture.

Here’s what I came up with:

I cut 19 ten inch lengths of the leather. Then, I cut 19 pieces of an inexpensive nylon yarn (it was the first thing I grabbed) and tied each to one end of each leather piece. The nylon pieces were long enough to tie to the front peg of the loom. At the other end of the leather, I tied it to the nylon yarn without cutting it from the spool.

Nylon tied to both ends to make one long warp end.

Nylon tied to both ends to make one long warp end.

Then, I wound that warp end onto the loom, cutting it from the spool when I got back to the beginning; tying it off.

Warp ends individually tied to the front warp peg.

Warp ends individually tied to the front warp peg.

Top of warp ends tied to the nylon yarn.

Top of warp ends tied to the nylon yarn.

Top of leather/ nylon warp heddled and unheddled.

Top of leather/ nylon warp heddled and unheddled.

Side view of leather/ nylon warp threads.

Side view of leather/ nylon warp threads.

Usually, I don’t tie-off each warp thread individually, but it worked well here. I have woven and taken out three different weft materials so far. The leather has a memory, so the weaving leaves it a bit wavy. I’d hate to do that if it were a real warp.

I do have a lovely mini-loom that I use for sampling when the material isn’t so precious. I’m curious to know what other people do to sample inkle weaving.

warp, weave, be happy! ~ Jenifer

Share this:

  • Click to share on Pinterest (Opens in new window) Pinterest
  • Click to email a link to a friend (Opens in new window) Email
  • Click to share on Facebook (Opens in new window) Facebook
  • Click to share on X (Opens in new window) X
Like Loading...

Do You Have Any Change?

18 Monday Mar 2013

Posted by Jennifer Williams a.k.a. inkledpink in Projects

≈ 8 Comments

Tags

change purse, inkle band, pick-up, projects

What do you give as a thank you gift to people for opening their home and welcoming you for a week and treating you like family. Simple. Give them something from the heart made with the hands. Inkle band change purse pick-up

Yup, I made change purses with the bands from my last post. I’ve actually wanted to do an inkle change purse since I first learned how to weave inkle. The original idea and inspiration came from a great tutorial on Curious Weaver. My purses ended up being slightly different than her lovely purse, however. I sewed my bands vertically to minimize the amount of cutting and joined them by hand to be able to hide the join stitches.Inkle band change purse joining 2 Inkle band change purse joining

I used a blanket stitch to close the side seams.Inkle band change purse blanket stitch seam

The purses are lined with cotton batik, which in hindsight I should have cut on the bias to allow for give inside the purse.

Inkle band change purse batik lining 2 Inkle band change purse batik lining

My assembly method more closely follows the tutorial from U-Handbag. Both tutorials miter the corners to give a flat bottom and use a glue-in frame. My purse frames are the sew-in type, stitched with nylon beading cord (think fishing line).

Inkle band change purse sew-in frame

The first purse ended up being a tricky little project at times. There were some lessons learned:
-Very fuzzy yarn is not good for inkle weaving. You WILL end up cutting it out.
-Darker, thicker, contrasting yarn is a good idea for doing pick-up weaving when you are sleepy- easier on the eyes.
-Once you get the rhythm of pick-up it goes faster than you think it will. It can take a while to get a rhythm.
-Measuring accurately prevents a lot of headaches.
-The trick to sew-in purse frames: the needle needs to be inserted at an angle.

Now that I know what the heck I’m doing, I’ll definitely be making one of these again for myself. The bottom of my pocketbook is always full of change that I can never seem to find when I’m ready to pay for something…

I have one more gift to make, which hopefully, I’ll be able to get to this week, between the diaper changes and feedings of one and the potty training of the other. Stay tuned.

warp, weave, be happy!

~Jennifer

Share this:

  • Click to share on Pinterest (Opens in new window) Pinterest
  • Click to email a link to a friend (Opens in new window) Email
  • Click to share on Facebook (Opens in new window) Facebook
  • Click to share on X (Opens in new window) X
Like Loading...

1st Inkle Pick-up Band

02 Saturday Mar 2013

Posted by Jennifer Williams a.k.a. inkledpink in Design

≈ 13 Comments

Tags

Anne Dixon, inkle, inkle band, pattern, pick-up, warp

My first completed pick-up inkle band!
Anne Dixon Inkle Band Pick-up pg 75

I did about as much “unweaving” with this band as I did weaving, but in the end I am really happy with the final result. The two pick-up patterns are Baltic-style pick-up on 13 warp ends from page 75 of Anne Dixon’s wonderful book The Weaver’s Inkle Pattern Directory 400 Warp-Faced Weaves.

Left: inkle band frontRight: inkle band back

(Pattern 1) Left: band front Right: band back

(Pattern 2) Left: band front Right:  band back

(Pattern 2) Left: band front Right: band back

Pattern 1

Pattern 1

Pattern 2

Pattern 2

Dropped pick-up warps to separate patterns.

Dropped pick-up warps to separate patterns.

Stay tuned for the cute project planned for this band…

warp, weave, be happy!
~Jennifer

Share this:

  • Click to share on Pinterest (Opens in new window) Pinterest
  • Click to email a link to a friend (Opens in new window) Email
  • Click to share on Facebook (Opens in new window) Facebook
  • Click to share on X (Opens in new window) X
Like Loading...

An Inkle Bit of Love

14 Thursday Feb 2013

Posted by Jennifer Williams a.k.a. inkledpink in Projects, Tutorials

≈ 13 Comments

Tags

air, Aleene's glue, b m, heart, inkle, inkle band, kjk, love, magnet, pin, Valentine's day, Weaving

Updated 2/13/2021

Happy the day before Valentine’s Day. I revisited this post today after Liz Gipson a.k.a the Yarnworker, shared the project on her facebook page of the same name. Thank you, Liz! I am so glad she did. I haven’t seen these little hands and fingers in so long. They are still cute, in my unbiased mommy opinion, just 8 years bigger. Time does fly. In revisiting the post I made a few updates. The update is in two parts, so be sure to keep scrolling to the part 2.

Happy Valentine’s Day! Today is the perfect day for my first post since June; the perfect day to share that the reason for the break is the new love in my life. Growing this new love has kept me from weaving and writing, but ultimately has brought me so much joy. I am happy to introduce you to my new love, our new son, who joined us on January 10th.

My new love!

Now that I’m not “growing”’ this love anymore, I feel more like myself and am so happy to be weaving, writing and creating again. Although, arguably, I was creating for 9 months… So, here is an “inkle bit of love” project for you. I hope you enjoy.

Supplies needed: Craft glue, scissors.

You will need a band no wider than 3/4″ cut into four 8″ long pieces, any wider and it just looks wonky. However, shorter pieces will give you a smaller heart and longer pieces will give you bigger heart. (and the world needs more of those!) Use the glue to seal the edges of each band piece so they don’t fray and to glue the band ends down after you’ve gotten them into place.

Updated (2/13/21)

The Steps:

  1. Interlace four ends of your cut bands, lining up the cut edges with the selvedges.

2. Fold the left vertical band over the top and under the bottom horizontal strips. Be sure not to twist when folding.

3. Fold the top horizontal band over, under, over the three vertical bands. Be sure not to twist when folding.

4. Fold the bottom horizontal band piece behind the center heart and glue in place. It is not woven in.

5. Repeat step 4 with the right vertical band.

Wouldn’t this heart be fun made into a lapel or scarf pin, a hair clip, a magnet… What else? Do you have any ideas?

Update part 2 (2/13/21):

Looking back on this post gave me the urge to make a pin. In my bin of bands that have no purpose but were fun to weave, I found a thinner 1/2″ band, in Valentine’s Day worthy colors. The heart is smaller than the original , about 3 1/2″ wide by 2 1/2″ tall.

The main difference from the original heart and this one, besides being smaller, is I bent the two outer bands back instead of over and back. The smaller size just seemed to call for it.

Then, I sewed a pin to a piece of felt cut to fit the back of the heart and glued the felt to the heart.

Et voila, a Valentine’s Day heart pin.

This was a fun update.

Warp, weave, be happy! ~ Jennifer

Share this:

  • Click to share on Pinterest (Opens in new window) Pinterest
  • Click to email a link to a friend (Opens in new window) Email
  • Click to share on Facebook (Opens in new window) Facebook
  • Click to share on X (Opens in new window) X
Like Loading...

Inkle: Read all About it!

24 Sunday Jun 2012

Posted by Jennifer Williams a.k.a. inkledpink in Reading

≈ 2 Comments

Tags

destash, Handwoven Magazine, inkle, inkle band, inspiration

I sat on the floor with 25+ years of Handwoven Magazine at my finger tips. Stacked in neat tantalizing piles they were waiting for me to attack.Stack of Handwoven Magazine

A few weeks ago a fellow guild member sent out an email bragging she was destashing her Handwoven Magazine collection dating back to 1985 (well, not really bragging, but since I don’t destash I am always jealous of people who do). My heart fluttered, I only learned about the magazine 4 years ago when I became a weaver. Just imagine what inkle weaving treasures could be in those pages. She had EVERY issue. I had to go take a look.

Now, how to find the inkle weaving articles in over 100 issues without taking so long to search that I would have to move into her house. Hmmm! I needed a game plan.

Guess what? Interweave Press, publisher of Handwoven, has indexed every issue since 1979 by subject and author!

Handwoven Magazine Inkle IndexYeah, I know, No way! What an awesome resource!

I went to the index, searched the word inkle, printed the index pages that matched my criteria (6 in all) and headed to her house.

My game plan: with the specific issues and pages I was interested in highlighted, I’d be in and out. Took a little longer than that, but after 2 ½ hours I was a happy girl. I still can’t believe I only walked out with 6 magazines. But my “plan” allowed me to be eagle eye focused.

Since I’m so into inkle band projects, I was hoping to find cool ideas and inspiration; more than belts and bookmarks. While those were there I did find some great goodies. Including a doll I can’t wait to try! How unique and cute are these?!

Inkle Band dolls

“Inkle Band Babies” by Christi Eales Ehler, Handwoven Magazine Nov/Dec 2003 p. 60

Thank you Handwoven Magazine so much for saving me from having to move! This index might just be one of the greatest online weaving resources around. I’m hoping to make some of the fun Handwoven Magazine projects in the near future, let’s hope my son keeps taking long naps!

warp, weave, be happy! ~Jennifer

Share this:

  • Click to share on Pinterest (Opens in new window) Pinterest
  • Click to email a link to a friend (Opens in new window) Email
  • Click to share on Facebook (Opens in new window) Facebook
  • Click to share on X (Opens in new window) X
Like Loading...
← Older posts

Find on Inkled Pink

Top Posts & Pages

  • Inkle Shoelace Aglets: How To
  • Inkle Band Ornaments
  • An Inkle Bit of Love
  • Give Backstrap Weaving a Chance
  • Project Tutorials
  • Inkle Shoelaces for Boston
  • Daily Band Practice: The Gallery
  • Inkle + Origami

Previously on Inkled Pink

  • Daily Band Practice: Day 67
  • Daily Band Practice: Day 66
  • Daily Band Practice: Day 65
  • Daily Band Practice: Day 64
  • Daily Band Practice: Day 63

Archives

  • March 2021
  • February 2021
  • January 2021
  • August 2016
  • December 2015
  • April 2015
  • March 2015
  • February 2015
  • January 2015
  • June 2013
  • May 2013
  • April 2013
  • March 2013
  • February 2013
  • June 2012
  • May 2012
  • April 2012
  • March 2012
  • February 2012
  • January 2012

Categories

  • Backstrap Weaving
  • Daily Band Practice
  • Design
  • Inkle Looms
  • Inspiration
  • Projects
  • Reading
  • Teaching
  • Tips
  • Travel
  • Tutorials
  • Uncategorized
  • Weaving material
  • Yarn

Enter your email address to follow this blog and receive notifications of new posts by email.

inkled pink

inkled pink

    https://www.instagram.com/inkledpink/

    Welcome Readers!

    counter for wordpress

    Blog at WordPress.com.

    • Subscribe Subscribed
      • inkled pink
      • Join 237 other subscribers
      • Already have a WordPress.com account? Log in now.
      • inkled pink
      • Subscribe Subscribed
      • Sign up
      • Log in
      • Report this content
      • View site in Reader
      • Manage subscriptions
      • Collapse this bar
     

    Loading Comments...
     

      %d