• About Inkle
  • About Me
  • Contact
  • Daily Band Practice: The Gallery
  • Project Tutorials
  • Teaching
  • Translate inkled pink

inkled pink

~ warp, weave, be happy!

inkled pink

Category Archives: Tutorials

Inkle Shoelace Aglets: How To

28 Tuesday May 2013

Posted by Jennifer Williams a.k.a. inkledpink in Tips, Tutorials

≈ 17 Comments

Tags

aglets, Boston Marathon, fabric stiffener, heat tool, shoelace tips, shoelaces, shrink tubing, tutorials

Did you know that the little plastic tips on the end of your shoelaces have a name?

blog.inkledpink.com

Of course they have a name, everything has a name right? But, there are some things we can go a lifetime not knowing the name of, like the name of the little plastic tips on the end of your shoelaces.

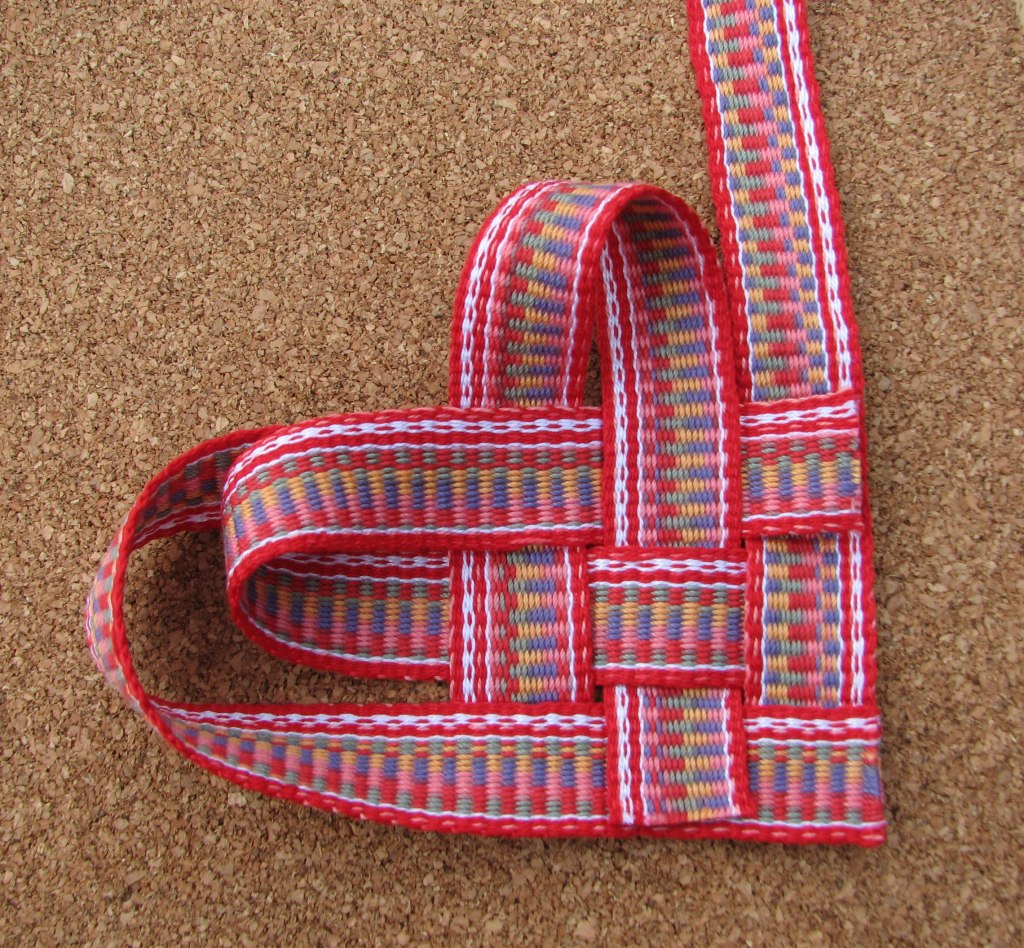
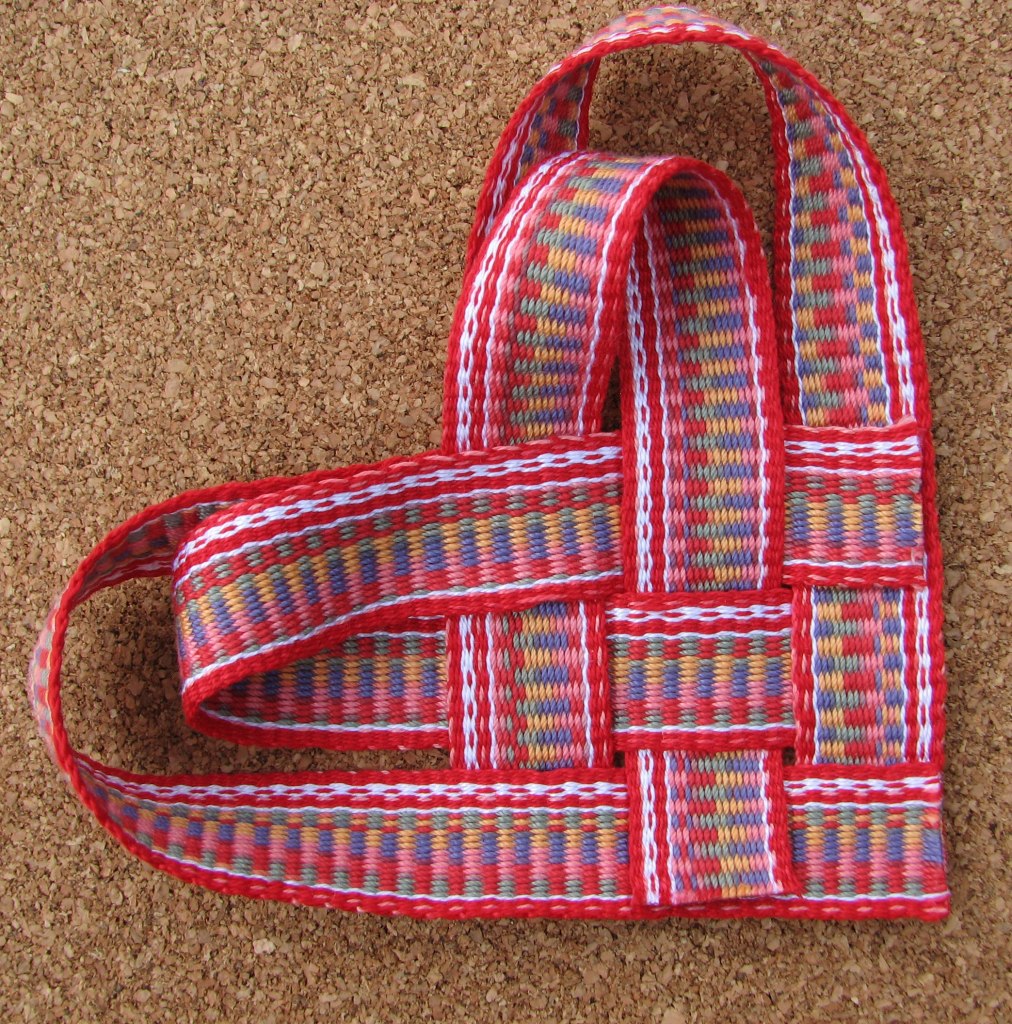
They are called aglets. I learned this as I researched how to finish the ends of the shoelaces I am weaving to raise money for the Boston Marathon victims. (You can read more about that effort here.)

While investigating, I came across a post on the blog A Spinner Weaver, written by fellow inkle weaver Annie MacHale, about a pair of shoelaces she wove and the dilemma of how to finish the edges. The discussion in the comments section of the post sparked the method I came up with for making my shoelace tips. Take a look and let me know what you think.

Materials I used:

-10/2 mercerized cotton (to weave the laces and wrap the tips). My laces have 30 warp ends – 15 heddled and 15 unheddled.
-3/32 heat shrink tubing (from Skycraft Surplus, comes in 4’ lengths)
-fabric stiffener (I used Plaid brand Stiffy Fabric Stiffener – but any brand will do)
-heat gun/tool (I tried a hair dryer, but it just doesn’t get hot enough to shrink the plastic tubing thoroughly. It would come off with a bit of a tug. So, I bought a Darice brand heat tool at Joann Fabric and Craft Stores with a 50% off coupon – Yay!) *I don’t suggest using glue. It scorched under the plastic tubing from the heat.

Other tools:

scissors
ruler
permanent marker
cutting mat
rotary cutter or craft blade

blog.inkledpink.com

Measure, mark, and cut fringe to desired length of shoelace tip plus at least an additional 1/2″. You’ll need this to hold onto.

Lay a loop of thread or yarn about 6" long, down the center of the fringe and shoelace. This will be used to secure the tail of the wrapping at the end.

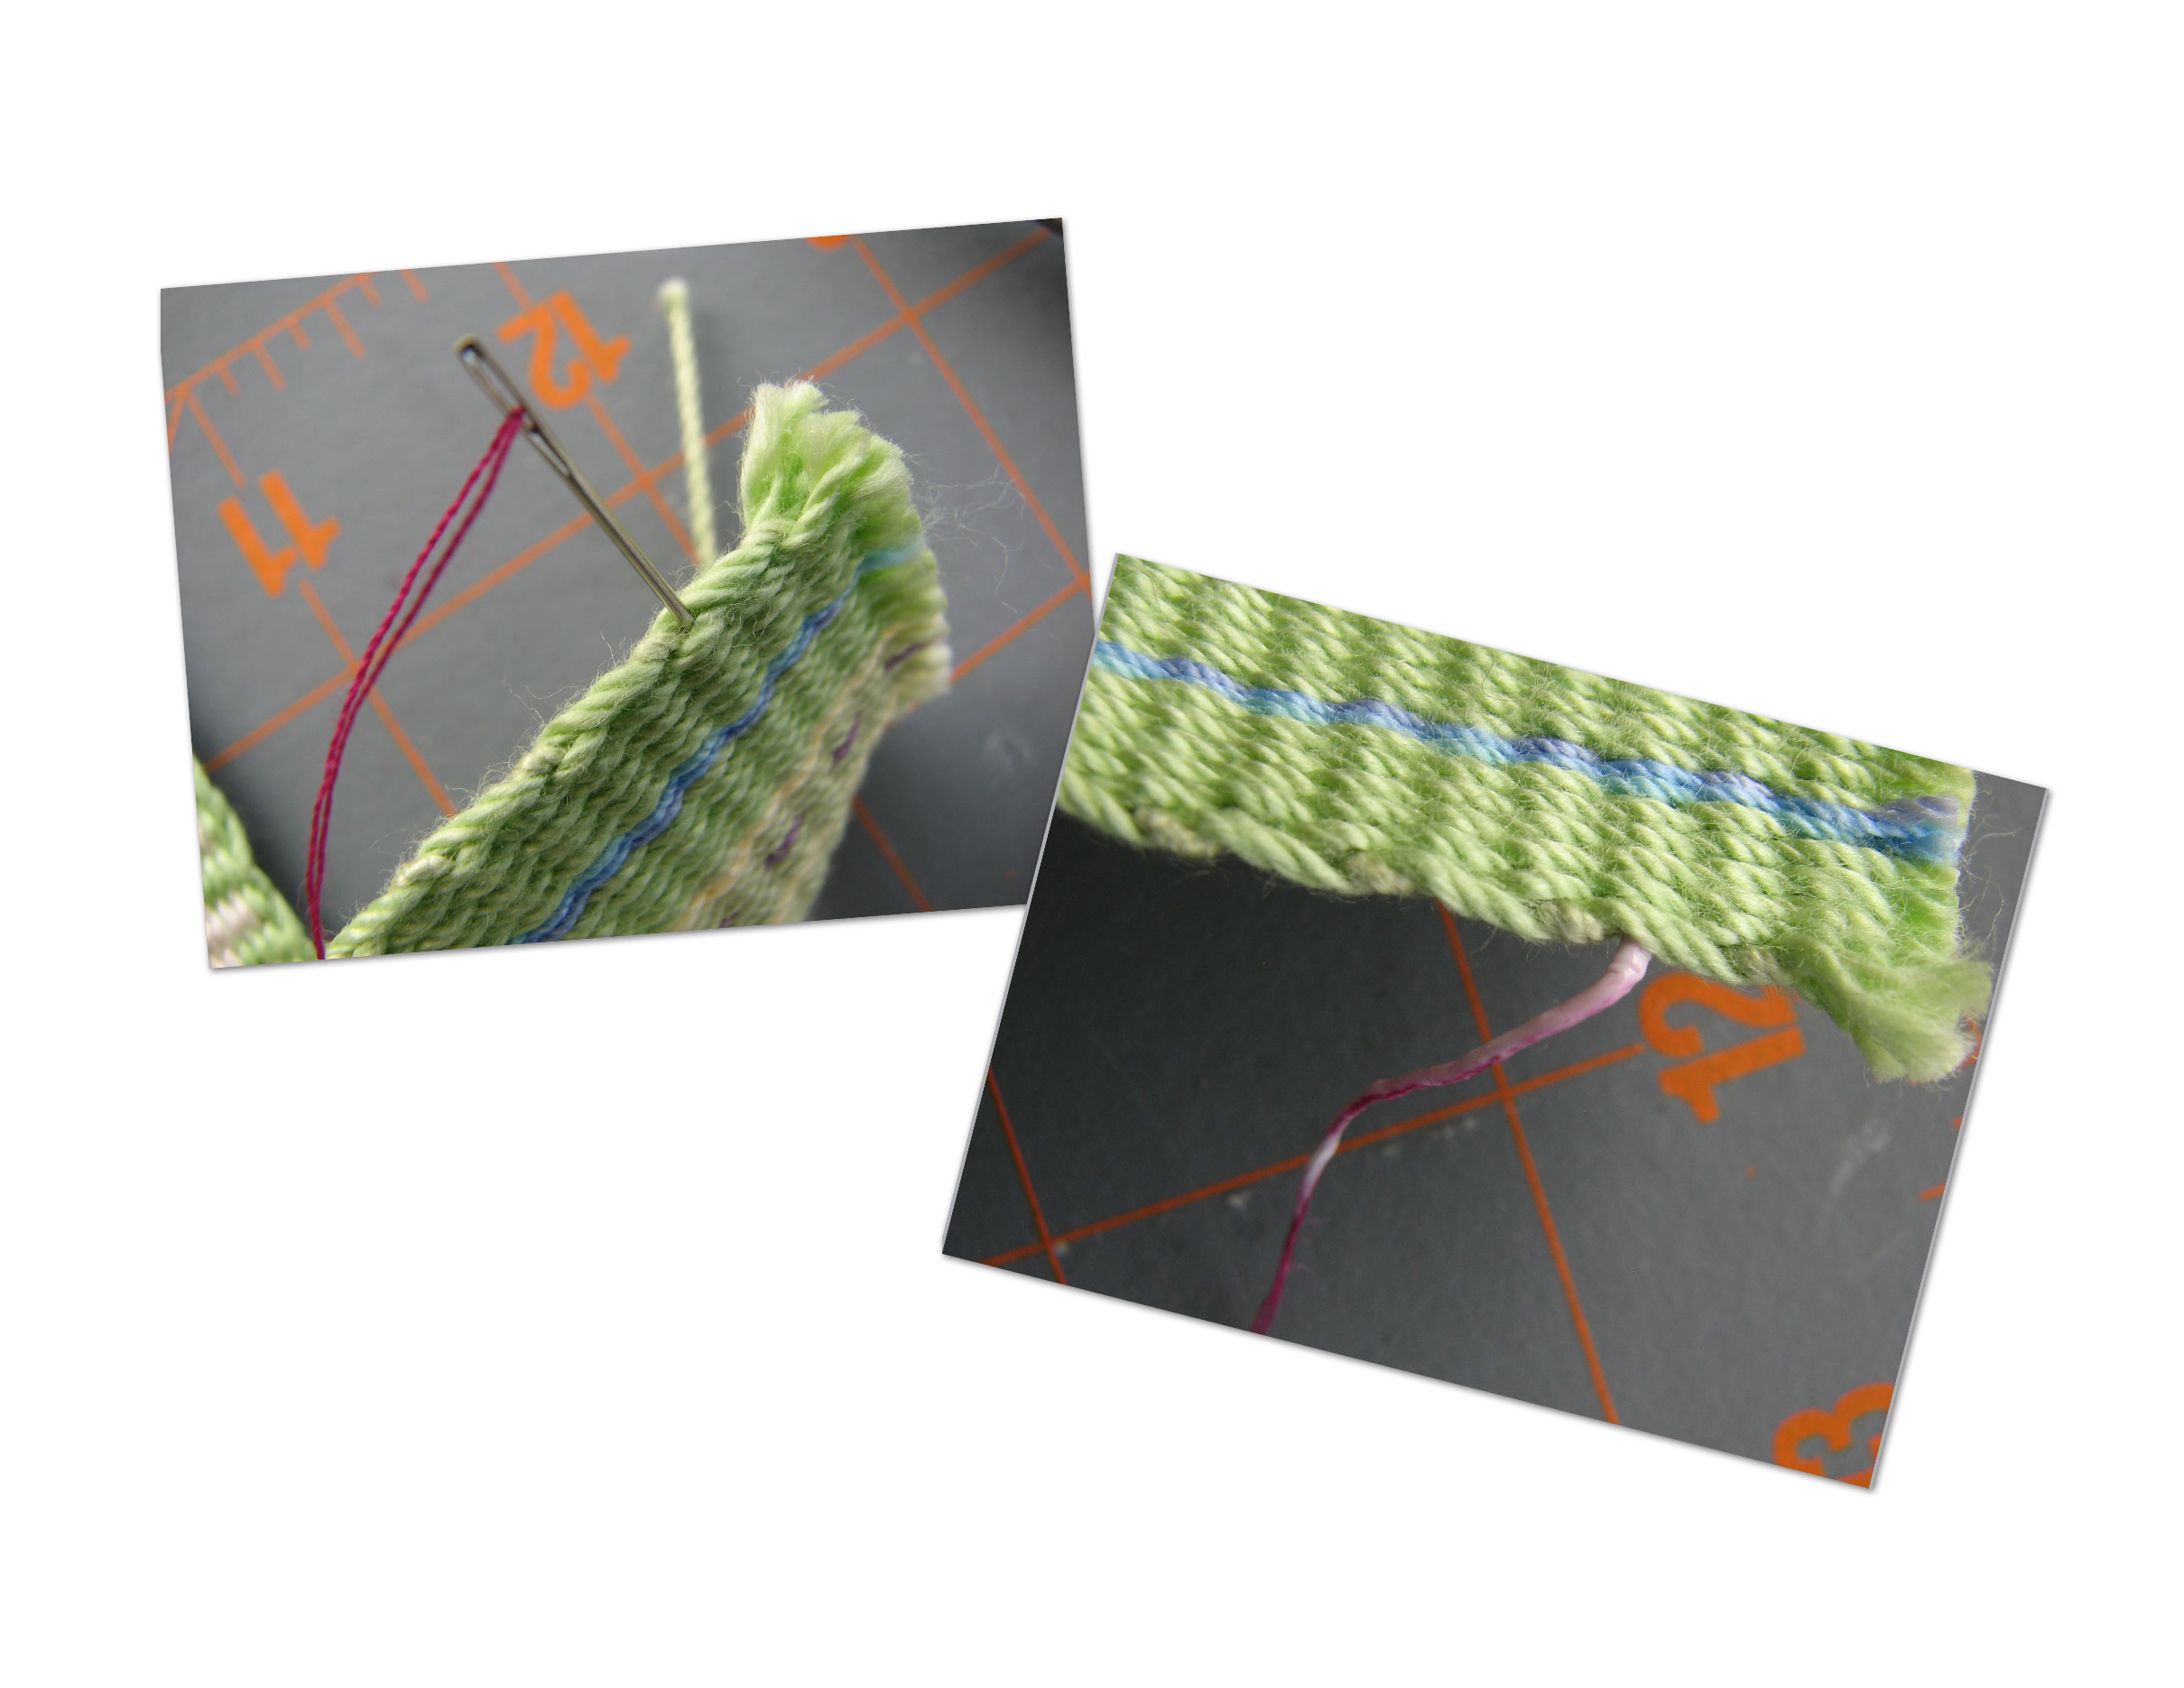
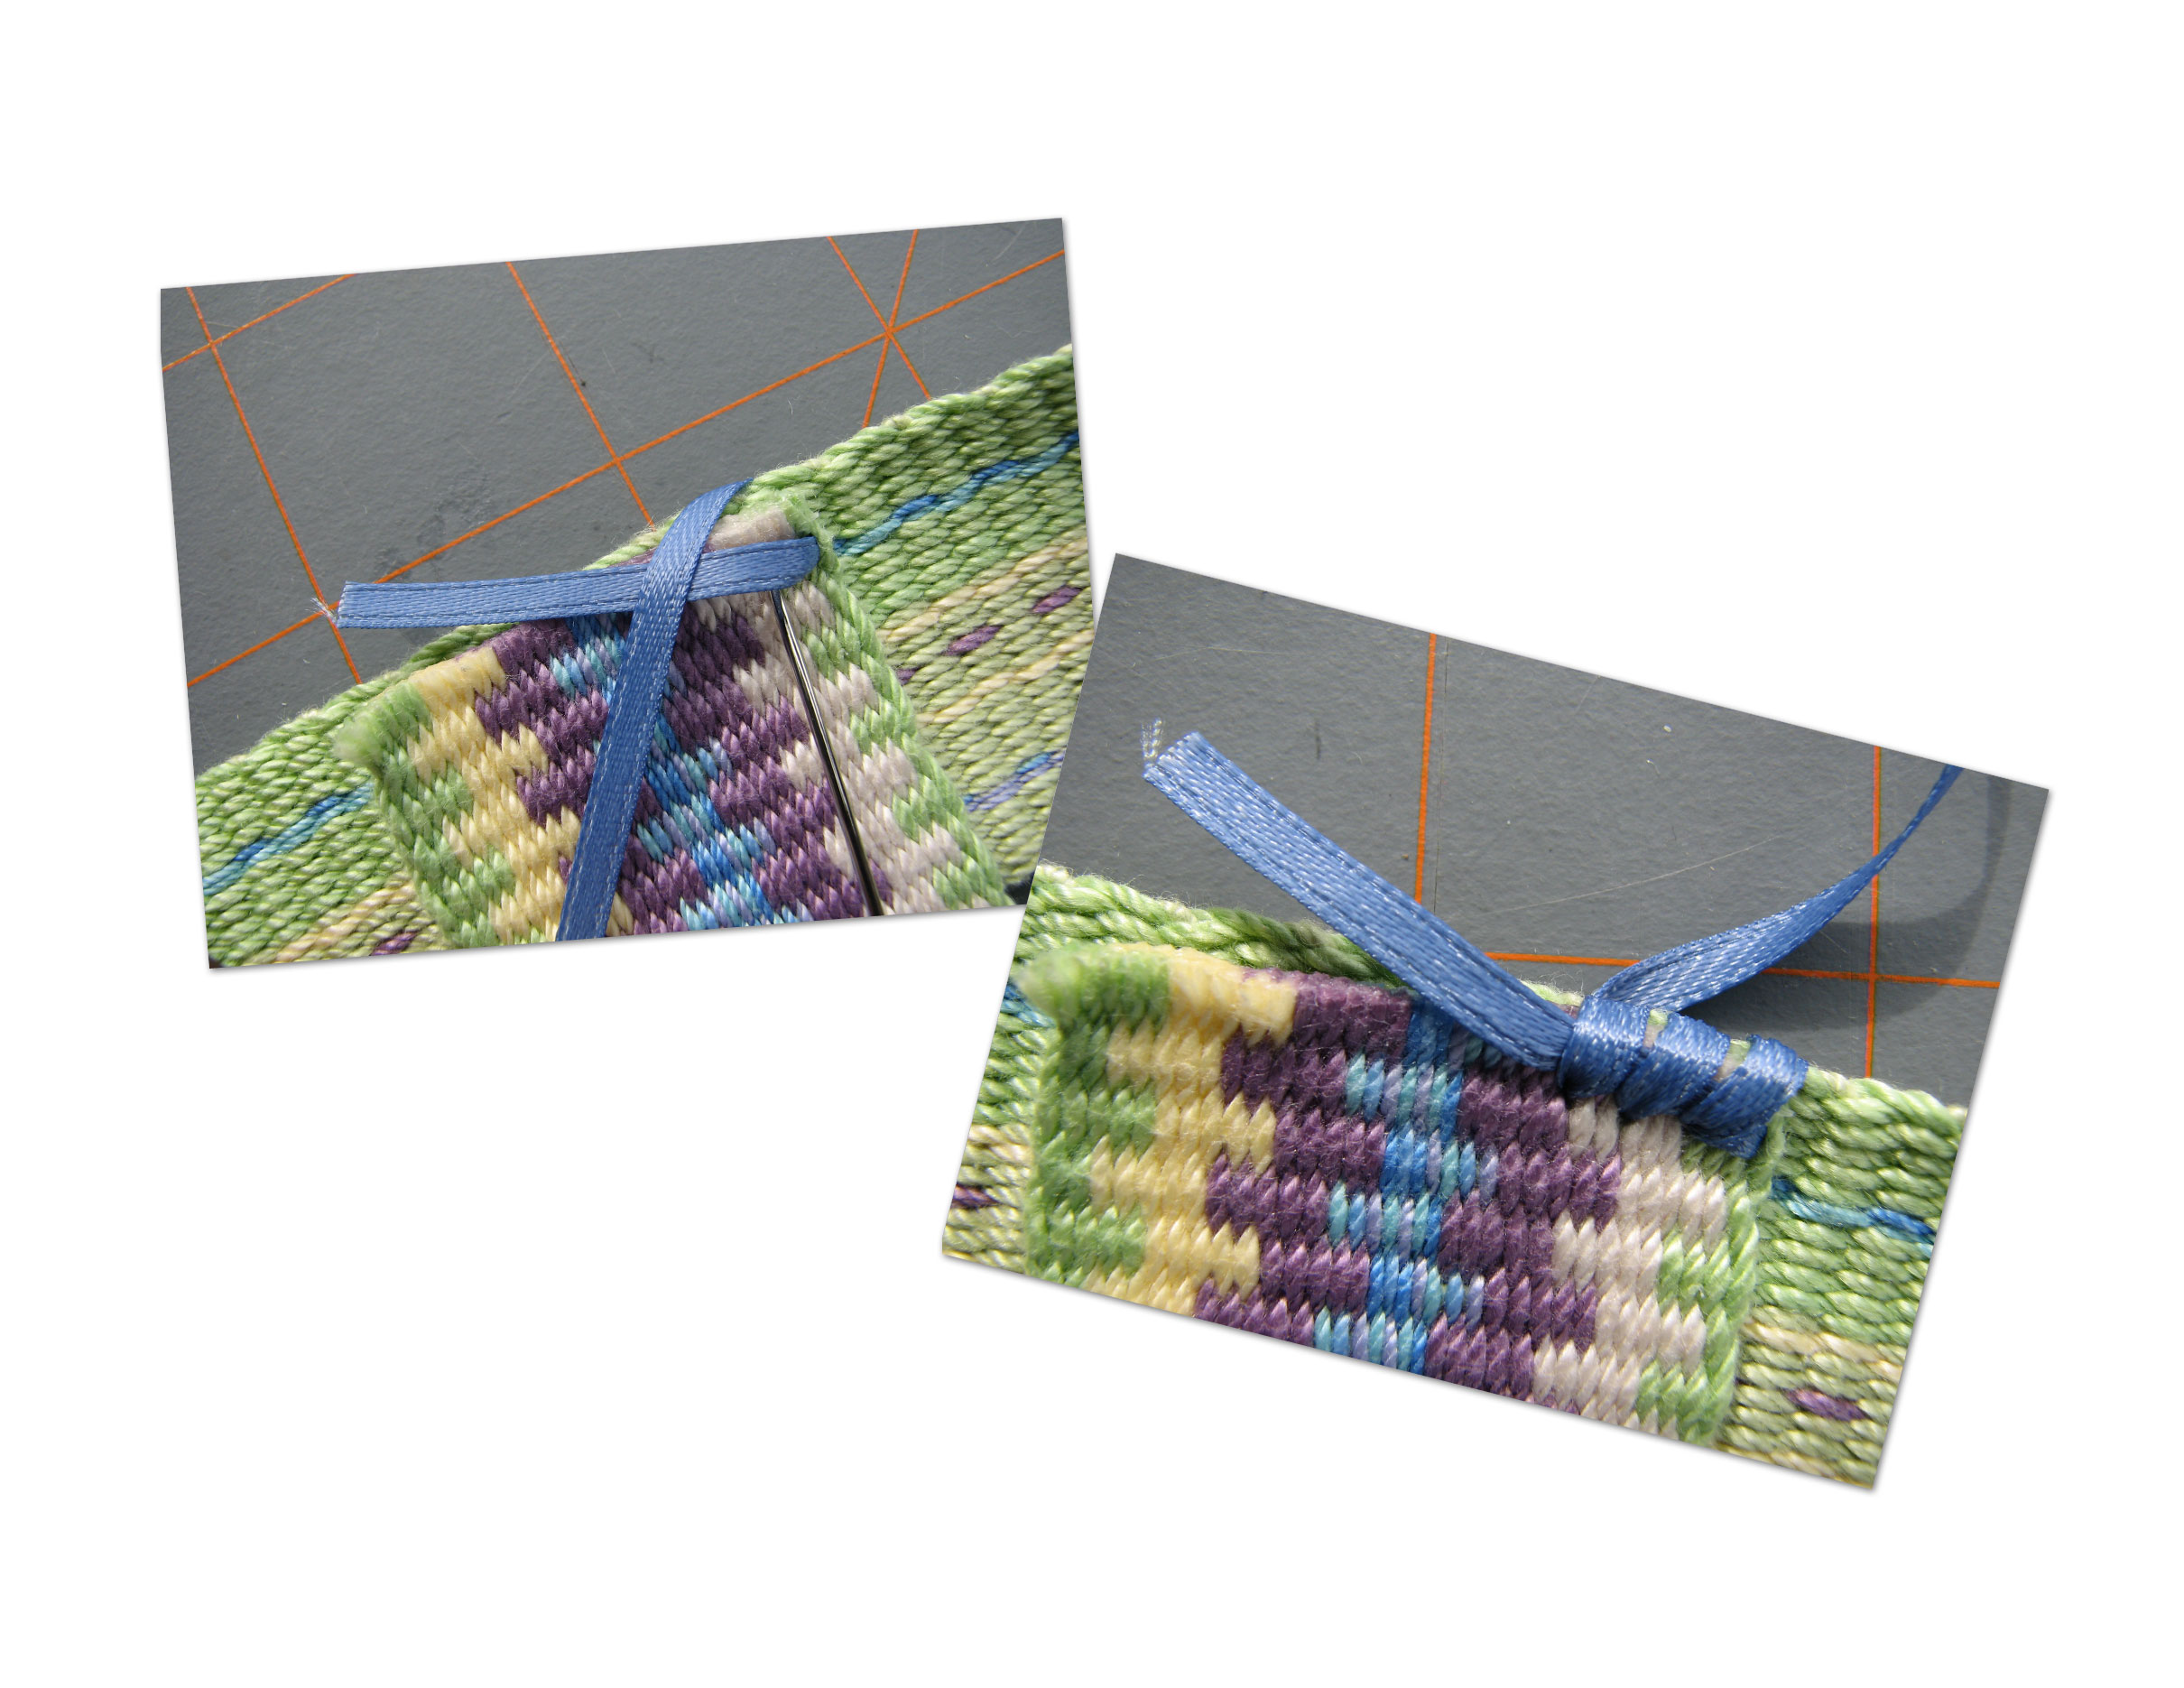
Lay a loop of thread or yarn about 6″ long, down the center of the fringe and shoelace. This will be used to secure the tail of the wrapping at the end.

blog.inkledpink.com

Wrap a piece of size 10/2 yarn, about 16″ long, tightly around the fringe, being sure to start at the last row of weaving.

blog.inkledpink.com

Once you have wrapped to the desired length, insert the tail into the loop as pictured.

blog.inkledpink.com

Pull the loop (orange yarn) until it goes under the wrapping.

blog.inkledpink.com

Continue to pull the loop until the tail comes out the bottom.

blog.inkledpink.com

When you pull the tail all the way through, the top should settle in and be neat and snug. Closely clip the tail.

blog.inkledpink.com

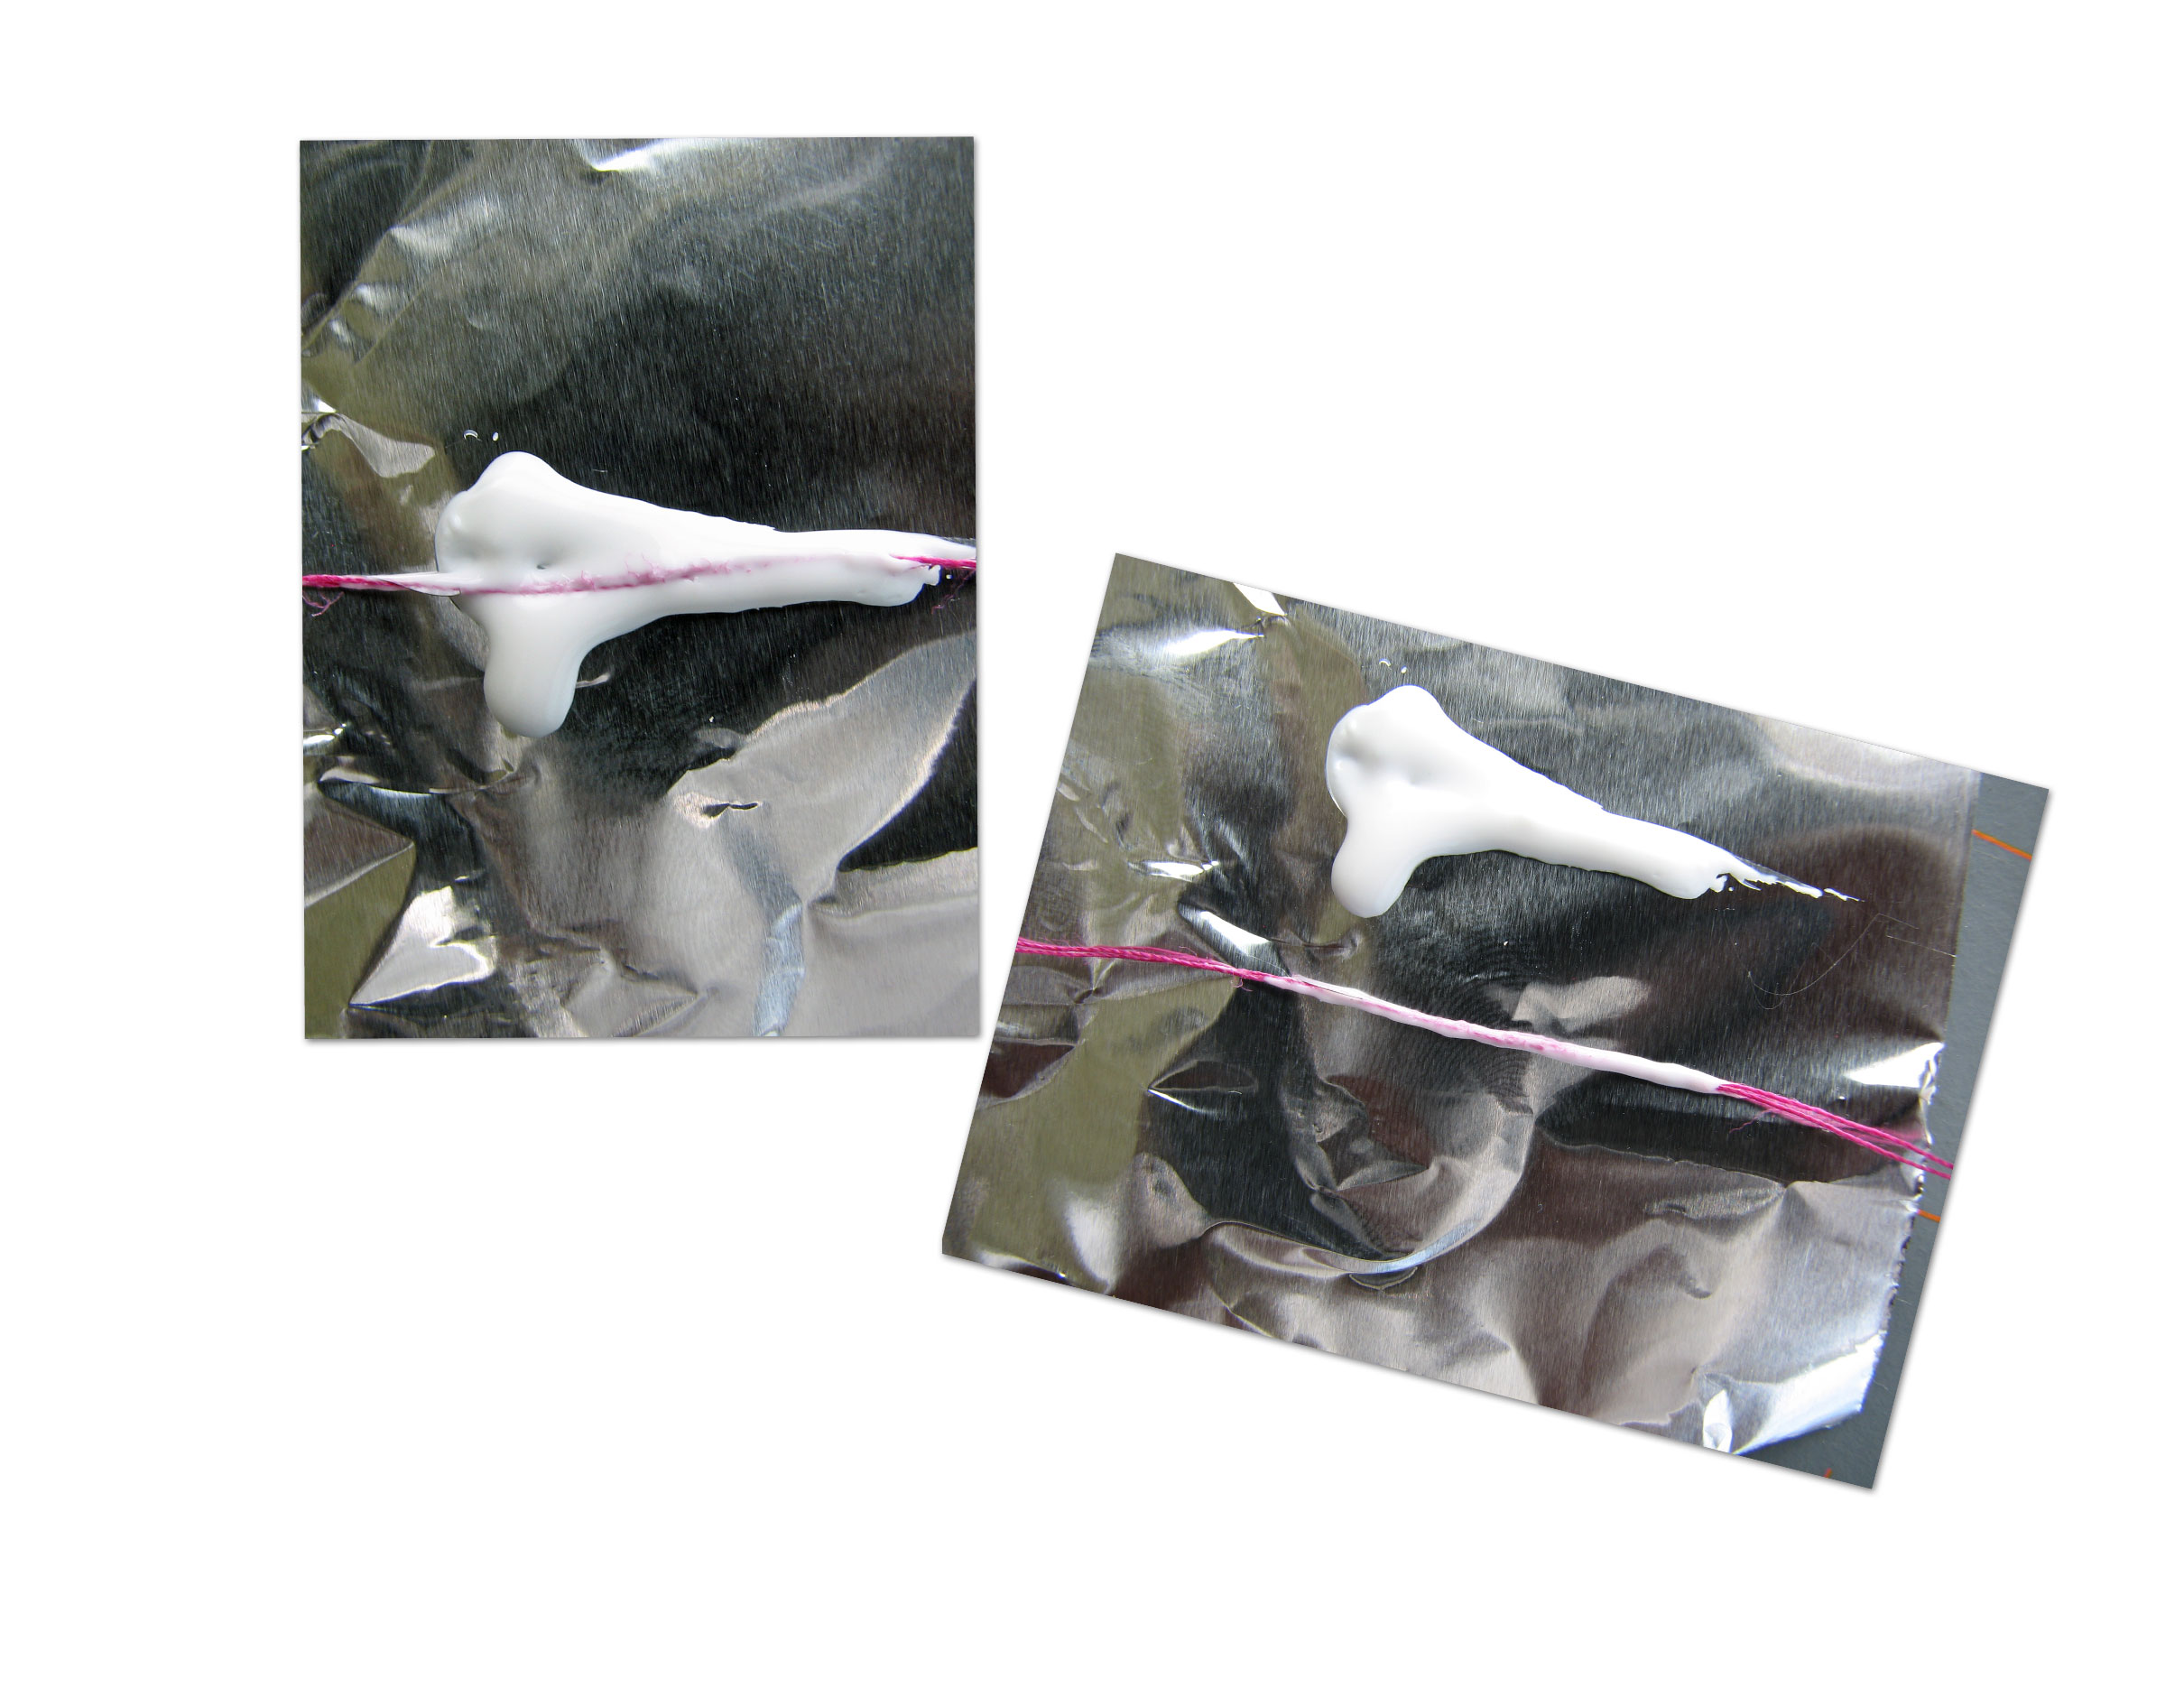
Trim the fringe to approximately 1/4″ above the top of the wrapping. Dip the tip into the bottle of fabric stiffener. Do not shake off the excess. It will dry clear.

blog.inkledpink.com

Once the tip is dry, use the rotary cutter to slice off the fringe. This gives a nice clean edge to feed into the tubing.

blog.inkledpink.com

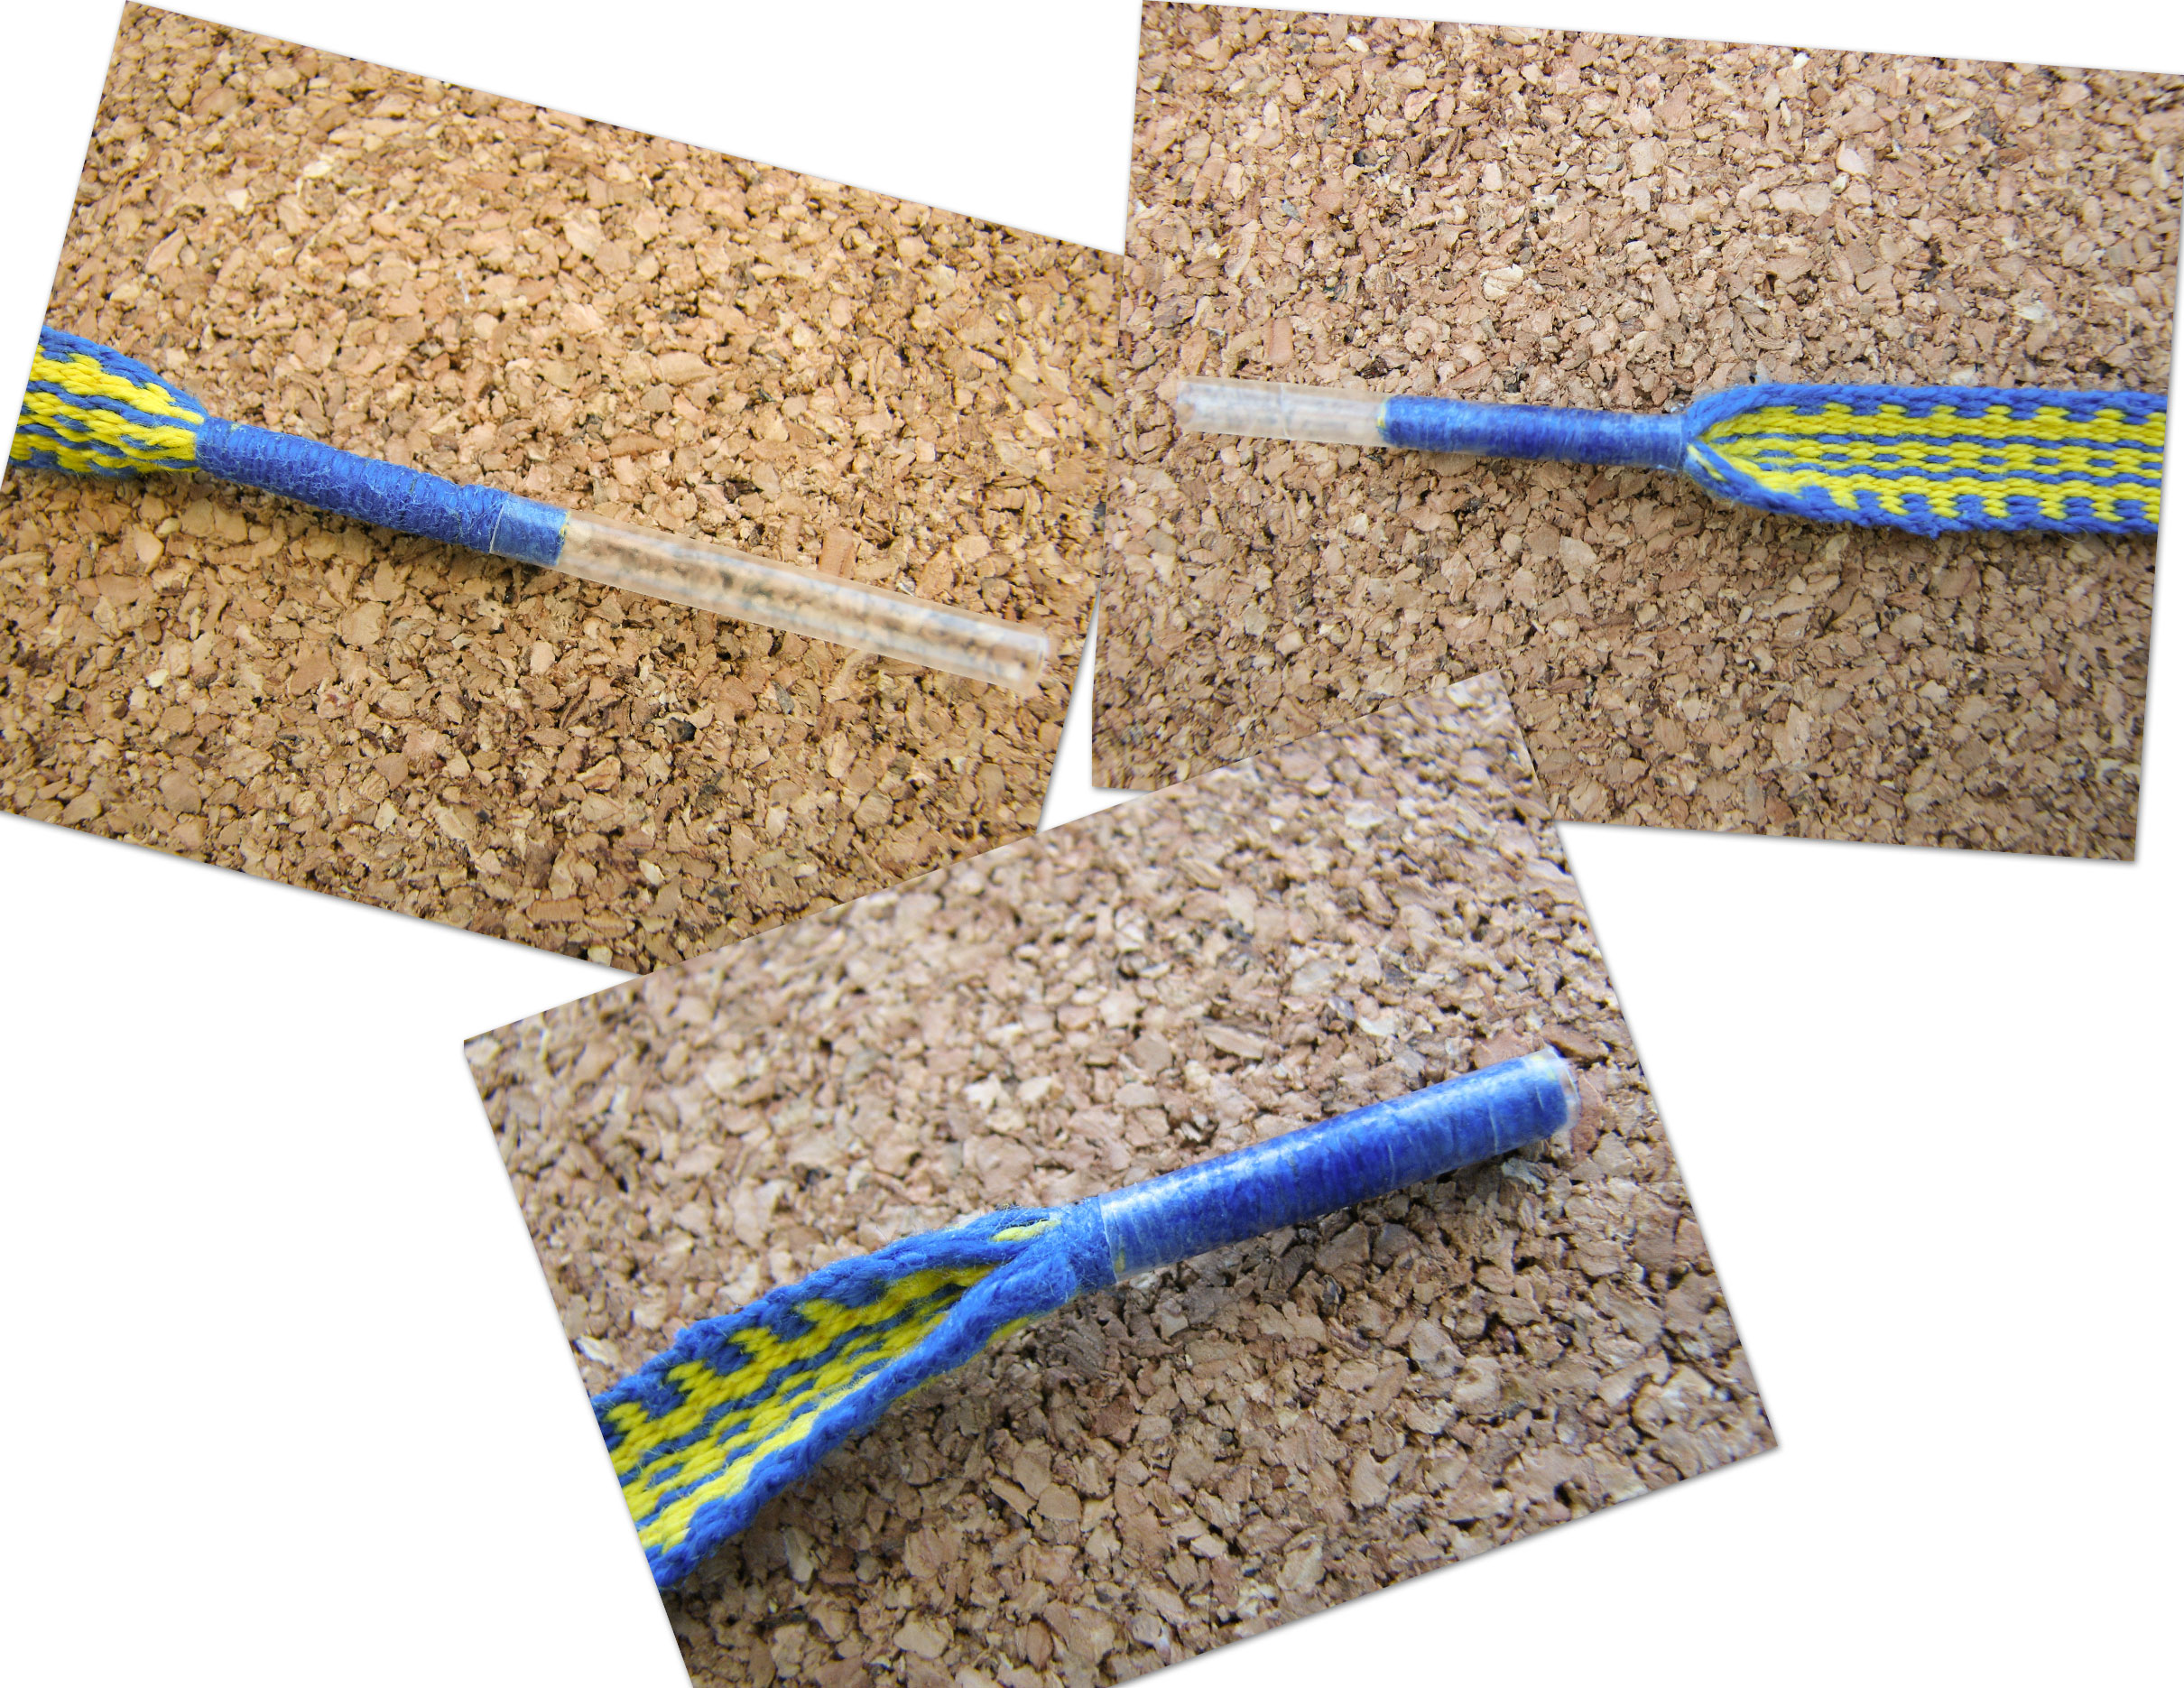
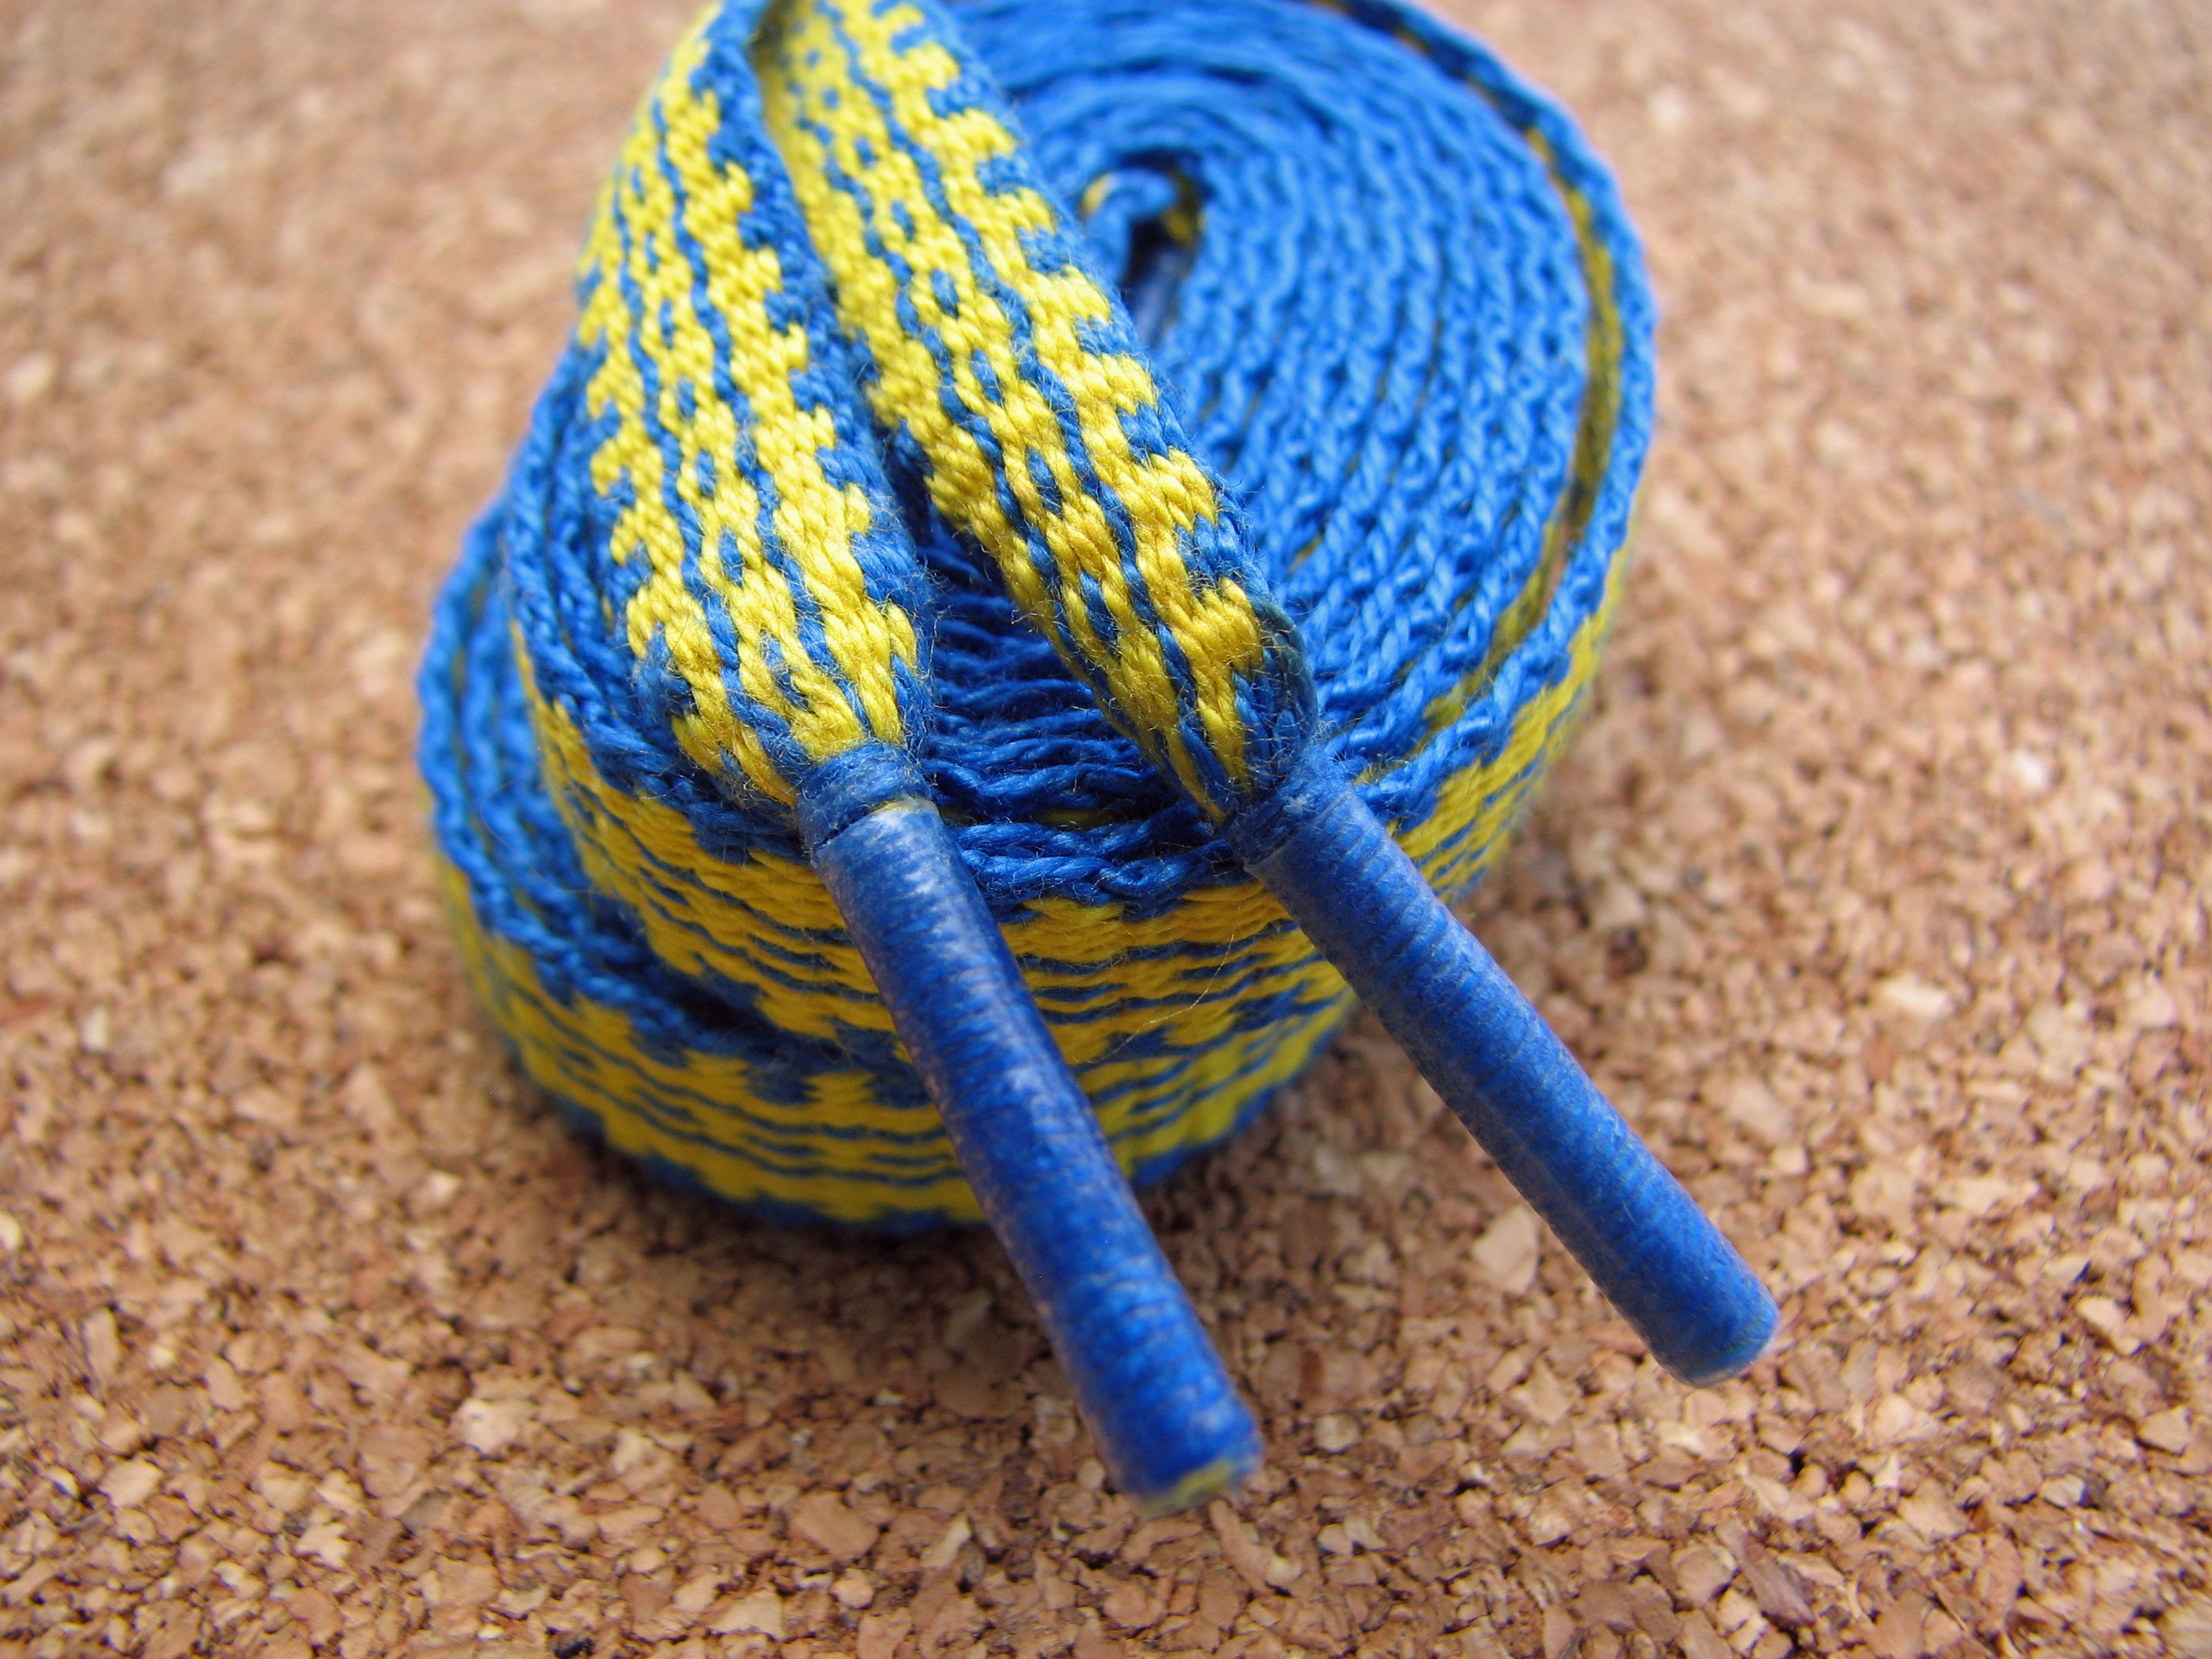
Cut a piece of tubing 1/2″ longer than the tip length. Insert the tip into the tubing. You will need to twist, push, pull, shove, and cajole the tip into the tubing. It is a tight fit. This is what helps it stay without glue. After the tubing is on, cut it down to be level with the top of the tip. Shrink the tubing with the heat tool, being careful not to burn the shoelace, tubing or your fingers!. You are finished and have a beautiful shoelace tip.

If you are looking for information on how to weave a shoelace, the article by Brianna Lancaster, daughter of talented weaver Daryle Lancaster, on Weavezine is very good. Also, I found this site dedicated to shoelaces. Fascinating stuff.

How have you ended your shoelaces? Do you have any tips or suggestions?

warp, weave, be happy!

Jennifer

Share this:

  • Click to share on Pinterest (Opens in new window) Pinterest
  • Click to email a link to a friend (Opens in new window) Email
  • Click to share on Facebook (Opens in new window) Facebook
  • Click to share on X (Opens in new window) X
Like Loading...

A Tisket, A Tasket, Weave an Inkle Basket

03 Wednesday Apr 2013

Posted by Jennifer Williams a.k.a. inkledpink in Projects, Tutorials

≈ 39 Comments

Tags

basket, inkle band, sew, thrumbs, Weaving

I’ve always wanted to try basket making. Update: 8/29/18 I have tried basket weaving and now I have, oh my, it is a wonderful as I had imagined. They are beautiful and useful- the same as inkle bands. So, I got this crazy idea; why not weave a basket with inkle bands?! Inkle band basket tutorial final

My inkle basket is created by cutting two inkle bands into strips and weaving them together in a simple over under pattern. For a little contrast, I used two different bands to make the basket , but it would look really nice made out of one pattern too. My band was 1 1/2″ wide and the final basket is 4 1/2″ L x 4 1/2″ W x 4 1/2″ H.

Supplies needed:

1. Inkle band(s) 2. masking tape 3. extra yarn, floss, or thread 4. all purpose glue 5. knitting needle (optional) 6. scissors 7. straight pins and embroidery needle 8. something to measure with 9. clothes pins

1. Inkle band(s) 2. masking tape 3. extra yarn and thread 4. all purpose glue 5. knitting needle (optional) 6. scissors 7. straight pins and embroidery needle 8. something to measure with 9. clothes pins (*not pictured: 1/8″ (3mm) wide coordinating satin ribbon and sewing thread)

Update: 8/29/18 Thanks to a fellow Inkle Weaver in the Inkle facebook group an error was found in my calculations below. I am ever grateful for the discovery! The update is in italics below.

We have to do a bit of math to determine the length of inkle band you will need.

Multiply width of inkle band by 3 = width of basket base
Multiply width of basket base by 3 = length of one *vertical inkle strip
Multiply length of one *vertical inkle strip by 6 = total length of band needed for *vertical strips of the basket

Then:

Multiply width of basket base by 4 = length of one *horizontal inkle strip
Multiply the width of the band by 2. Add to length of one horizontal inkle strip – this will allow for overlap of the woven strips)
Multiply length of one *horizontal inkle strip by 3= total length of band needed for *horizontal strips of the basket

*vertical and horizontal refer to the direction of the strips as they are woven to make the sides of the basket.

example: (for easy math imagine your band is 1 inch wide)
1″ x 3 = 3″ (Width of basket base)
3″ x 3 = 9″ (Length of one vertical strip)
9″ x 6 = 54″ (Total length of band needed for Vertical Strips: excluding fringe)
3″ x 4 = 12″ (Length of one horizontal strip)
2 x 1″ = 2″ (width of inkle band multiplied by 2)
12″ + 2″ = 14″ (Length of one horizontal strip plus width of band x2)
14″ x 3 = 42″ (Total length of band needed for Horizontal Strips of the basket

The example basket would measure 3″L x 3″W x 3″H.

Following the example above, with two bands, as I did, you would need one band at least 54″ for the vertical strips and one at least 42″ for the horizontal strips. If using only one band the two totals need to be added together. Your band would need to be at least 96″. These totals are excluding fringe. The width of the bands will determine the final dimensions of your basket.

So let’s get started!

You will need 6 vertical strips and 3 horizontal strips each cut to the lengths you calculated.

To prevent the ends from raveling, seal the ends. Thread a needle with sewing thread. Put a bit of glue on the end of the thread as wide as the band. I call this glue thread. Yes, I thought long and hard on that name.
inkle band basket tutorial step 9.5.

Insert the needle into the “tunnel” between the warp layers, one or two rows from the top edge. Pull the needle and thread all the way through until the glue thread is sandwiched in the band. Press firmly with your fingers to seal.
inkle band basket tutorial step 9

Trim the strip above the glue thread row. Apply glue along the top of the cut edge. Let the glue dry for at least 15 minutes. Your strips should be good and sealed now.
Inkle band basket tutorial step 9.2

Now we are ready to make a basket!

Begin with 4 vertical strips placed like this. Inkle band basket tutorial step 1

Then:
Inkle band basket tutorial step 2

And last strip placed; your base is built. The base square should be centered with the strips edges being evenly lined up on all four sides. Tip: Use a knitting needle to help nudge the strips into place.
Inkle band basket tutorial step 3

Use the masking tape or straight pins to secure the base so it doesn’t shift while you weave the walls.
Inkle band basket tutorial step 4

Begin building the walls by weaving a horizontal strip around the base strips.
Inkle band basket tutorial step 5 Inkle band basket project step 6

Add glue to the overlap of the horizontal strip inside the basket and weave the overlap behind the next vertical strip to hide it.
Inkle band basket project step 7

inkle band basket project step 8

Oops, the strips in this picture are not sealed…

As you continue building the walls of the basket it might be helpful to fold the vertical strips over the horizontal strips to aid in keeping everything in place.

This is what it will look like when all of the sides are built.
Inkle band basket project step 10

Whipstitch around the top edge with the embroidery needle and ribbon, securing the vertical strips to the horizontal strip. Be sure to insert the needle below the glue thread row.
Inkle band basket tutorial step 11.

Braid handles out of the fringe you cut off or lengths of yarn. Wrap the ends with yarn and sew to the basket.Inkle band basket embroidery edge

And ta-da, you have a woven inkle basket!
Inkle band basket tutorial final

My basket is filled with some fibery goodness that just arrived in the mail. Can’t wait to empty it and fill it again. What will you fill your basket with?

warp, weave, be happy! ~ Jennifer

Share this:

  • Click to share on Pinterest (Opens in new window) Pinterest
  • Click to email a link to a friend (Opens in new window) Email
  • Click to share on Facebook (Opens in new window) Facebook
  • Click to share on X (Opens in new window) X
Like Loading...

An Inkle Bit of Love

14 Thursday Feb 2013

Posted by Jennifer Williams a.k.a. inkledpink in Projects, Tutorials

≈ 13 Comments

Tags

air, Aleene's glue, b m, heart, inkle, inkle band, kjk, love, magnet, pin, Valentine's day, Weaving

Updated 2/13/2021

Happy the day before Valentine’s Day. I revisited this post today after Liz Gipson a.k.a the Yarnworker, shared the project on her facebook page of the same name. Thank you, Liz! I am so glad she did. I haven’t seen these little hands and fingers in so long. They are still cute, in my unbiased mommy opinion, just 8 years bigger. Time does fly. In revisiting the post I made a few updates. The update is in two parts, so be sure to keep scrolling to the part 2.

Happy Valentine’s Day! Today is the perfect day for my first post since June; the perfect day to share that the reason for the break is the new love in my life. Growing this new love has kept me from weaving and writing, but ultimately has brought me so much joy. I am happy to introduce you to my new love, our new son, who joined us on January 10th.

My new love!

Now that I’m not “growing”’ this love anymore, I feel more like myself and am so happy to be weaving, writing and creating again. Although, arguably, I was creating for 9 months… So, here is an “inkle bit of love” project for you. I hope you enjoy.

Supplies needed: Craft glue, scissors.

You will need a band no wider than 3/4″ cut into four 8″ long pieces, any wider and it just looks wonky. However, shorter pieces will give you a smaller heart and longer pieces will give you bigger heart. (and the world needs more of those!) Use the glue to seal the edges of each band piece so they don’t fray and to glue the band ends down after you’ve gotten them into place.

Updated (2/13/21)

The Steps:

  1. Interlace four ends of your cut bands, lining up the cut edges with the selvedges.

2. Fold the left vertical band over the top and under the bottom horizontal strips. Be sure not to twist when folding.

3. Fold the top horizontal band over, under, over the three vertical bands. Be sure not to twist when folding.

4. Fold the bottom horizontal band piece behind the center heart and glue in place. It is not woven in.

5. Repeat step 4 with the right vertical band.

Wouldn’t this heart be fun made into a lapel or scarf pin, a hair clip, a magnet… What else? Do you have any ideas?

Update part 2 (2/13/21):

Looking back on this post gave me the urge to make a pin. In my bin of bands that have no purpose but were fun to weave, I found a thinner 1/2″ band, in Valentine’s Day worthy colors. The heart is smaller than the original , about 3 1/2″ wide by 2 1/2″ tall.

The main difference from the original heart and this one, besides being smaller, is I bent the two outer bands back instead of over and back. The smaller size just seemed to call for it.

Then, I sewed a pin to a piece of felt cut to fit the back of the heart and glued the felt to the heart.

Et voila, a Valentine’s Day heart pin.

This was a fun update.

Warp, weave, be happy! ~ Jennifer

Share this:

  • Click to share on Pinterest (Opens in new window) Pinterest
  • Click to email a link to a friend (Opens in new window) Email
  • Click to share on Facebook (Opens in new window) Facebook
  • Click to share on X (Opens in new window) X
Like Loading...

Inkle Origami Mobile

26 Thursday Apr 2012

Posted by Jennifer Williams a.k.a. inkledpink in Projects, Tutorials

≈ 2 Comments

Tags

Aleene's glue, craft, embroidery floss, fish, inkle origami, mobile, stash

My thought after I made my inkle origami fish last week was, “Great, that worked, and they’re cute, now what do I do with these fish?”

Then it hit me: an inkle origami mobile!

Inkle Origami Mobile

Inkle Origami Mobile

Fish out of water!

I’ve wanted to make a mobile forever. The fish gave me the perfect opportunity. This project made me very thankful that I have tried so many crafts and am a collector of crafty supplies.

From my stash I grabbed:

  • an embroidery hoop that I bought at an estate sale
  • embroidery floss from my overflowing bin
  • a spool of beading nylon cord
  • dyed shell pendant beads
  • a spool of “invisible” nylon thread
  • my go to glue: Alene’s Tacky Glue

To make the mobile, I:

1) Hung the fish from the beading nylon cord and tied them to the inner ring of the embroidery hoop, spaced evenly.

2). Put the hoop back together, catching the tied nylon between the inner and outer hoops, and wrapped the whole hoop with embroidery floss.Inkle Origami Embroidery Hoop

3) Tied the shells to the fish cords with the invisible thread, randomly spaced.

Inkle Origami Mobile Shell Beads

4) Tied 4 lengths of floss to the hoop at the top, spaced evenly, gathered them together so it was level and tied a loop to hang it from.Inkle Mobile Embroidery Hoop Close-up

This can be customized so many ways: with more fish, more beads, tassels, hanging the fish evenly or unevenly, or even using a bigger or smaller hoop. Sky’s the limit!

Now where to put it? Should it be new décor for our son’s room, or for my creative room? Hmmm.

warp, weave, be happy! ~Jennifer

Share this:

  • Click to share on Pinterest (Opens in new window) Pinterest
  • Click to email a link to a friend (Opens in new window) Email
  • Click to share on Facebook (Opens in new window) Facebook
  • Click to share on X (Opens in new window) X
Like Loading...

Try Your Hand at Inkle Gardening

06 Friday Apr 2012

Posted by Jennifer Williams a.k.a. inkledpink in Projects, Tutorials

≈ 13 Comments

Tags

Aleene's glue, batting, carrot, craft, green, inkle, inkle band, needlepoint, orange, projects, rabbit, sew, stash, stitch, stuffing, tatting, tutorial, weave, Weaving

How cute are these little carrots?!

With my non-green thumb, these are the only carrots I can grow – besides, I’m not all that crazy about digging in the dirt. I had a blast designing them. Quick and easy, they are a great stash buster, ok, really they didn’t even make a dent in my stash but, I did use yarn that I had on hand. Carrots come in a rainbow of colors, so use the yarn you have!

If you “grow” your own carrots do let me know how they turn out. I’d love to see pictures and if I get enough I will do a garden post!

You will need:

Materials

  • 1”wide inkle band at least 18” long

*(a little wider or narrower is okay) with two shades of orange 10/2 or 8/2 perle cotton, tatting yarn, or needlepoint yarn. 8/2 perle cotton and needlepoint yarn are a bit thick but will work.

*The carrot in the rabbit’s arms is woven using needlepoint yarn and the other two are woven with both 10/2 perle cotton and tatting yarn.

  • green worsted or sport weight yarn
  • cotton or poly stuffing batting
  • woven fusible interfacing
  • straight pins
  • needle and matching thread (forgot to put in picture –oops!)
  • scissors
  • glue (Alene’s tacky)
  • ruler
  • fine felt-tip marker

Equipment

  • sewing machine (very helpful but optional – can be sewn completely by hand)
  • iron
  • ironing board

Have fun!

I hope you enjoyed the first Inkled Pink tutorial! Don’t forget: show me what you come up with – I’d love to see!

warp, weave, be happy!

Share this:

  • Click to share on Pinterest (Opens in new window) Pinterest
  • Click to email a link to a friend (Opens in new window) Email
  • Click to share on Facebook (Opens in new window) Facebook
  • Click to share on X (Opens in new window) X
Like Loading...

Find on Inkled Pink

Top Posts & Pages

  • Inkle Shoelace Aglets: How To
  • Inkle Band Ornaments
  • An Inkle Bit of Love
  • Give Backstrap Weaving a Chance
  • Project Tutorials
  • Inkle Shoelaces for Boston
  • Daily Band Practice: The Gallery
  • Inkle + Origami

Previously on Inkled Pink

  • Daily Band Practice: Day 67
  • Daily Band Practice: Day 66
  • Daily Band Practice: Day 65
  • Daily Band Practice: Day 64
  • Daily Band Practice: Day 63

Archives

  • March 2021
  • February 2021
  • January 2021
  • August 2016
  • December 2015
  • April 2015
  • March 2015
  • February 2015
  • January 2015
  • June 2013
  • May 2013
  • April 2013
  • March 2013
  • February 2013
  • June 2012
  • May 2012
  • April 2012
  • March 2012
  • February 2012
  • January 2012

Categories

  • Backstrap Weaving
  • Daily Band Practice
  • Design
  • Inkle Looms
  • Inspiration
  • Projects
  • Reading
  • Teaching
  • Tips
  • Travel
  • Tutorials
  • Uncategorized
  • Weaving material
  • Yarn

Enter your email address to follow this blog and receive notifications of new posts by email.

inkled pink

inkled pink

    https://www.instagram.com/inkledpink/

    Welcome Readers!

    counter for wordpress

    Blog at WordPress.com.

    • Subscribe Subscribed
      • inkled pink
      • Join 237 other subscribers
      • Already have a WordPress.com account? Log in now.
      • inkled pink
      • Subscribe Subscribed
      • Sign up
      • Log in
      • Report this content
      • View site in Reader
      • Manage subscriptions
      • Collapse this bar
     

    Loading Comments...
     

      %d